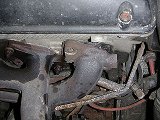
 | 23.04.2005
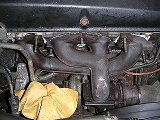
Manifold
I had a misfortune of having a couple of studs go on the exhaust manifold.
One day they just disappeared, leaving two gaping holes in the manifold.
The studs were broken flush with the head.
| 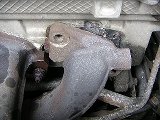 | 23.04.2005
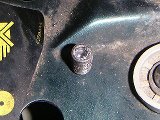
Broken studs
A close-up of the problem area. In my case it was not enough to just drill
the studs out, because the gasket moved and was partially blocking the
port (and causing a leak too). Therefore the entire manifold had to come
off.
|
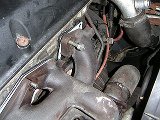
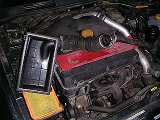 | 23.04.2005
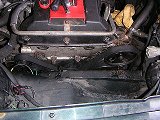
Intake
The first step is to remove the intake. The airbox cover comes off
with the intake pipe and the return line from the bypass valve.
Plug the turbo inlet pipe immediately, you don't want any dirt to
get in there.
| 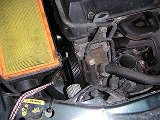 | 23.04.2005
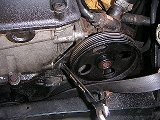
Belt
Loosen the belt with a long 1/2" socket extension and lock the tensioner
with a thin Allen key. Remove the belt from the steering pump pulley.
This picture shows the airbox still in place, but it's actually better to
remove it before starting on the pump. The airbox is secured by three
10 mm nuts.
|
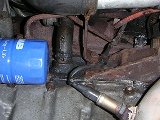
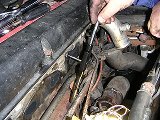
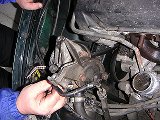 | 23.04.2005
Steering pump
The steering pump bracket is attached to the head with two bolts on the top
and one under the pulley (use a 13 mm socket or wrench here). The lower
bolt is a bit of a pain to get to. Unbolting the metal PCV vent pipe from
the valve cover gives you some extra room.
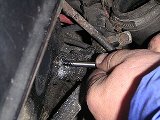
|  | 23.04.2005
Turbo studs
The manifold to the turbo nuts are next (13 mm). You can see that all nuts
have been generously sprayed with rust solvent last night. That helped!
|
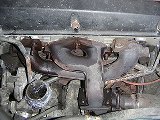
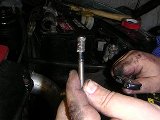
 | 23.04.2005
Manifold studs
The nuts on the remaining manifold studs come next. The three studs in the
middle are short, while the outer ones are long and have cylindrical spacers
on them, designed to help with deformations occuring at high temperatures.
|  | 23.04.2005
Nuts removed
The leftmost nut took the stud with it, but the rest came off without
a fight. The WIS calls for complete turbo removal, otherwise there's not
enough room to get the manifold off the studs on both sides. We chose to
remove the manifold studs instead, since we planned to replace them
anyway.
|
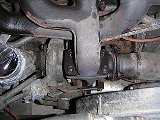
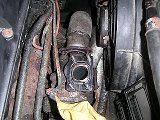
 | 23.04.2005
Turbo stay
An extra wiggle room is still required to remove the manifold. It can
achieved by unbolting the downpipe from the turbo, and the turbo
stay from the engine block.
|  | 23.04.2005
Hose coupler
This brass hose coupler has been found at the local hardware store. It was
a snug fit to the manifold and worked well as a guide for the drill bit,
helping to ensure that we start drilling at the centre of the stud. A small
mirror came handy to peek into the hole to observe the results.
|
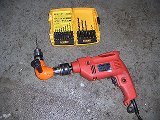 | 23.04.2005
Drill
The right angle drill extension is needed since there is not enough room
to fit the drill in front of the head. I initially purchased a set of left
handed HSS drill bits, but they didn't last long enough as the studs were
too hard for them. This set of cobalt bits was much better suited for the
job.
|  | 23.04.2005
Stud removal
The remaining manifold studs were removed using an old trick with two
nuts tightened together. The short stud closest to the two previously
broken ones also broke after we attempted to remove it. Fortunately, it
left a piece long enough so we could grab it with vice grips and unscrew
the stud later when the manifold was off.
|
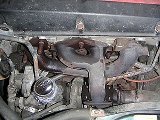
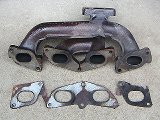 | 23.04.2005
Manifold
Here's the manifold off the car. You can see than its mating surfaces
and the gasket are still clean where the nuts were tight, but the fourth
cylinder area is covered with soot on both sides.
|  | 23.04.2005
I.N.P.
My father happened to be visiting from overseas and didn't mind getting
his hands dirty. He helped a great deal and made the job much easier than
it would have been if I did it alone. Thanks, dad! ;)
|
 | 23.04.2005
First
With the manifold off, it was easy to drill the holes deeper. Then, after
some struggle with a screw extractor, the first stud came out.
|  | 23.04.2005
Second
And then the other one.
|
 | 23.04.2005
Extractor
Here's the remaining part of the broken stud as it came out of the head.
|  | 23.04.2005
Stud
You can see a close-up of the hole we drilled in one of the studs.
|
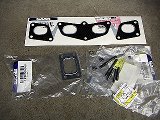 | 24.04.2005
New parts
About $60 worth of parts: new gaskets, studs, nuts and washers. The big
gasket goes its metal side to the manifold, soft side to the head.
|  | 24.04.2005
Turbo gasket
Time to clean the metal shavings and dirt, and pull the rug out of the
turbo housing. The gasket goes on.
|
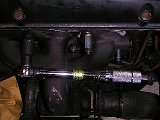
 | 24.04.2005
New studs
The manifold slides onto the turbo side studs first, and then new studs
can be screwed into the head. Some were easy to put in, some requred the
two nut trick again.
|  | 24.04.2005
New studs
After all the studs are in, start putting the nuts on. Do not tighten them
yet, just put the nuts on both the head and the turbo side. Tighten the
turbo stay on the engine block.
|
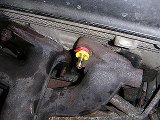
 | 24.04.2005
Tightening
Tighten the nuts on the manifold and the turbo to 16 ft-lbs. Connect the
downpipe to the turbo.
|  | 24.04.2005
Steering pump
The steering pump bolts are hard to reach, especially the bolt below.
There's only enough room to turn the wrench 1/12 of a turn.
|
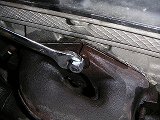
 | 24.04.2005
Belt
Put the belt on and attach the vent pipe to the valve cover.
|  | 24.04.2005
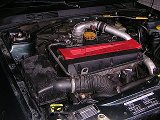
Done
Install the airbox and enjoy the job well done.
|
|


