 | 15.05.2006
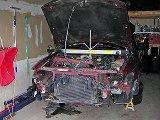
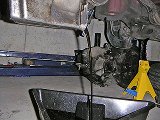
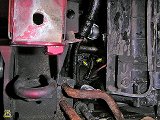
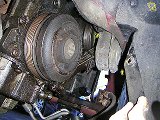
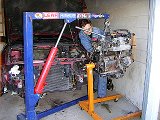
Engine support
The car is on jack stands. The subframe and gearbox are already
removed,
and the engine is hanging on the support beam.
|  | 09.05.2006
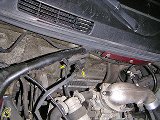
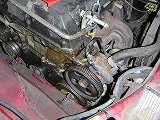
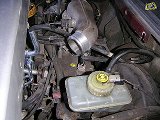
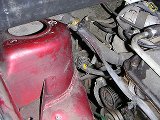
MAP
Unplug the connector and the vacuum hose from the manifold absolute
pressure sensor. Alternatively, you can unbolt the sensor. I just removed
it with the strut bar to free up some room.
|
 | 12.05.2006
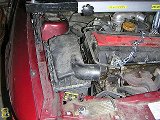
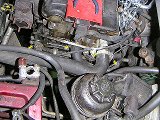
Airbox
Remove the airbox and the rubber part of the turbo inlet hose.
|  | 12.05.2006
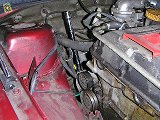
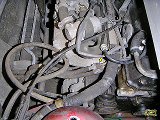
Belt
Insert a long ½" extention into the tensioner socket and
release the belt. Lock it with a 2 mm Allen key or a nail. Remove the belt.
|
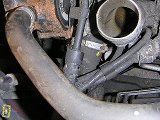
 | 12.05.2006
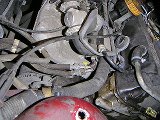
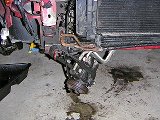
Steering pump
Undo three bolts holding the steering pump to the engine (13 mm wrench).
Bend the hoses and move the pump out of the way.
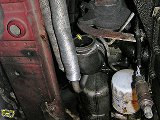
|  | 12.05.2006
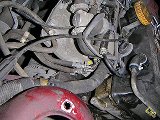
BPC
Unscrew the boost pressure control valve (Torx T25) and detach its cable
from the fender. Put the valve and the cable on the engine.
|
 | 19.05.2006
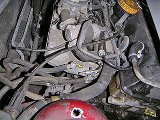
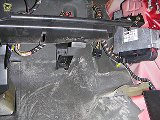
Cruise control unit
Unplug the cruise control unit connector. Detach the control unit (two
plastic 10 mm nuts), lift it and move it aside.
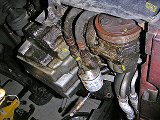
|  | 18.05.2006
Fuel tank vent line
Release the clamp and detach the fuel tank vent hose from the back of the
throttle body.
|
 | 18.05.2006
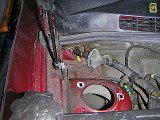
Fuel lines
The rubber fuel lines are attached to the fuel rail via a special locking
joint. The release mechanism is covered by a rubber plug.
|  | 18.05.2006
Fuel line cap
Use curved needle nose pliers to pull the rubber plug out of the joint
and move it up the pipe so it doesn't get in the way.
|
 | 18.05.2006
Disconnect tool
Get a 8 mm (5/16") fuel disconnect tool (it looks like a hollow plastic
cone with a rim) and put it on the line. Push it down the joint until you
hear a click.
|  | 18.05.2006
Disconnected
Wiggle the hose while pushing the disconnect tool in, and the joint will
come apart. There might be some fuel left in the lines so have a catch
can ready. Repeat with the second line, plug the hoses.
|
 | 19.05.2006
Throttle cables
Detach the accelerator cable from the throttle body. Detach the cruise
control cable.
|  | 20.05.2006
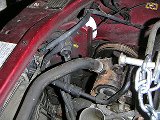
Brake booster hose
Unbolt the brake booster hose from the intake manifold.
|
 | 19.05.2006
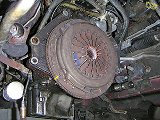
Clutch
If you need the access to the flywheel or the main seal, remove the pressure
plate now (12 mm socket). Most engine stands bolt to the gearbox mouting
holes, and there will be little room to reach the clutch.
| 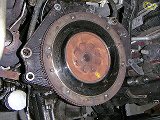 | 19.05.2006
Flywheel
The flywheel is held by eight big 19 mm bolts. In order to get them off, you
need to attach a flywheel stop or otherwise ensure that the crankshaft
won't move.
|
 | 19.05.2006
Coolant
Unscrew the radiator drain plug (13 mm wrench) and drain the coolant.
|  | 19.05.2006
Coolant hoses
Detach coolant hoses from the driver's side of the engine (flat screwdriver
or 7 mm socket). More coolant will come out of the heater core hoses,
so have a pan ready.
|
 | 19.05.2006
Lower hose
Remove the lower radiator hose from the passenger side of the engine. If
you unhook the lower part of the hose, be ready for more coolant spills.
|  | 19.05.2006
Turbo
Remove the intercooler hose from the compressor outlet on the turbo.
|
 | 19.05.2006
Oil
Drain engine oil (13 mm socket). Don't pour it down the drain, bring it
to the nearby recycling facility (around here, Canadian Tire collects
used oil free of charge).
|  | 19.05.2006
Oil cooler lines
Unbolt the oil cooler lines from the oil filter housing (22 mm wrench).
Some oil will drain from those. Undo the lower A/C compressor bolt (16 mm).
|
 | 19.05.2006
A/C compressor
Unbolt the two upper A/C compressor bolts. Unplug the compressor clutch
control wire from the connector on the radiator.
|  | 19.05.2006
A/C compressor
Lower the compressor (it's quite heavy) and hang it off the towing hook.
Be careful not to bend the lines too much.
|
 | 20.05.2006
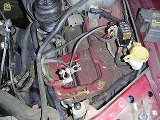
ECU harness
Inside the car, remove the glovebox and locate the wire cluster coming
from the engine. One half goes to the ECU, while another feeds the data
to the dashboard. Unplug both.
|  | 20.05.2006
ECU harness
Pull the rubber gromet in the firewall and carefully retrieve the ECU
harness through the opening. Put it on the engine.
|
 | 20.05.2006
EVAP valve
Unplug the connector from the EVAP valve.
|  | 20.05.2006
Positive cable
Detach the positive battery cable from the fuse box (10 mm socket).
|
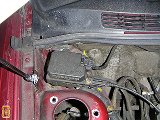
 | 20.05.2006
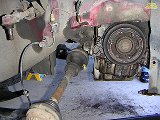
Axle
Remove the passenger side axle by tapping it gently from behind, until
it comes off the shaft.
|  | 20.05.2006
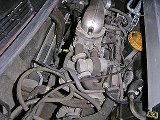
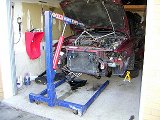
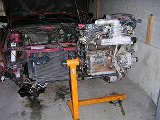
Crane
Bring the crane and lift the engine slightly so it takes the weight
off the support beam and the remaining engine mount.
|
 | 20.05.2006
Engine mount
Unbolt the passenger side engine mount (15 mm socket). Be careful as the engine
might shift suddenly when you remove the last bolt.
|  | 20.05.2006
Beam removed
With the crane holding the engine, you don't need the support beam anymore.
Remove the beam (in my case the lifting hook got stuck in the chain, so
we just left it there).
|
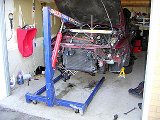
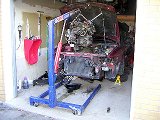 | 20.05.2006
Engine out
Lift the engine out of the car. Watch closely while lifting it, to
ensure you won't break anything.
| 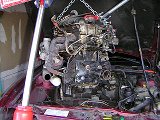 | 20.05.2006
Plate attached
Attach the lifting plate from the engine stand (if you're planning to put
the engine on the stand). Some of the bolt holes required unusually long
bolts, the ones that came with my stand were too short.
|
 | 20.05.2006
Engine stand
Lower the engine and secure it on the stand. I had a friend helping out
with the engine removal. It's always a good idea to have a second
pair of hands while doing serious work like this.
|  | 20.05.2006
On the stand
Engine out. Job done.
|
|


