 | 21.01.2006
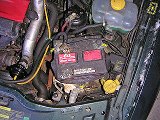
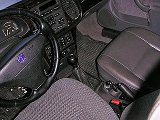
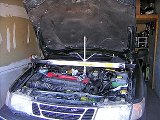
Battery
Disconnect both cables from the battery (negative first!). Unscrew the
13 mm bolt at the battery base.
|  | 21.01.2006
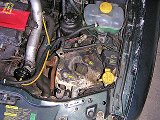
Battery base
Lift the battery and store it in a safe place. Unbolt the battery
mounting plate (two 10 mm bolts) and remove it from the car.
|
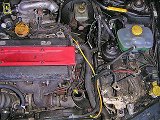
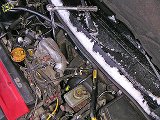
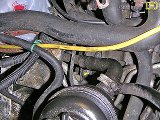
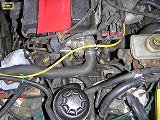
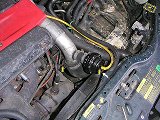 | 21.01.2006
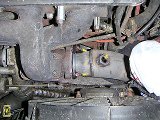
Delivery pipe
Release the hose clamp on the lower end of the delivery pipe.
Unhook the vacuum line from the bypass valve (as well as the return
hose if you have it).
|  | 21.01.2006
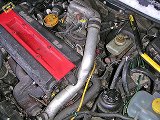
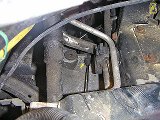
Delivery pipe
Remove the hose clamp from the throttle body side of the delivery
pipe. Unbolt the pipe from the engine (13 mm wrench).
|
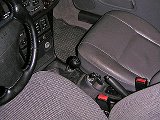
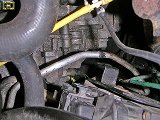
 | 21.01.2006
Delivery pipe
Remove the delivery pipe from the car. Plug the intercooler hose and
throttle body inlet to keep the dirt away.
|  | 21.01.2006
Fourth gear
Move the shifter into fourth gear.
|
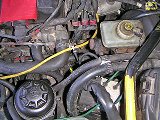 | 21.01.2006
Transmission lock
Remove the plastic plug on top of the transmission and insert a thin
L-shaped Allen key to lock it in gear.
|  | 21.01.2006
Linkage
Use a 13 mm socket with a long extention to loosen the nut on the
shifter linkage.
|
 | 21.01.2006
Third gear
Move the shifter into third gear position to separate the shifting rod
from the linkage.
|  | 21.01.2006
Cable
If you have a cable clutch, unhook the cable from the lever on top of the
transmission. If it is hydraulic, pull the clip to detach the clutch line
from its nipple and quickly plug it to minimize fluid loss.
|
 | 21.01.2006
Cable
Pull the cable from its seat on the other end of the transmission.
|  | 21.01.2006
Reverse switch
Unplug the reverse gear switch.
|
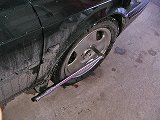 | 21.01.2006
Wheels
Loosen wheel nuts (17 mm wrench).
|  | 21.01.2006
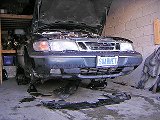
In the air
Raise the front of the car, remove the wheels, take off the plastic shields
under the bumper.
|
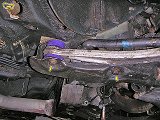
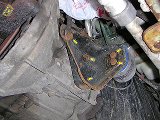
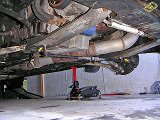 | 21.01.2006
Brace
Remove the subframe brace if equipped (11 mm socket for MP Performance
version).
|  | 21.01.2006
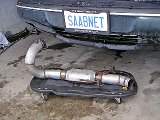
Exhaust joint
Unscrew the rear O2 sensor (22 mm crowfoot socket), remove the clamp
from the exhaust pipe (13 mm socket). Unbolt the two rear engine mount
nuts sitting in the round holes in the subframe (16/17 mm socket).
|
 | 21.01.2006
Downpipe
Unbolt the front O2 sensor (22 mm crowfoot) and detach the downpipe
from the turbo (three 13 mm nuts).
|  | 21.01.2006
Downpipe
Unhook the rubber hangers and remove the downpipe from the car.
|
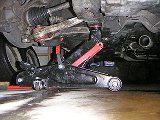
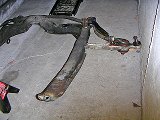
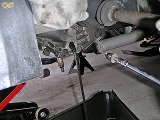
 | 21.01.2006
Linkage
Unbolt the linkage from the shifter rod on the transmission (13 mm socket).
|  | 21.01.2006
Linkage
Detach the linkage support arm from the ball pin on the differential
housing (or pull it from the eye on the mount if you have an old-style
linkage).
|
 | 21.01.2006
Linkage
Remove the gearshift linkage from the car.
|  | 21.01.2006
Engine support
Unbolt the rear engine mount from the subframe, install an engine support beam on the fenders, attach it to the lifting
hook on the head and pull up slightly to ensure it takes the weight
of the engine.
|
 | 21.01.2006
Subframe bolts
Start removing the subframe bolts. The rear bolts holding the stanchion
arms take a 16 mm socket, the middle ones are 18 mm.
| 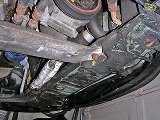 | 21.01.2006
Subframe bolts
The bolts in front have a 16 mm head as well. With all bols removed,
the subframe will be hanging on just the ball joints.
|
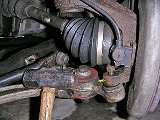 | 21.01.2006
Ball joint
You can usually separate the ball joints by unscrewing the nut a bit, and
hitting the knuckle with a heavy hammer (the weight of the subframe helps
to release the ball joints).
|  | 21.01.2006
Jack
If the ball joints cannot be defeated, unbolt the control arms from
the subframe. Jack it up so it doesn't drop to the ground right away.
|
 | 21.01.2006
Subframe
Lower the subframe to the ground and drag it away. In my case, I succeeded
in separating one ball joint, and unbolted the control arm on the other
side.
|  | 21.01.2006
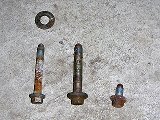
Subframe bolts
The subframe bolts left to right: rear, middle, front. Don't lose the
washers that go between the subframe and the body above the stanchion arms.
|
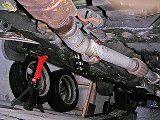
 | 21.01.2006
Transmission oil
With the subframe out of the way, it's now easy to remove tha drain plug
(8 mm Allen socket) and drain the transmission oil.
|  | 21.01.2006
Driveshaft
Prop a wide flat chisel against the differential housing and push on the
other end to pop the driveshaft. It should slide right out.
|
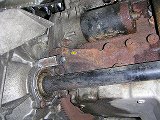
 | 21.01.2006
Driveshaft
Suspend the driveshaft (or remove it completely if you unbolted the axle
nut).
|  | 21.01.2006
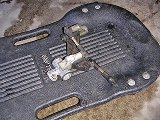
Flywheel cover
Unbolt the flywheel cover at the bottom of the transmission
(two 11 mm bolts).
|
 | 21.01.2006
Upper bolts
Remove the three upper bolts attaching the transmission to the engine
(18 mm socket).
|  | 21.01.2006
Transmission mount
Detach the small wire on the side of the transmission (13 mm socket).
Unbolt the transmission mount from the body (two 15 mm bolts), lower
the engine slightly to free up the mount.
|
 | 21.01.2006
Mount bracket
Unhook the big ground wire from the transmission (17 mm socket). Unbolt
the bracket from the transmission (and the mount itself from the
bracket if it helps to remove it).
|  | 21.01.2006
Rear bolt
Remove the rear transmission bolt (18 mm socket).
|
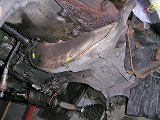
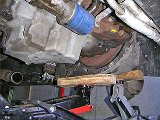
 | 21.01.2006
Lowering
Lower the engine as much as needed to get a good access to the transmission.
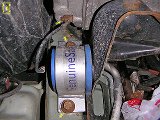
| 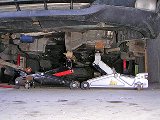 | 21.01.2006
Jacks
If you don't have a specialized transmission jack, a couple of regular ones
will support it from below. Just make sure it's balanced right so it won't
slide sideways and fall to the ground when you detach it from the engine.
|
 | 21.01.2006
Front bolt
Undo the last bolt holding the transmission. If you were lucky enough to
detach a control arm from the subframe, you can use its bolt as a guiding
pin in place of the shorter original bolt.
Gently pry the transmission away from the engine.
| 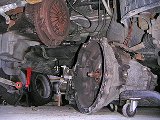 | 21.01.2006
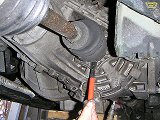
Transmission down
The main shaft will slide right out, but the intermediate shaft might not
want to separate, so in the worst case you'll have to unbolt it from the
block under the alternator. Lower the transmission to the ground.
|
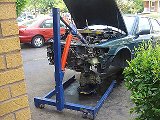 | 24.06.2006
Crane
A shop crane makes transmission removal much easier. Older gearboxes
have one hole for a lifting eye, newer ones might have two.
| 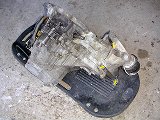 | 21.01.2006
Transmission
Move the transmission away and unbolt the rear engine mount bracket if
you're planning to transfer it to a new gearbox.
|
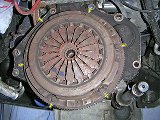 | 21.01.2006
Pressure plate
The flywheel will turn a bit, so you might need to came up with a way to
hold it in place while unbolting the pressure plate (six 12 mm bolts).
|  | 21.01.2006
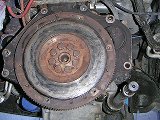
Flywheel
If the flywheel is visibly scratched or scored, or has cracks in it, you
need to remove it from the engine and take to a machine shop for
resurfacing.
|
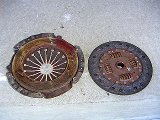 | 21.01.2006
Old clutch
The poor clutch shows painful signs of trying to hold the stage3 power.
|


