 | 17.04.2004
The kit
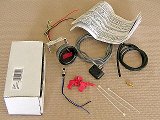
A Cyberdyne Ultragage boost/vacuum gauge kit (part #A213E061Y) bought on
eBay. It contains a gauge, a sender, some tubing and other supplies.
|  | 05.11.2005
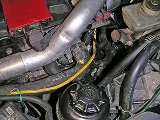
Vacuum line
Locate the vacuum line going from the throttle body to the bypass valve.
|
 | 05.11.2005
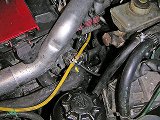
Tap
Tap into the line (or replace the hose to keep a spare handy) and insert
a tee.
|  | 05.11.2005
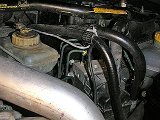
Sender
Connect the sender unit and attach it into a secure spot. Tie the cable
so it doesn't dangle around.
|
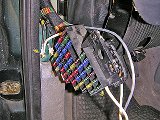
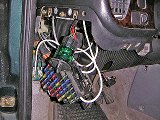
 | 05.11.2005
Fuse box
Undo the 10 mm nut holding the fuse box. Lift the box and move it aside.
| 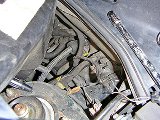 | 05.11.2005
Firewall
Locate the wire cluster going throught the firewall next to the clutch
cable (or the clutch line). Unwrap the tape and cut the zip tie around it.
|
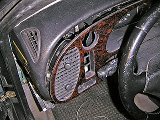
 | 05.11.2005
Lower panel
Undo Torx T25 screws on the lower panel. Unscrew the OBD II connector.
| 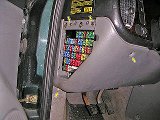 | 05.11.2005
Fuse box
More screws around the fuses. Finally, a 10 mm bolt at the bottom,
and the trim panel comes off.
|
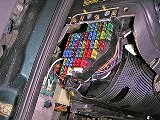 | 05.11.2005
Fuse box
Removing the fuze box is not absolutely necessary, but it gives you more
room to do the wiring. Three Torx T25 screws.
|  | 05.11.2005
Wire cluster
The rubber gaiter securing the wire cluster is found next to the clutch
pedal.
|
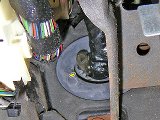 | 05.11.2005
Pipe
Push a piece of PVC pipe between the wires and the rubber sleeve so
it comes out on the engine side.
|  | 05.11.2005
Wire
Slide the sender unit signal wire through and remove the pipe. Zip-tie
and wrap the rubber sleeve on the engine side.
|
 | 05.11.2005
More wires
Connect a piece of wire to the ground nut under the dash. Connect another
wire to the cigarette lighter fuse for a source of switched power. It is
a good idea to have the battery disconnected prior to this.
|  | 05.11.2005
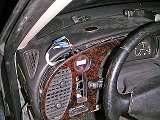
Dash
Many 2"1/16 gauges will fit right in, but you will need to cut the plastic
inside the headlight switch socket. I decided to pop the dashboard to
attach the display from the rear. Follow
this
guide for dashboard removal.
|
 | 05.11.2005
Wiring
Trim and crimp the wires from the sender, as well as your power and ground
lines.
|  | 05.11.2005
Gauge
Attach mating connectors to the gauge display unit.
|
 | 05.11.2005
Test run
Connect the wires, double check everything and do a test run. After
you start the car, you should see 15-16 Hg of vacuum at idle.
|  | 05.11.2005
Headlight switch
The headlight switch will rest inside the dashboard set to the
"headlights on" position. Saab DRLs run the headlights full on anyway, so
it won't make much difference.
|
 | 05.11.2005
Wrapped
Wrap the switch into something so it doesn't rattle inside the dash.
|  | 05.11.2005
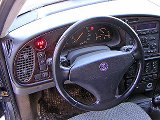
Finished
Job complete. The gauge is nicely illuminated at night.
|
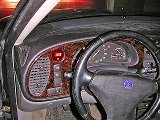
 | 07.03.2006
On
It's clearly visible in the bright sun.
| 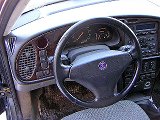 | 07.03.2006
Off
Nice and stealthy when the car is shut off.
|
|


