 | 23.05.2005
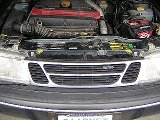
Grille
Raise the front of the car and open the hood. Remove the grille by
detaching two tabs on top.
|  | 23.05.2005
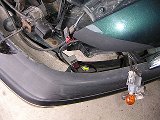
Blinker
Undo the Torx T25 screw on the turn signal assembly, remove the housing and
unplug the wires.
|
 | 23.05.2005
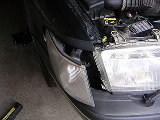
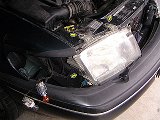
Headlight
Remove the headlights (three Torx T25 screws). Unplug the wires, use a flat
screwdriver to release the locking tab on the harness.
|  | 23.05.2005
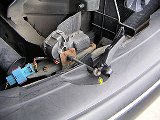
Wiper
Lift the covers over the nuts on the headlight wiper arms and
remove the arms (8 mm socket). Detach the washer fluid hose from the bumper (there is
a couple of metal tabs holding it).
|
 | 23.05.2005
Lower shields
Remove the plastic shields from below. Each side is held by half a dozen
screws with a 8 mm hex head.
|  | 23.05.2005
Foglight
Unplug the wires from the foglights.
|
 | 23.05.2005
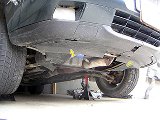
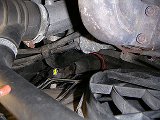
Sensor
Detach the temperature sensor under the bumper. That horrible rusty thing
is the license plate holder.
|  | 23.05.2005
Screw
Remove the Torx T25 screw under the fender (one on each side).
|
 | 23.05.2005
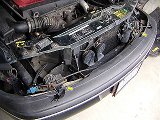
Bumper bolts
Undo two long bumper bolts located next to the headlight wipers (16 mm
socket).
|  | 23.05.2005
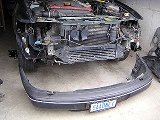
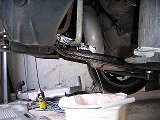
Bumper
Pull the bumper forward and remove it from the car. Mind the sides of the
bumper cover while pulling: there are latches on each side that you need
to release.
|
 | 23.05.2005
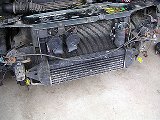
Intercooler
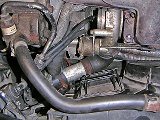
The intercooler is held by two long (and likely rusty) bolts. Use a
10 mm socket to remove those. Both hoses are attached on the driver's side,
the clamps can be released through the headlight opening with either
a 7 mm socket or a flat screwdriver (and a lot of rust solvent).
|  | 23.05.2005
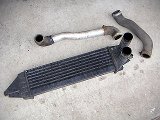
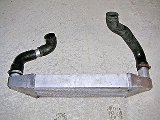
Old intercooler
Remove the intercooler from the car. Detach the hoses from the delivery
pipe and the turbo.
|
 | 23.05.2005
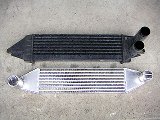
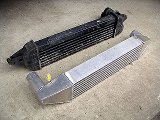
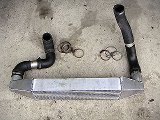
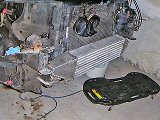
Old vs new
The old intercooler was a two-pass design, the new one is a cross-flow.
|  | 23.05.2005
Old vs new
The upgraded intercooler core is made by Spearco and has a 3"x7" cross
section with a flow area of 5.30 square inches. This is 60% more than a
cross-flow Viggen intercooler has, and 4 times more than my base unit.
There are also 5 times more fins for a much greater cooling capacity.
|
 | 23.05.2005
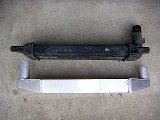
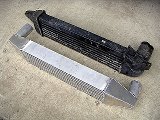
Old vs new
The end tanks are made by MP. You can see an extra weld spot: this was
a discounted defective unit. I had to take it to an alloy welder for
repair first. We've found four pinholes in the welds. The regular units
should not have these problems, but it never hurts to do a pressure test.
Also check for metal shavings in the end tanks: I had a lot of those.
|  | 23.05.2005
Old vs new
The newer intercoolers MP sells now have additional grooves machined on
the inlet pipes to help secure the hoses better. Mine didn't have that,
and the pipes were unequal length, but then again, I knew what I was
getting, and it's hard to complain considering the discount they offered.
|
 | 23.05.2005
Lower radiator hose
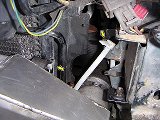
The 900 models have an older lower radiator hose that gets in the way of
the intercooler inlet hose. It has to be replaced by a new design (Saab
part #4963872).
|  | 23.05.2005
Draining coolant
With the intercooler removed, you now have the access to the radiator
drain plug. Use a piece of aluminium foil to form a trough gutter and
drain the coolant into a clean bucket so you can reuse it later (assuming
your coolant does not require replacement yet).
|
 | 23.05.2005
900 vs 9-3
Here's the old hose next to the new style hose provided by MP. They
supply used hoses, and unfortunately this one had a crack on the back.
I've noticed it too late and had to reinstall the old hose since it was
a holiday and the dealership was closed.
|  | 23.05.2005
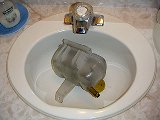
Coolant tank
To not make my coolant drain a total waste of time, I cleaned the coolant
expansion tank (it looks rather dirty on this picture). A quarter cup of
rice, some soap water and 10 minutes of vigorous shaking made it shine like
new! If you do that, wash it well: you don't want any rice in your coolant
pipes ;).
|
 | 23.05.2005
Old inlet pipe
Normally, the intercooler is supplied with Viggen hoses which are almost
a direct fit. The custom made piping would've been even better.
Unfortunately, I had neither, since my intercooler didn't come with any,
and the stores were closed. So I decided to make the most of the stuff
I had.
|  | 23.05.2005
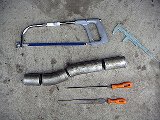
Test fit
I had one extra elbow that helped to form the inlet section.
The test fit looks promising.
|
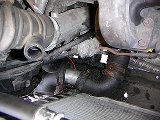 | 23.05.2005
Inlet hose
The intercooler is put in place and the turbo hose is attached. This
actually looks better than the Viggen hose, as the Viggen elbow forms
a nasty bend on the T25 turbo, because the T25 is angled differently.
And there's enough clearance even with the original radiator hose.
| 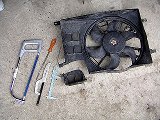 | 23.05.2005
Radiator fan
The new hose did not fit with the radiator fan frame, so I had to cut
a corner of the frame off.
|
 | 23.05.2005
Fan installed
The fan is attached with two screws at the top. Everything seems to
fit well. Make sure all clamps are very tight, especially if you used soap
or another lubricant to put them on. You don't want any of those to come
off on the road.
| 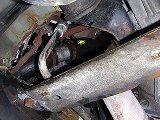 | 23.05.2005
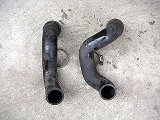
Hose
This is the hose from the intercooler to the delivery pipe. It had to
be extended an inch and a half. The clamps are easier to reach from under
the car.
|
 | 05.11.2005
New hoses
This is an updated hose arrangement used with a Mitsubishi TD04 turbo
(aka "Viggen turbo").
|  | 05.11.2005
Turbo pipes
The compressor outlet on TD04 is angled differently, which allows
for a shorter hose.
|
 | 23.05.2005
Zip ties
The intercooler is not bolted on like the old unit, but it's held by the
hoses quite firmly and is not going anywhere. I added strong zip ties on
each side, as well as a couple of rubber strips to prevent it from rubbing
against the radiator.
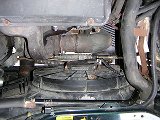
|  | 05.11.2005
No bumper
A view of the intercooler with the bumper removed.
|
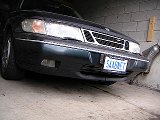
 | 05.11.2005
Bumper on
The bumper is a rather close fit. Leave the intercooler sticking out
too far, and it will rub against the bumper rail.
|  | 23.05.2005
Coolant
Time to fill the coolant.
|
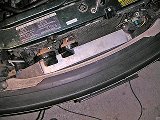
 | 23.05.2005
Installed
Install the lower shields, headlights and grille. The only
sore spot left is my rusty license plate holder, which also blocks the
intercooler.
| 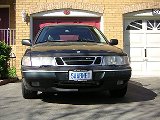 | 23.05.2005
License plate
The finished install: the plate has been replaced and attached higher, and
the intercooler is seen through the opening in the bumper.
|
|


