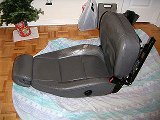
 | 18.12.2004
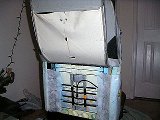
The seat
Here's the seat after I brought it home. You can see that the left bolster
surface is worn badly and has a huge hole in the middle.
|  | 18.12.2004
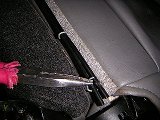
Head support sleeves
First, remove the headrest and its support sleeves. Insert a screwdriver
a couple of centimeters down along the sleeve, press a tab and pull the
sleeve out.
|
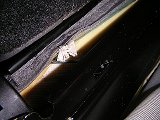
 | 18.12.2004
Staples
On the bottom of the seat back, there are five staples that hold the ends
of the upholstery together. The staples are rather thick, you need two
pairs of needle nose pliers to handle them.
|  | 18.12.2004
Tension rod
After the staples are gone, pull the fabric apart slightly and disconnect
the tension rods from the seat frame (there are two of them).
|
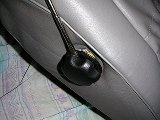 | 18.12.2004
Lumbar knob
Remove the lumbar support knob. It comes right off if you give it a good
pull.
|  | 18.12.2004
Inside out
Starting from the bottom of the seat, turn the edges of the skin inside
out and pull it upward to remove from the frame.
|
 | 18.12.2004
More staples
You will encounter more staples on your way. They connect the tension rods
to the thick wires attached to the seat frame.
|  | 18.12.2004
Last staples
The last couple of staples at the next seam, and the seat cover is
free. Memorize the locations of the staples, you will have to put them
back later.
|
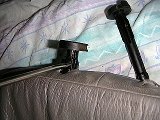
 | 18.12.2004
Rear view
This is how the lumbar adjustment mechanism looks like.
|  | 18.12.2004
Leather skin
The skin is finally removed from the seat. Looks rather untidy.
|
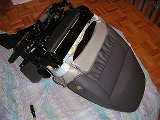
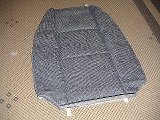
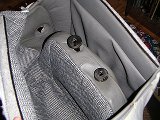
 | 18.12.2004
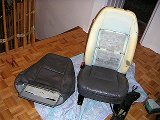
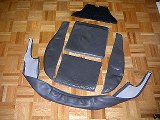
The seat
The seat without its backrest upholstery. If your seat heaters do not
work, it's a good time to inspect the heating pads for torn wires (they
are the two grey squares in the middle).
|  | 18.12.2004
Seams undone
I'm only replacing the front surface of the seat, so the back remains
untouched. Undo the seams and note how everything was put together,
including the tension wire.
|
 | 18.12.2004
Layers
It helps to sign the parts on the back. The original upholstery consisted
of two layers: the leather top and the foam backing.
|  | 18.12.2004
Ribbons
These ribbons work as sleeves for the tension wire. Ironing them should help
later when you will be sewing the fabric back together.
|
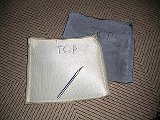
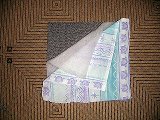
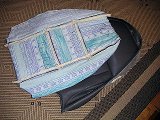
 | 18.12.2004
Fabric
Here's some thick matching upholstery fabric from
BouClair. We bought a bit more
in case we'll need to do the other seats in the future.
|  | 18.12.2004
Cut to shape
Use the old pieces of leather to cut the fabric to the desired shape.
|
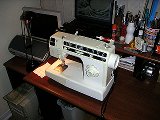 | 18.12.2004
Singer
An old trusty sewing machine.
|  | 18.12.2004
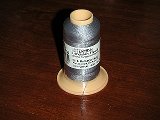
Thread
A spool of strong unholstery thread.
|
 | 18.12.2004
Layers
We did not want to reuse the old smelly foam backing, so we used a layer
of polyester fiber-fill covered with thin fabric.
| 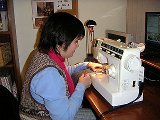 | 18.12.2004
Helga
The essential element of the whole adventure. Helga agreed to help
out despite having a cold and a sore throat.
|
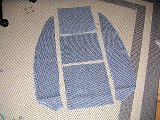
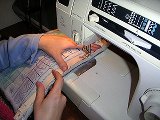 | 18.12.2004
Stitching
It is a two-step process. First you sew the upholstery fabric to the
backing, and then stitch the pieces to each other with the tension wire
sleeves on the back.
|  | 18.12.2004
Front complete
Here's the front section finished. Do not forget that strip at the bottom
with a wire on it.
|
 | 18.12.2004
Back side
Now you need to attach the new front section to the leather back.
| 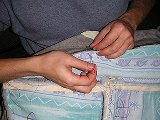 | 18.12.2004
Hand stitching
I'm doing it by hand, using the perforation of the old seams in the
original leather parts.
|
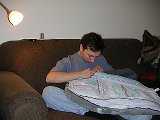 | 18.12.2004
Dmitry
It took me over an hour to do it the right way, but now I can brag that my
car has "hand-stitched leather" ;). And make that "sport seating
surfaces" too.
|  | 18.12.2004
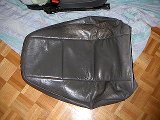
Top finished
Here's the renewed skin finished, waiting to be put back on.
|
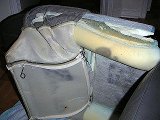
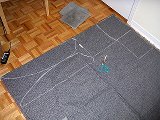
 | 12.06.2005
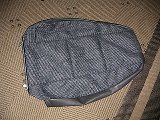
Bottom
The bottom is much easier, it is smaller, and there are less staples.
|  | 12.06.2005
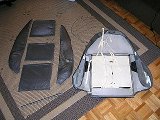
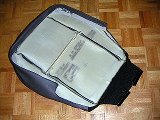
Undone
The only difficult part is the plastic trim around the edge. It makes it
much harder to saw the side section on later.
|
 | 12.06.2005
New fabric
The fabric is cut to the shape of the old parts.
|  | 12.06.2005
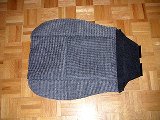
Bottom finished
The new parts are sewn together.
|
 | 18.12.2004
Fitting the top
Fitting is the reverse of the removal. Start with the top, fit the headrest
sleeves to hold the fabric and work your way down restoring the staples
and making sure the tension wires follow the grooves in the seat foam.
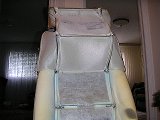
| 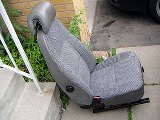 | 12.06.2005
Done
The job is complete. The fabric fits the seat nicely. It also holds you
better in sharp turns and feels more friendly in very cold or hot weather.
|
|


