 |
| 04.02.2006: Hood |
|
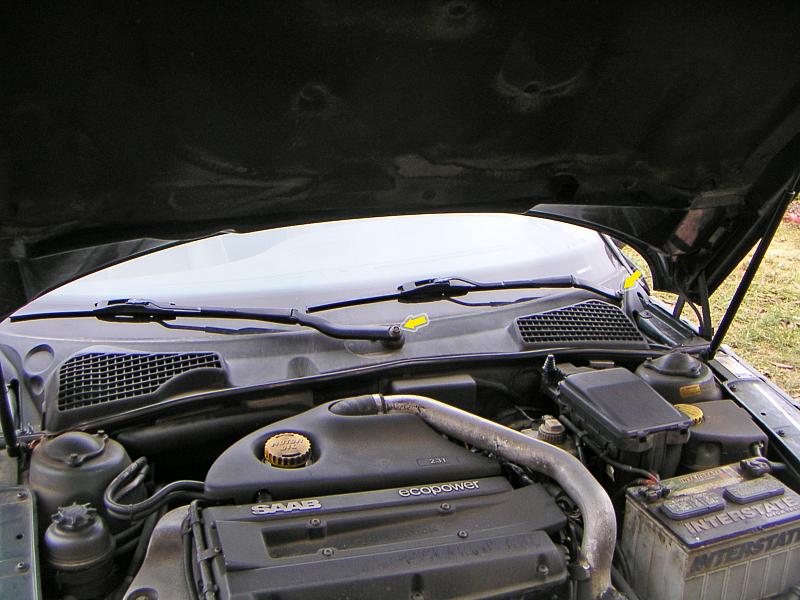
The motor is located right below the windshield. Start by opening
the hood and removing the wipers. If they are stuck, use a gear puller
or another suitable tool.
|
 |
| 04.02.2006: Wipers removed |
|
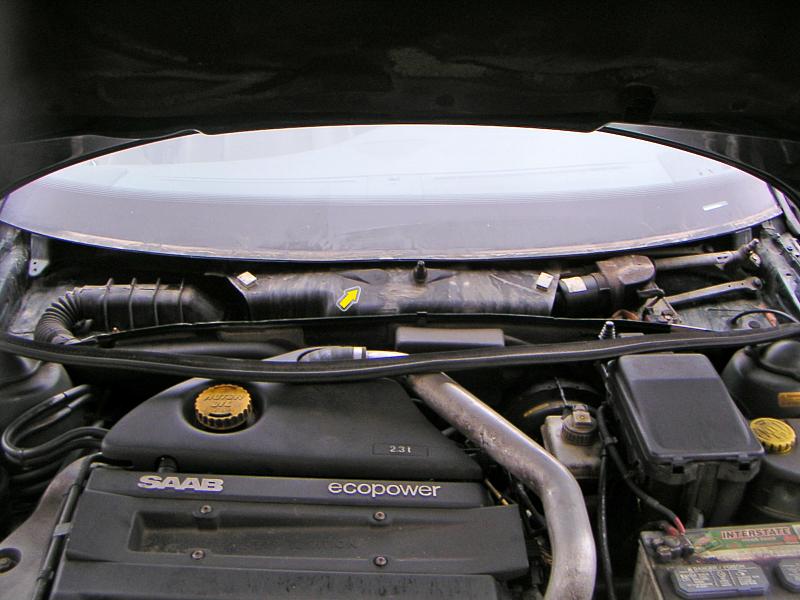
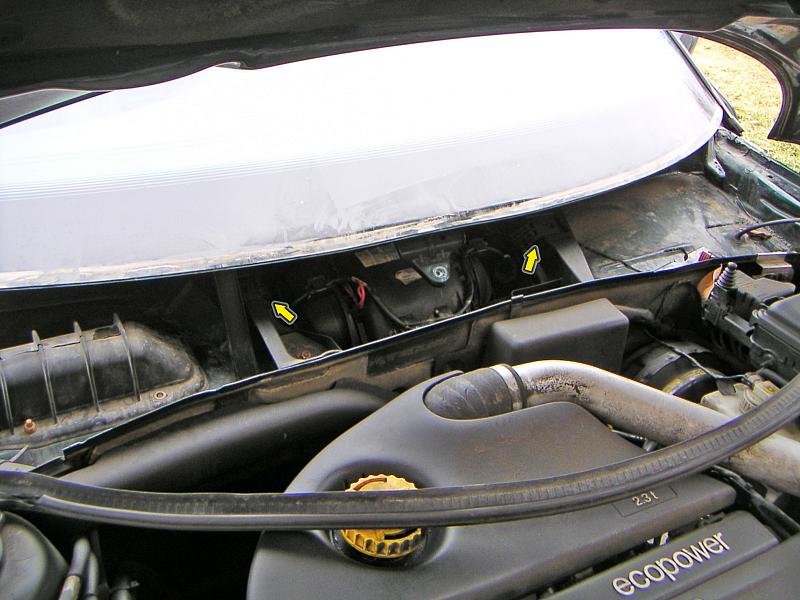
Pull the rubber strip along the firewall. Take out plastic screws in the
corners, and remove the cover completely. Be careful not to brake the
plastic clips holding it to the lower edge of the windshield.
|
 |
| 04.02.2006: Cover |
|
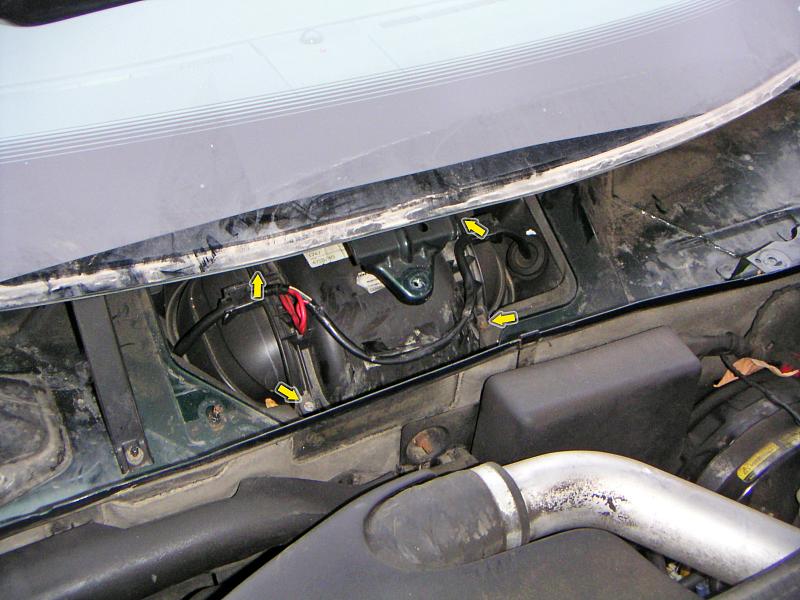
Lift the plastic cover in the middle. It's thin, and you can easily
bend it to pull out.
|
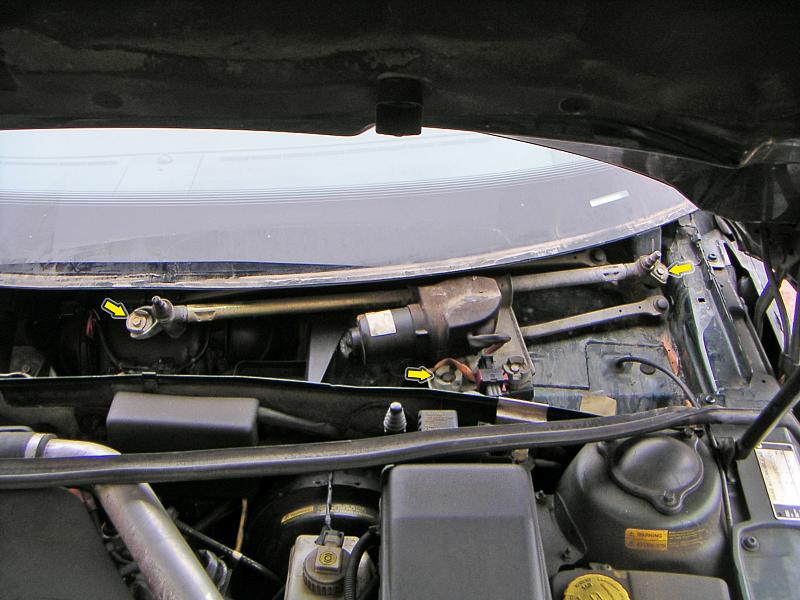 |
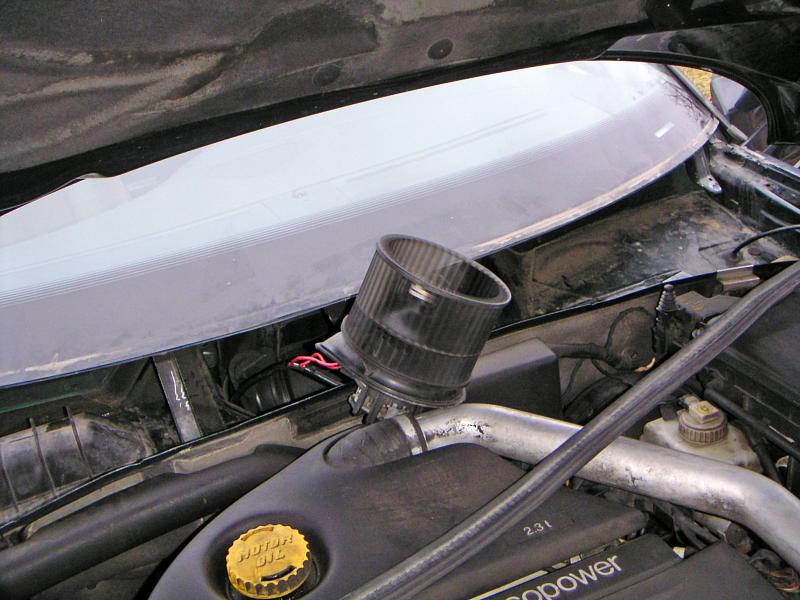
| 04.02.2006: Wiper motor |
|
Unplug the wiper motor harness, undo three 10 mm bolts and remove the
motor assembly.
|
 |
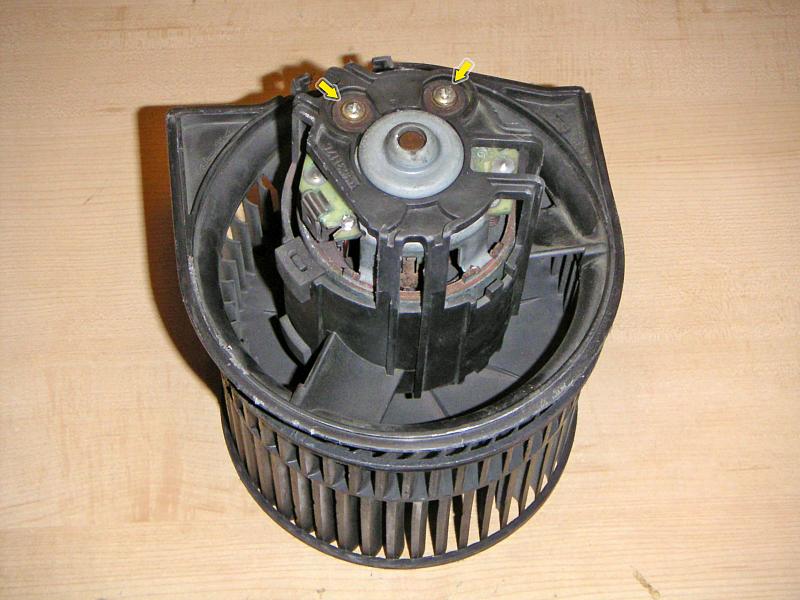
| 04.02.2006: Fan housing |
|
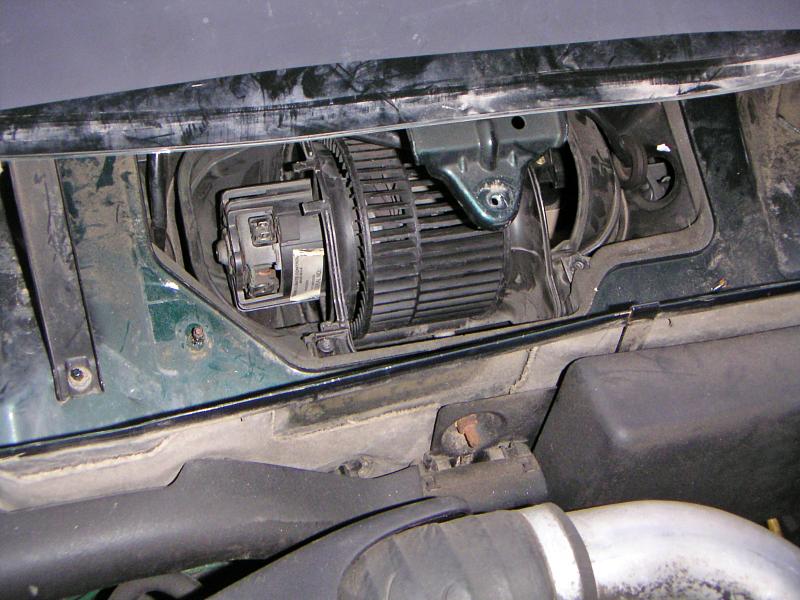
There's a plastic frame around the fan housing. It's fastened by two
latches.
|
 |
| 04.02.2006: Fan cover |
|
Detach the cable from the fan cover, remove the screws and lift the cover.
|
 |
| 04.02.2006: Fan |
|
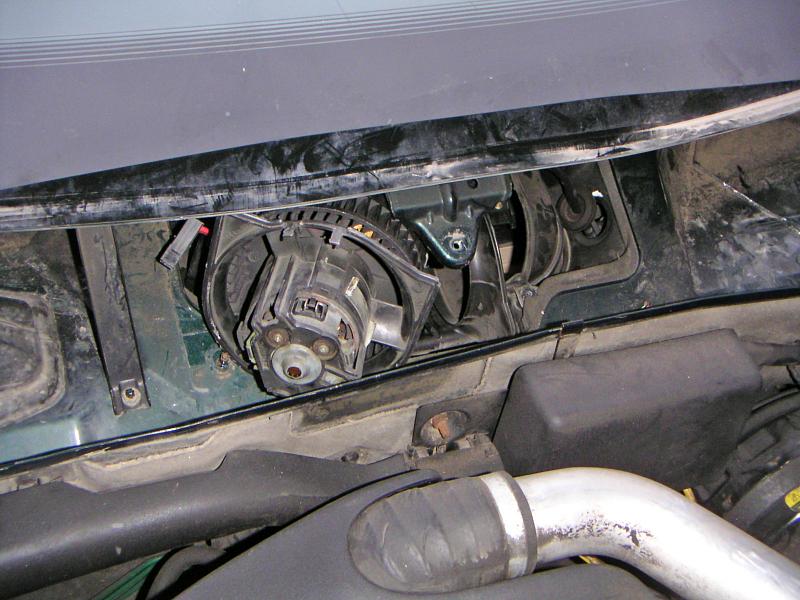
The fan is permanently attached to the motor, so you will have to remove
them together.
|
 |
| 04.02.2006: Fan removal |
|
Wiggle the motor out. If the fit is too tight, unbolt the windshield wiper
bracket in the middle.
|
 |
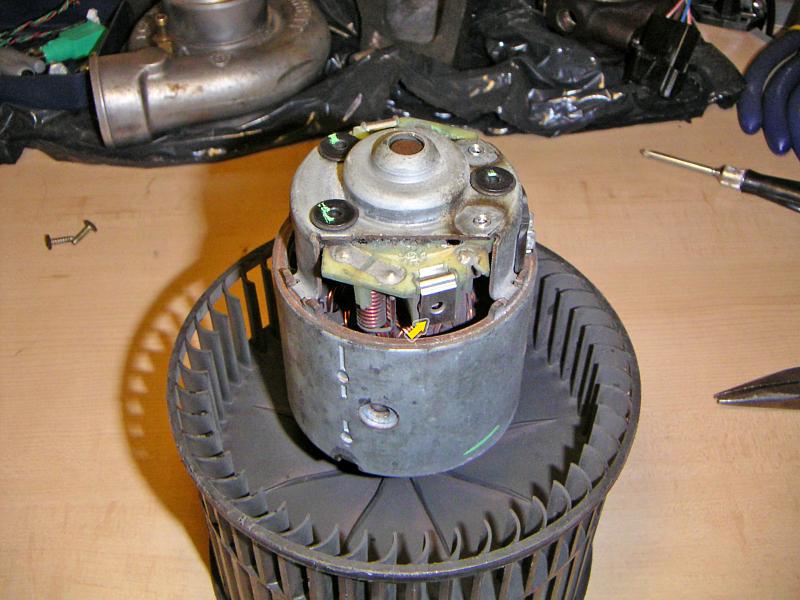
| 04.02.2006: Motor |
|
Unscrew the motor cover. It's not totally necessary, but it will give you
more room to inspect the motor.
|
 |
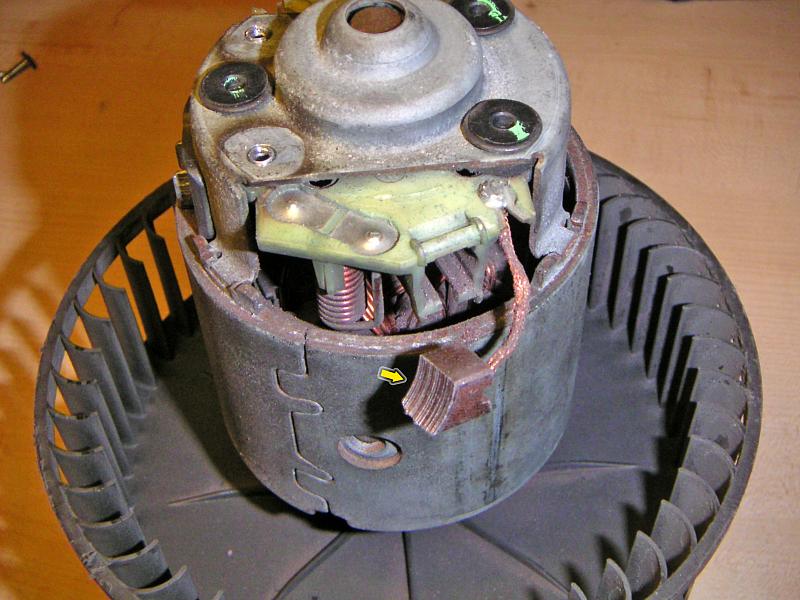
| 04.02.2006: Motor cover off |
|
Unhook the metal clips that hold the brushes. Be careful, there's a spring
inside.
|
 |
| 04.02.2006: Brush |
|
Pull the brushes and inspect them. This picture shows a brush at 40% of its
original size. If yours are worn too much, consider replacing them. Your
nearby alternator shop is a good place to start.
|
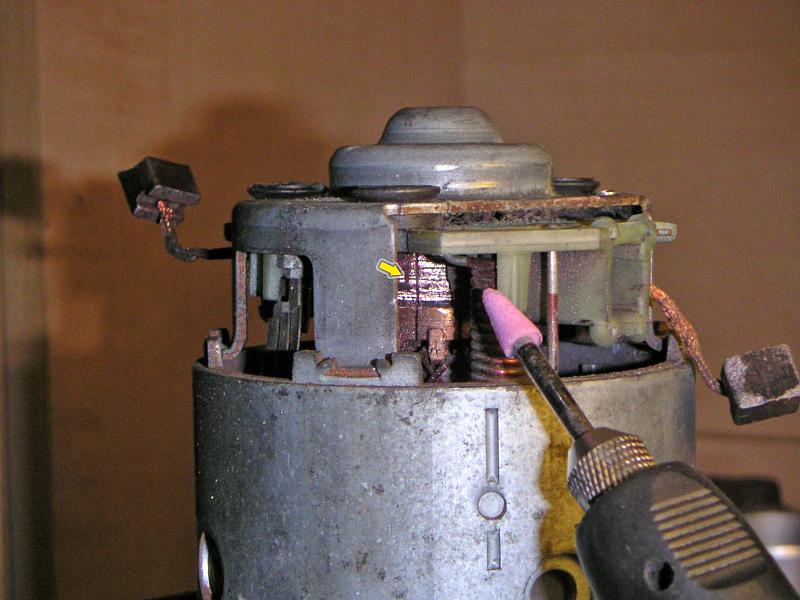 |
| 04.02.2006: Rotor cleaning |
|
Clean the rotor contact surface. Cotton swabs and electric contact cleaner
is a good start. If the rotor surface is scored, use a fine grinding bit
for your Dremel. Clean and sand the brushes too.
|
 |
| 04.02.2006: Testing |
|
Connect the motor and turn on the climate control to verify the operation.
The installation is the reverse of removal.
|


