 |
| 06.10.2004: Engine |
|
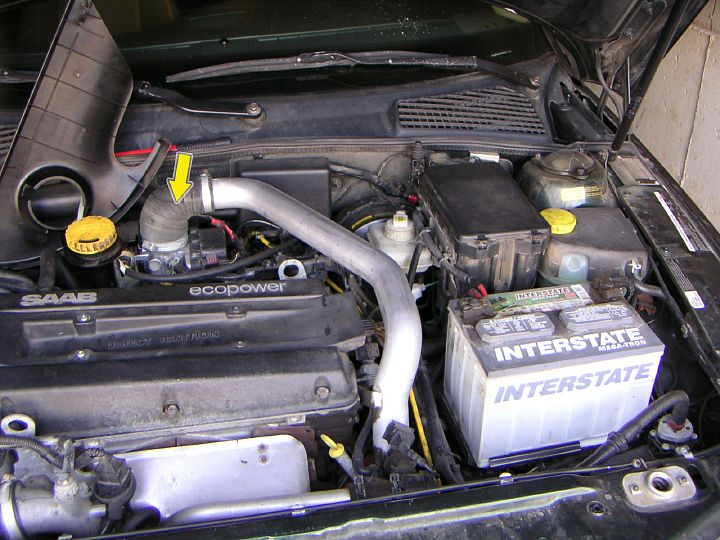
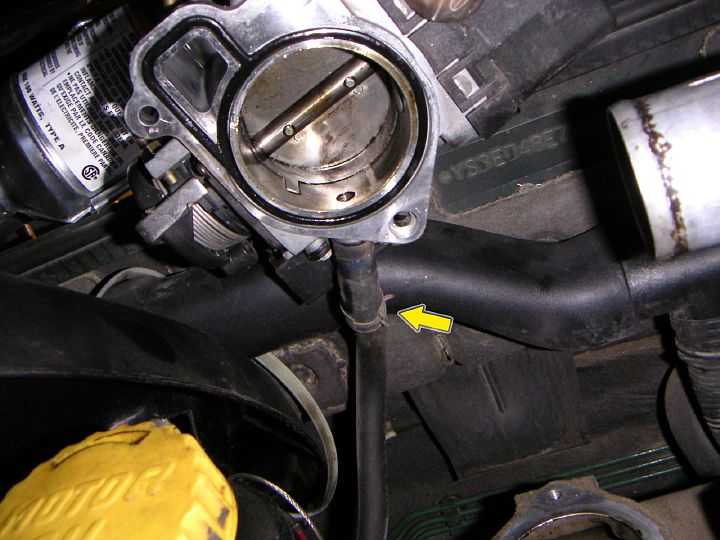
The throttle body is located under the plastic engine cover -- it's
where the delivery pipe leads to.
|
 |
| 06.10.2004: Battery |
|
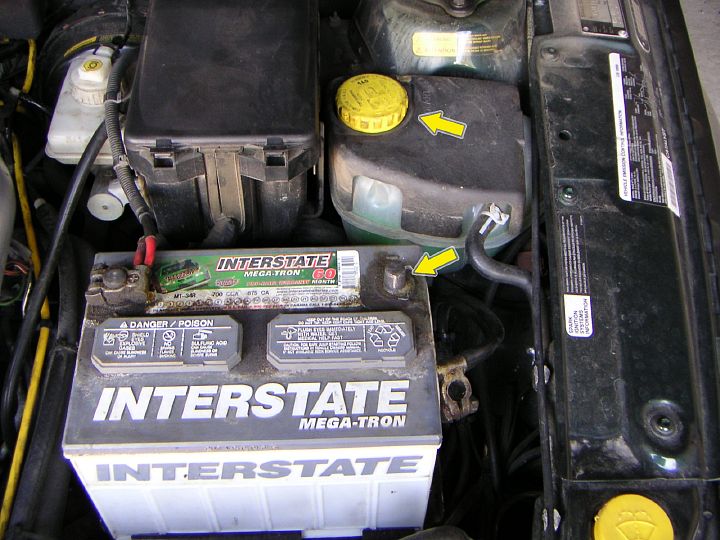
Disconnect the battery and unscrew the cap on the coolant expansion tank
to releave the pressure. Put the cap back on.
|
 |
| 06.10.2004: Boot |
|
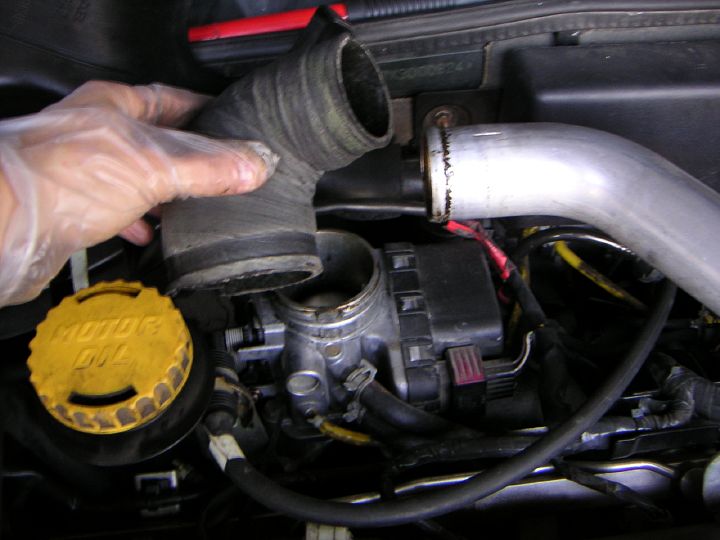
Undo the clamps on the delivery pipe and take the rubber boot off. On
newer cars with a plastic delivery pipe (and no rubber boot) you might have
to first slacken the delivery pipe retaining bolt on the cylinder head.
|
 |
| 06.10.2004: Cable cover |
|
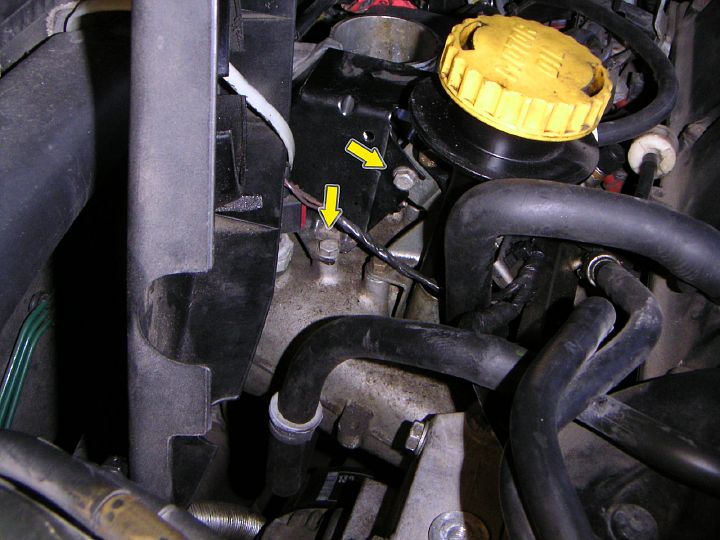
If you were to clean the throttle body, then you'd stop here, just clean it
inside and put the pipe back. However, to replace the throttle body, you
need to do more. Continue with removing the cover over the throttle cable
(two 10 mm bolts).
|
 |
| 06.10.2004: Cable |
|
Disconnect the accelerator pedal cable from the throttle body's pedal arm.
|
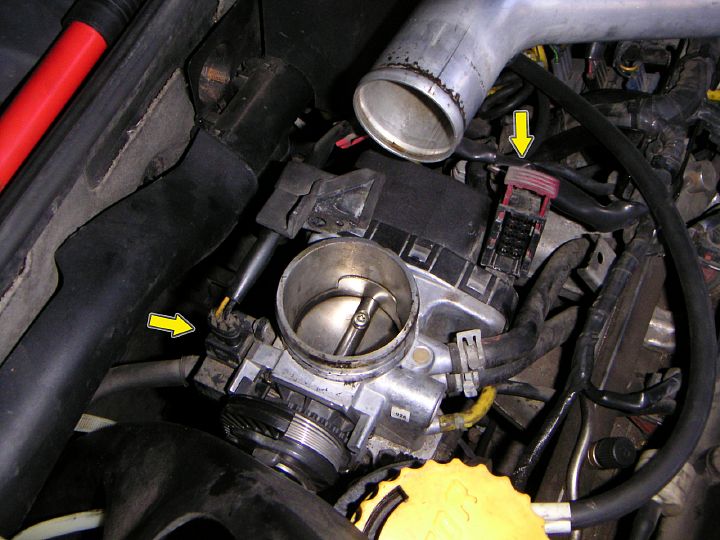 |
| 06.10.2004: Wires |
|
Unplug the wiring connectors from the limp-home solenoid and the throttle
body.
|
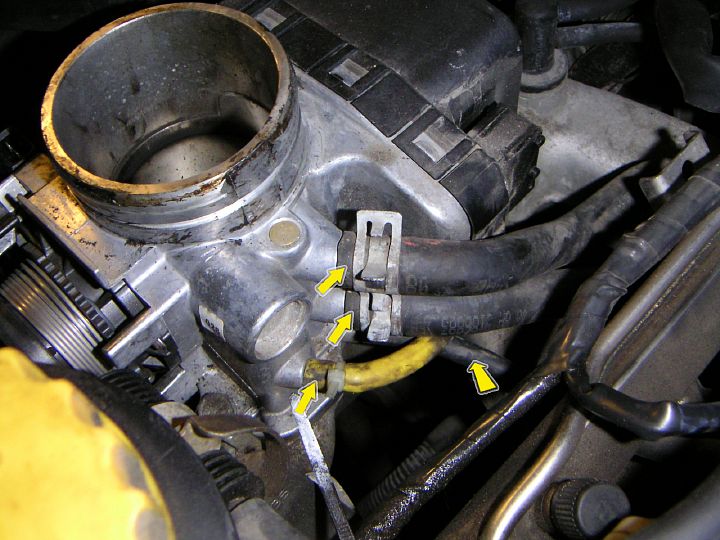 |
| 06.10.2004: Hoses |
|
Detach four hoses entering the throttle body. The two bigger hoses may
contain some coolant, so be careful if the engine is hot. WIS recommends
clamping them first to prevent coolant spillage.
|
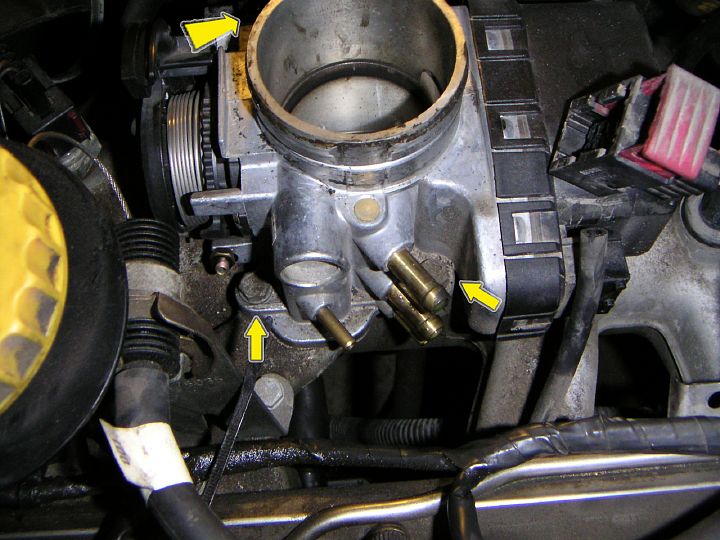 |
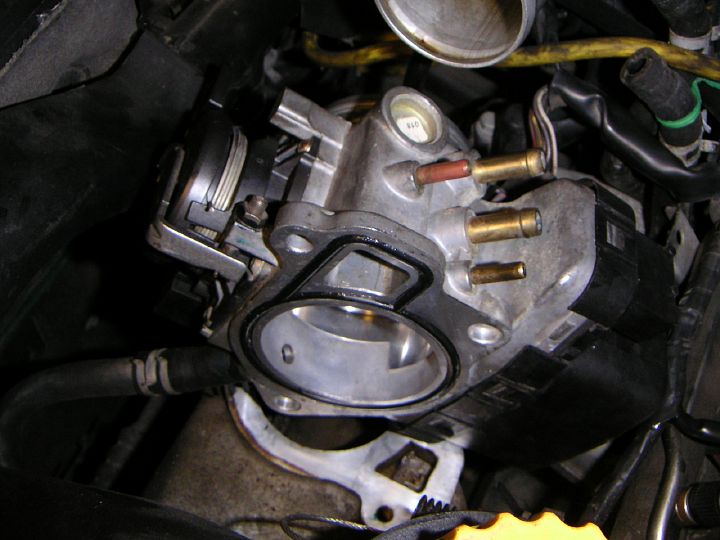
| 06.10.2004: Bolts |
|
Undo three 10 mm bolts and lift the throttle body off the intake manifold.
|
 |
| 06.10.2004: Last hose |
|
Undo the hose clamp on the back of the throttle body and detach the hose.
Congratulations, you have just removed your throttle body ;).
|
 |
| 06.10.2004: Old and new |
|
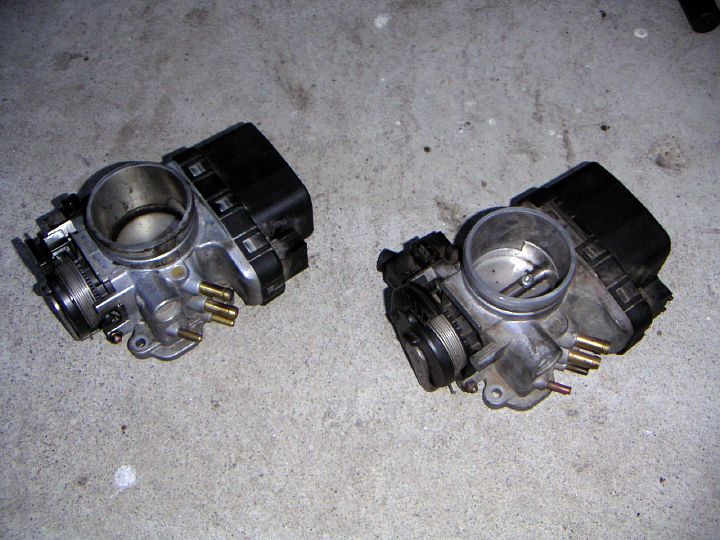
Two throttle bodies side by side. I'm installing a used unit (right), and it
actually appears to be dirtier on the outside. Cleaner on the inside though.
|
 |
| 06.10.2004: New and old |
|
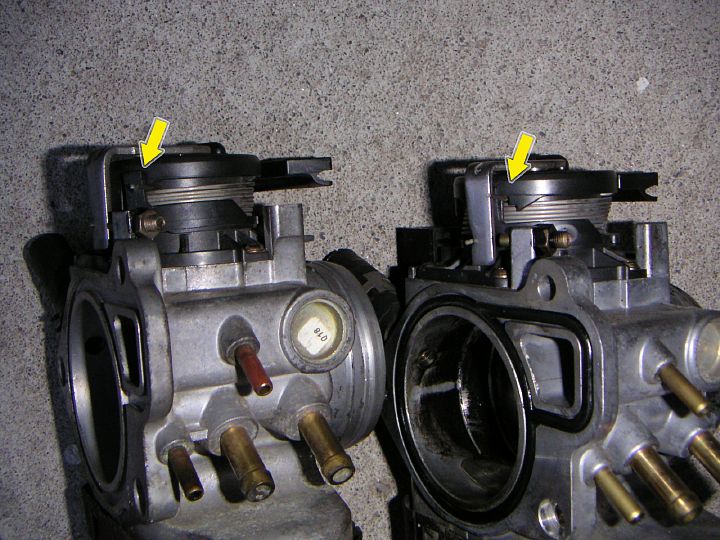
Note how the end of the spring is caught in the triangular tab on the old
unit (right). It's an indication that the limp-home solenoid has fired and
locked the pedal arm to the throttle butterfly.
|
 |
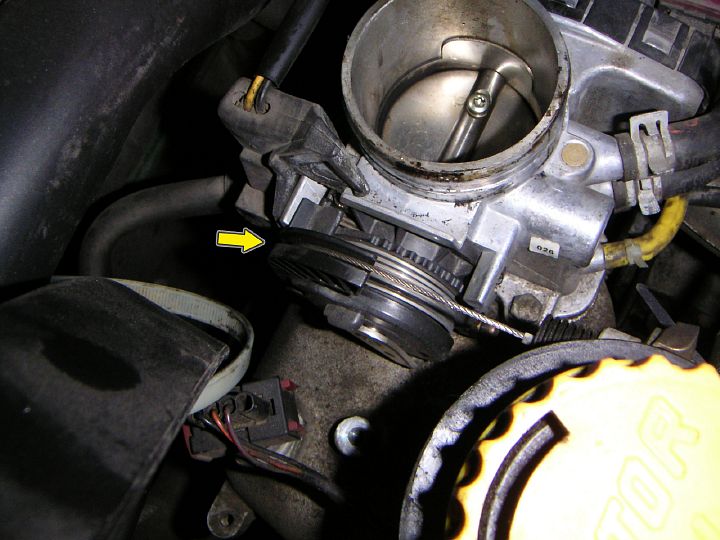
| 06.10.2004: Limp home reset |
|
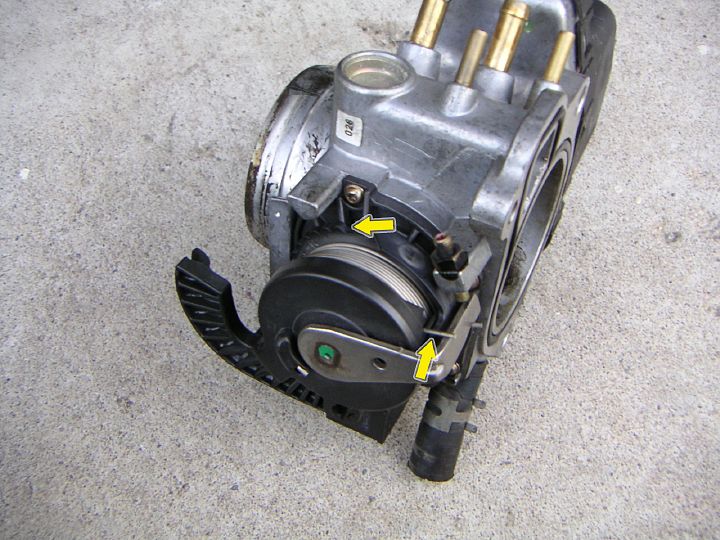
If you ever need to reset a previously activated limp-home mode, it can
be done directly on the car. Move the end of the spring towards the
throttle body to release it from the tab on the pedal arm, and then turn
the black toothed disc anti-clockwise, about a centimeter, until it clicks.
Now try moving the black plastic pedal arm to make sure that the metal
throttle body arm (the lever pointing to the right) is not following it
anymore.
|
 |
| 06.10.2004: Seal |
|
Install a fresh rubber seal and coat it with vaseline.
|
 |
| 06.10.2004: Installation |
|
Start by connecting the hose on the back of the throttle body and continue
in reverse order. The bolt tightening torque is 7.4 ft-lbs.
|


