 |
| 12.10.2009: Driver footwell |
|
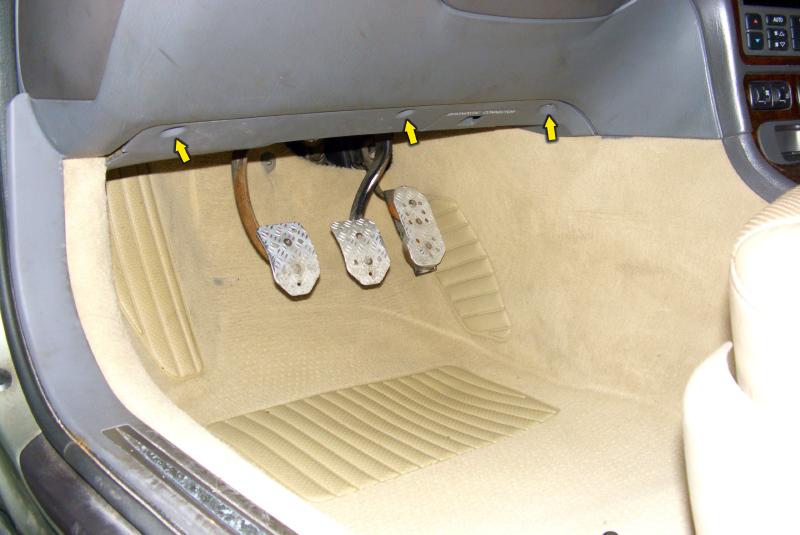
Undo the Torx screws holding the trim in the driver's footwell.
|
 |
| 12.10.2009: OBD connector |
|
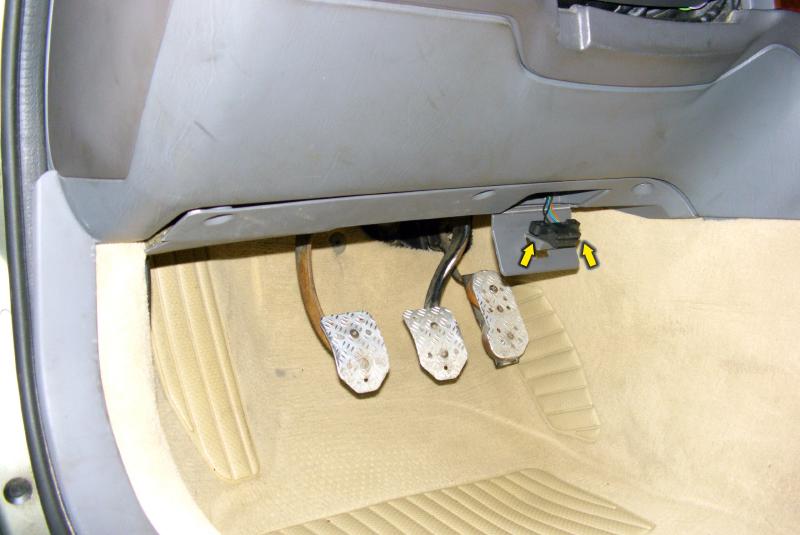
Unscrew the OBD-II connector from the trim panel.
|
 |
| 12.10.2009: Left motor |
|
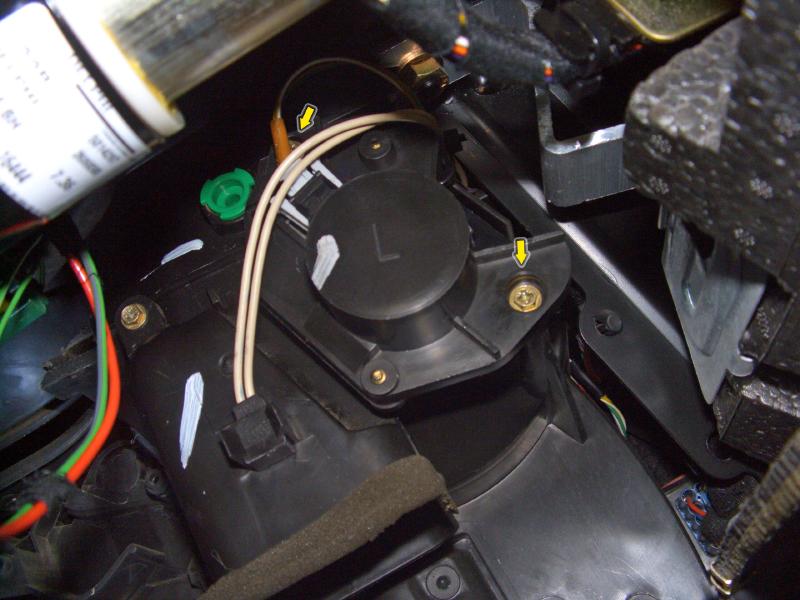
Locate the left stepping motor (it has a large "L" on it). Unplug the
connector and any other wires in your way. Undo two screws holding the
motor and pull it out.
|
 |
| 12.10.2009: Shaft position |
|
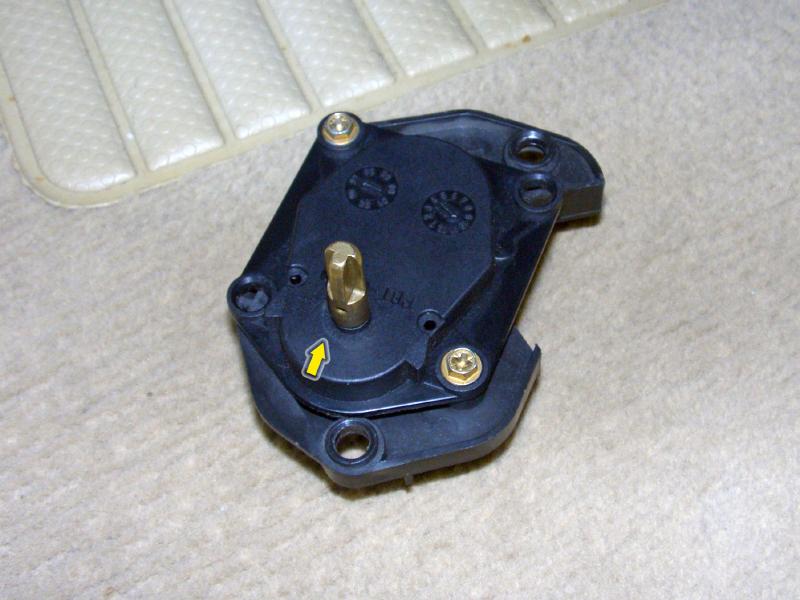
Make sure the notch on the shaft is pointed upwards. If it's not, plug
the motor connector back in and run the ACC calibration until the shaft
is positioned correctly.
|
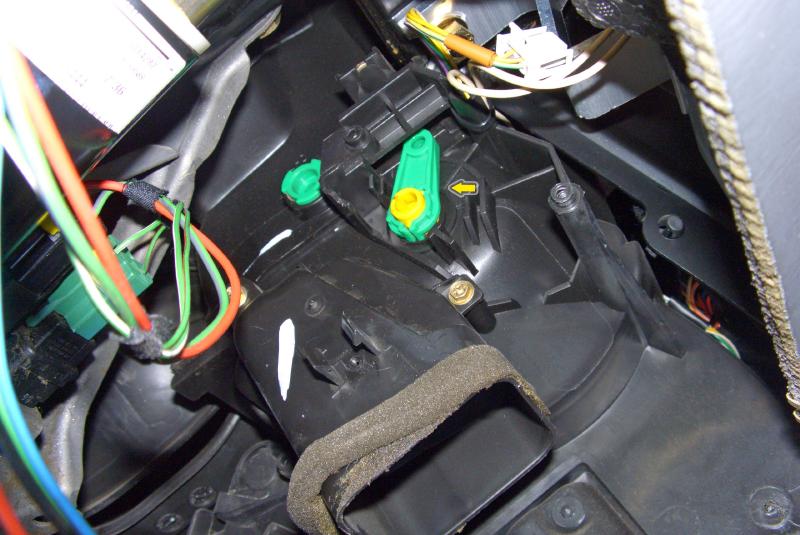 |
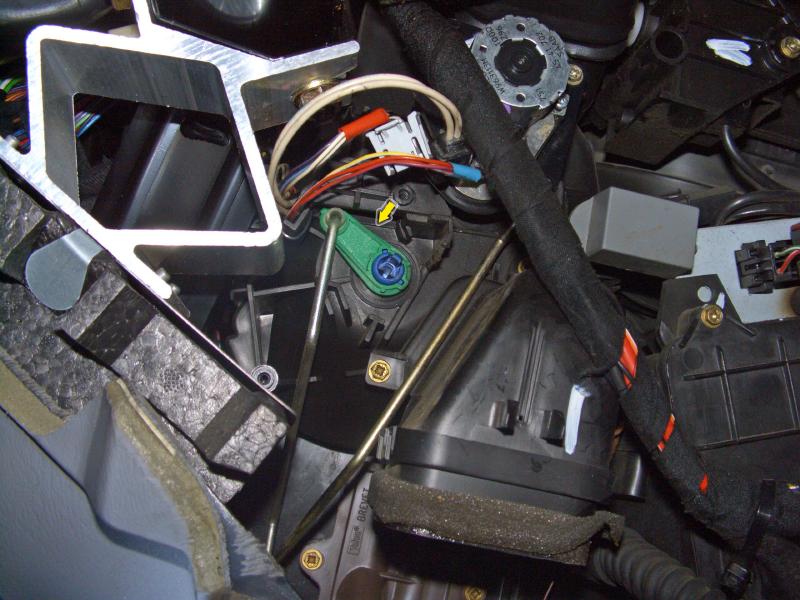
| 12.10.2009: Broken arm |
|
Old style green plastic stop arms often crack at the base, allowing the
shaft to spin freely. Newer style white arms have this end reinforced,
however they sometimes crack at the upper notch instead.
|
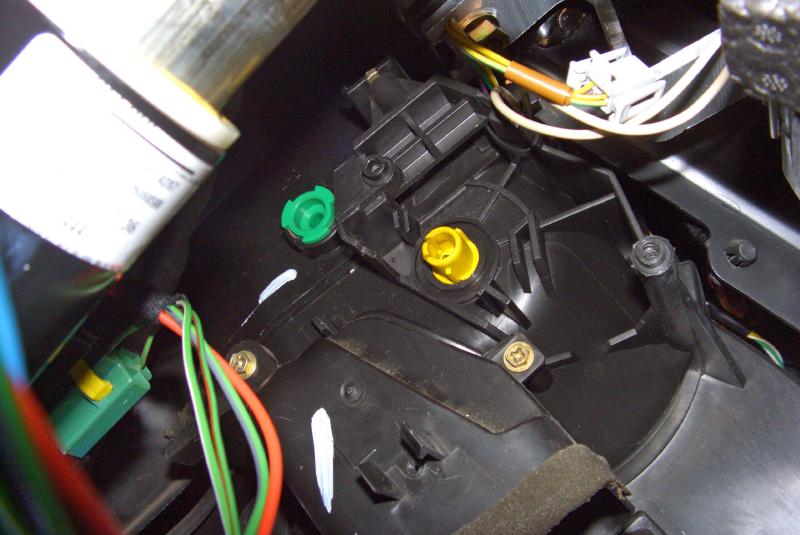 |
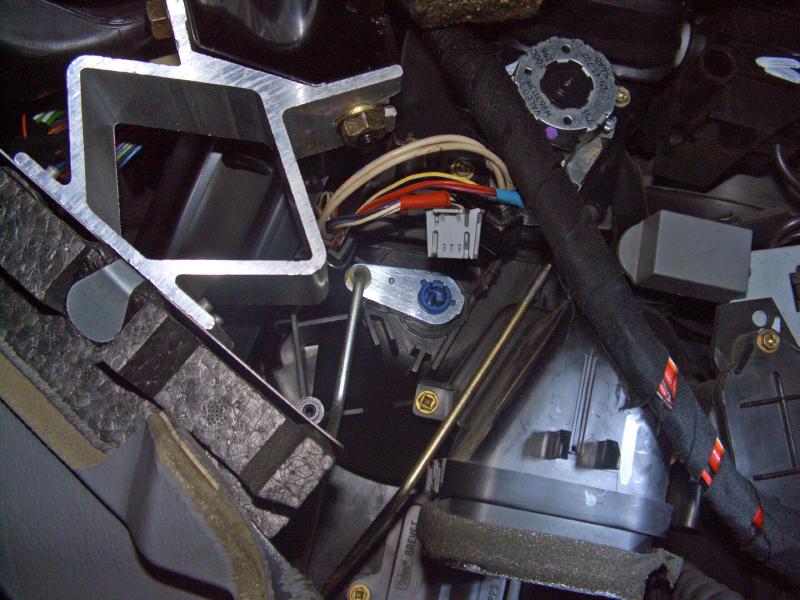
| 12.10.2009: Arm removed |
|
Remove the stop arm. Inspect the yellow shaft, make sure it turns and is
not broken. You can peek through the lower vent, or remove the vent
completely for easier access to the inner part of the shaft.
|
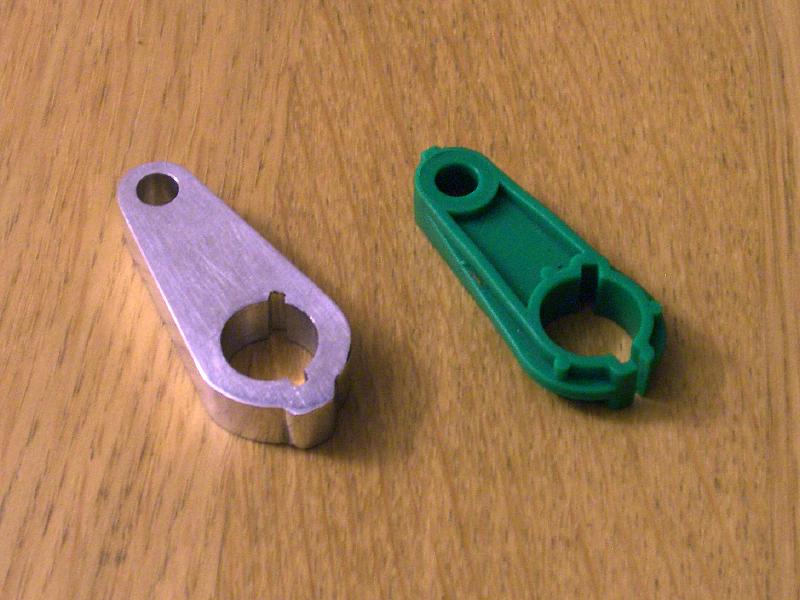 |
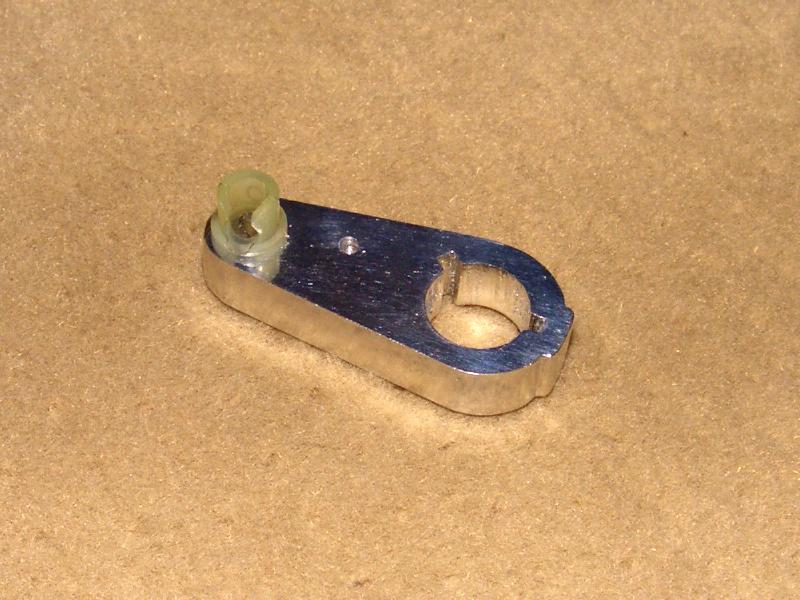
| 12.10.2009: New vs old |
|
This replacement arm was fabricated by my relative who works at the machine
shop. It's made out of military grade aluminium, very light and strong.
There are similar aftermarket replacement arms sold online.
|
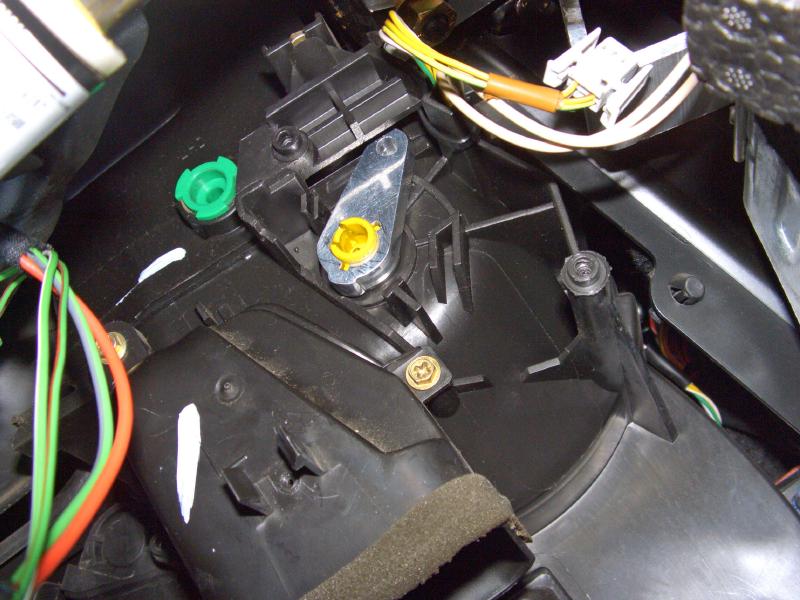 |
| 12.10.2009: Alumimium arm |
|
Install the new arm. It will be seated tight, so push it in carefully -
all the way until the catch clicks. Before re-installing the motor, make
sure the shaft profile is aligned with the notch on the motor shaft.
|
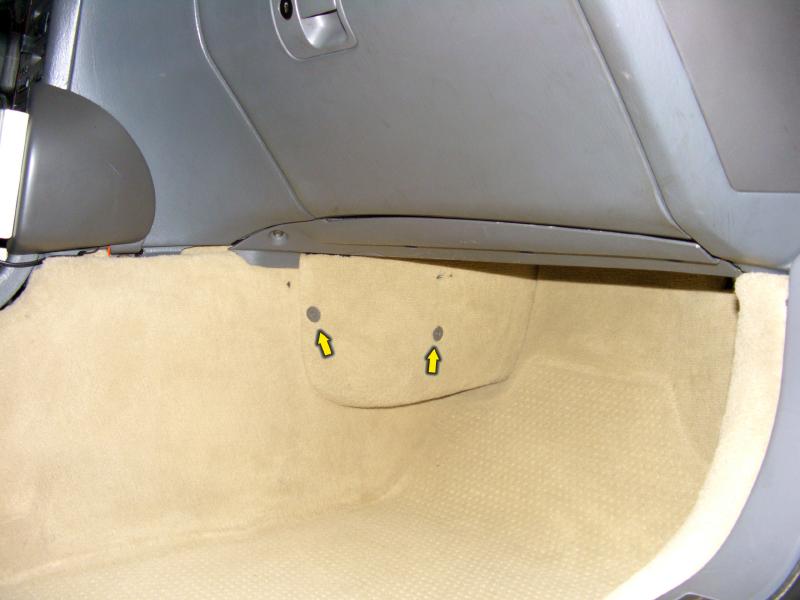 |
| 12.10.2009: Carpet clips |
|
The passenger side is less prone to failure, but I decided to replace both
as I had extra parts. Start by pulling the clips out of the carpet trim.
|
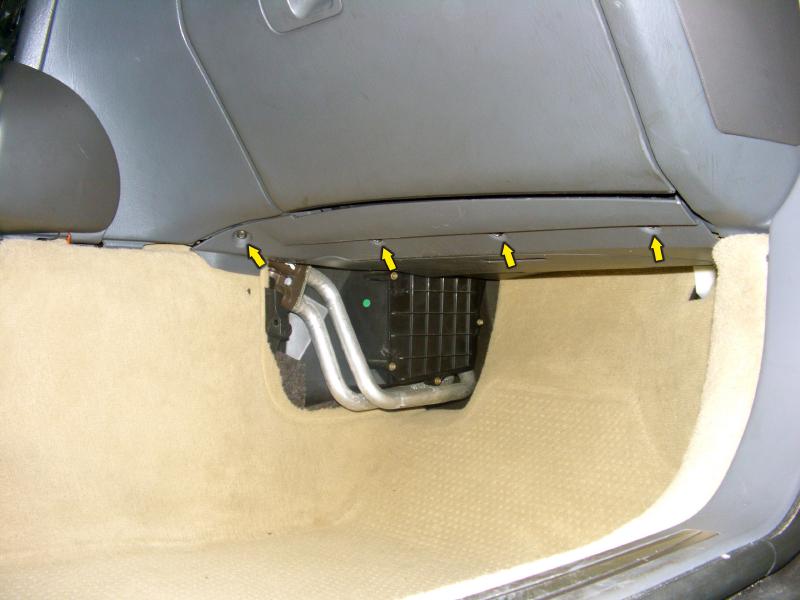 |
| 12.10.2009: Lower trim |
|
Next, undo the four screws holding the lower plastic panel.
|
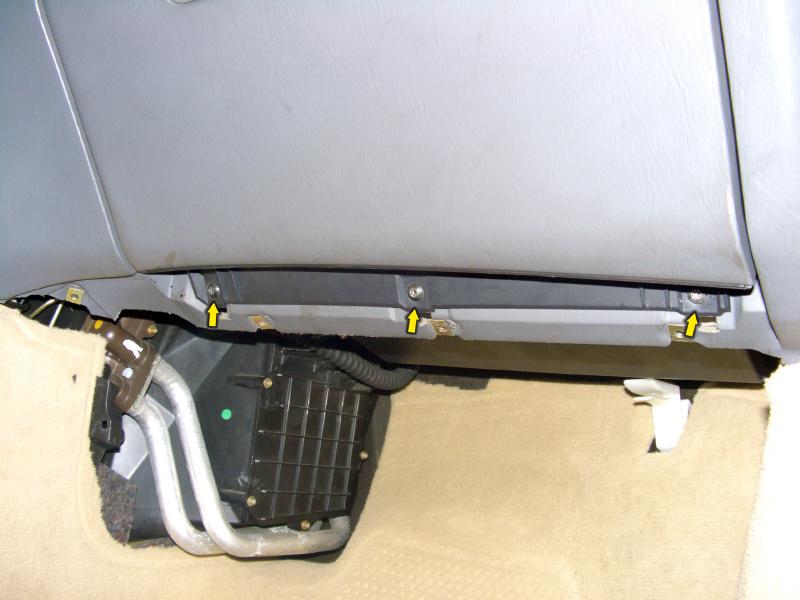 |
| 12.10.2009: Glovebox screws |
|
Unscrew the lower edge of the glove box.
|
 |
| 12.10.2009: Upper screws |
|
Open the glovebox and undo the remaining screws along the top.
|
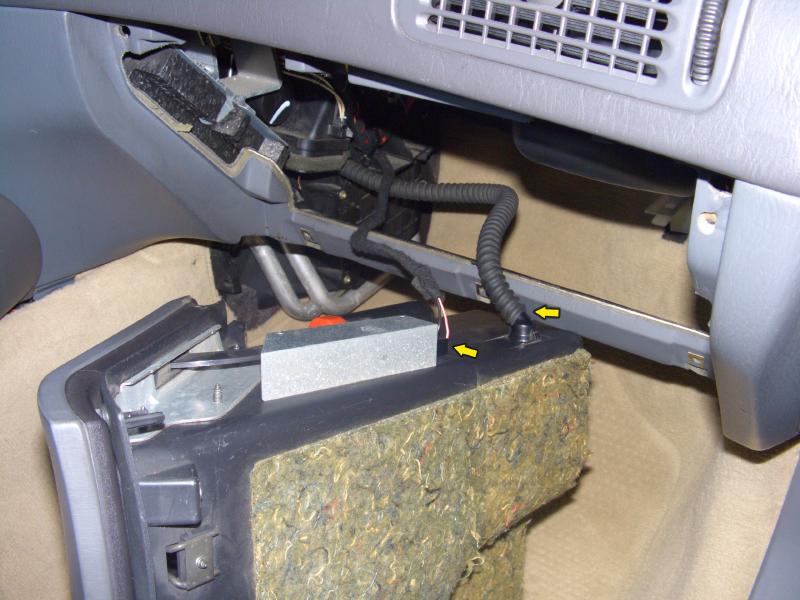 |
| 12.10.2009: Glovebox removed |
|
Pull the glovebox, disconnect the vent hose and the electrical connector.
|
 |
| 12.10.2009: Right motor |
|
Locate the stepping motor with a large "R" on it, unhook the wires and
unscrew the motor.
|
 |
| 12.10.2009: Original arm |
|
The passenger side arm is connected to a metal rod that operates additional
vents on the floor.
|
 |
| 12.10.2009: Arm removed |
|
Unhook the rod and pull the stop arm off the shaft. Inspect for damage. My
arm was starting to develop a crack at the upper notch.
|
 |
| 12.10.2009: Rod fitting |
|
Remove the soft plastic rod bushing from the old arm and insert it into the
new arm.
|
 |
| 12.10.2009: Installed |
|
Installation is the reverse of removal. Once everything is done, start
the car and run the ACC calibration by pressing AUTO+OFF.
|


