 | 08.02.2009
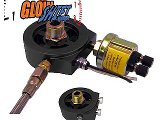
Glow Shift adapter
The 4 cylinder 9-5 is prone to low oil pressure problems, so I wanted to put
in a gauge to monitor the pressure. Hopefully then I could catch any
potential problems before the OEM low pressure light would come on (at about
6 psi). Putting the gauge in was easy and only cost about $100, including
shipping.
I purchased a 3/4 unf-16 oil filter
sandwich adapter,
black 7-color oil pressure gauge, and the universal single pillar pod all
from GlowShift. This is easier than
tapping into the factory oil pressure sending unit and allows you to keep
the factory oil pressure warning light without having to add some kind of
a junction box.
|
 | 08.02.2009
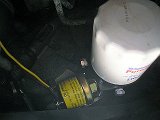
Filter sandwich
GlowShift recommends the adapter nut be tightened to a little more than
hand tight. That didn't feel tight enough to me, so I tightened it a
little more than that. But don't tighten it too much or it will distort
the rubber washer that comes with it and leak. The adapter has four ports.
Because I was only adding a pressure gauge, I plugged three (the adapter
comes with plugs) and screwed the pressure sender (the sender comes with
the gauge) into the fourth. Use Teflon tape around the threads of the
plugs and sender to prevent leaks.
I oriented the adapter so the sending unit was protected by the plastic
stone guard. That makes it a little difficult to connect the wires and
see the terminal markings, so connect the wires up before installing the
adapter. Be sure to mark which wire is the ground and which is the sender
wire. I took the ground wire up to a ground terminal in front of the
battery; the sender wire goes into the cabin as shown in the next picture.
|
 | 08.02.2009
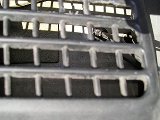
Firewall
My plan was to take the sender wire through the firewall, but I couldn't
find anyplace that looked easy. But I did notice that the hood release
cable comes through at about the right spot. After pushing the rubber
grommet back a bit with a screwdriver, it was easy to fish a stiff wire
through the hole, and it came out at just the right spot under the dash.
I taped the sender wire to the stiff wire, but it was too tight a fit, so
I had to drill the hole a little bigger to get everything through.
The main problem was the sender wire was now pushed tight up against the
sharp edge of the sheet metal. I used electrical tape to make a pad and
stuffed it between the sheet metal and the sender wire. If that doesn't
hold up, I'll have to come up with a more permanent solution.
(DP: consider this grommet under the fuse box).
|
 | 08.02.2009
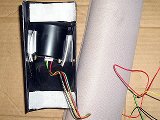
Gauge pod
To install the gauge, first remove the trim from the A pillar. I used a
door trim removal tool I got from the local auto parts place for about $5.
The trim comes off easily. I thought the gauge looked best when positioned
low on the A pillar. Both the gauge and the pod are light, so I decided to
attach everything with Velcro. I Gorilla-glued the Velcro on the pod and
drilled a small hole through the trim to feed the wires through. I used
double-sided sticky tape to hold the gauge in position. I kept the tape a
little loose so I could fine-tune the gauge's position after it was
installed.
There's plenty of space at the bottom of the A pillar to feed the gauge
wires through. The yellow wire of the gauge is attached to a circuit with
constant current and the red wire is attached to a switched circuit that
is only hot when the car is running. Constant current is needed because
the gauge needs to remember which of the seven colors you prefer.
|
 | 08.02.2009
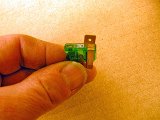
Fuse
Rather than tap directly into a wire, I used fuse blades. They go around
one prong of the fuse. I don't know if it matters, but I put the blade
around the upper prong of the fuse. Before you start pulling any fuses,
disconnect the cable from the negative battery post.
|
 | 08.02.2009
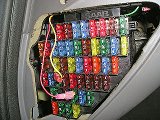
Fuse panel
For the yellow (constant) wire, I used the fuse for the electric-operated
driver's seat (fuse #25). For the red (switched) wire, I used the fuse
for the cigarette lighter (fuse #34). The fuses are clearly marked on the
plastic fuse box cover by the driver's side door. Because of the extra
thickness of the blade, you have to apply some extra force to push the
fuses in. Bend the blades just enough to get the fuse box cover back on.
|
 | 08.02.2009
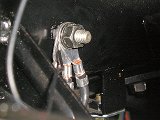
Ground
The green wire of the gauge gets hooked up to the sender wire you brought
through the cable hole. The gauge's black wire needs to go to a good
ground. There's a grounding terminal behind the dash about 8 inches
away from where the sending wire comes through into the cabin.
|
 | 08.02.2009
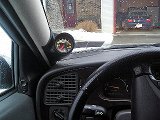
Installed
When the engine is fully warmed up, my gauge shows about 40 psi at 2000 rpm
and about 20 psi at idle. There's a little button to press to change the
gauge color. I like the green/yellow color during the day, red at night.
|
|