 |
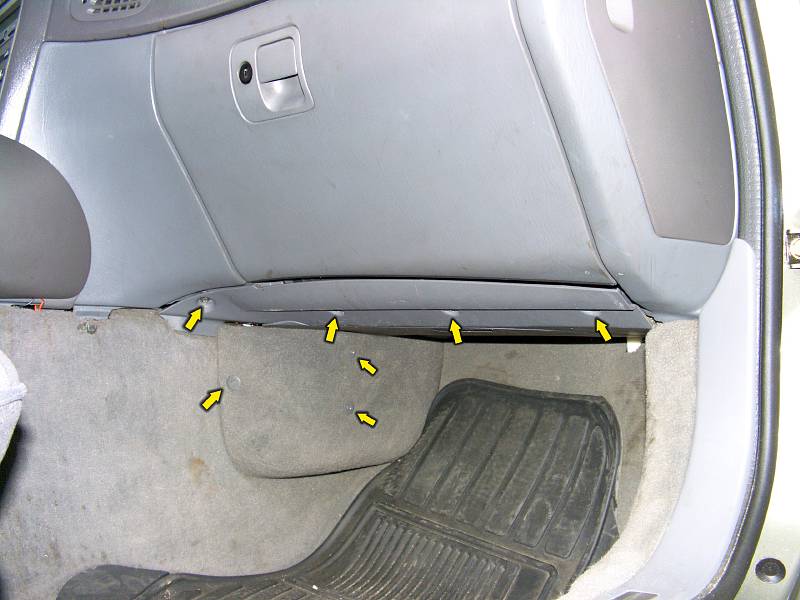
| 30.07.2008: Passenger footwell |
|
Unlatch three plastic pins and remove the piece of carpet on the left.
Then undo four screws holding the plastic panel under the glovebox.
|
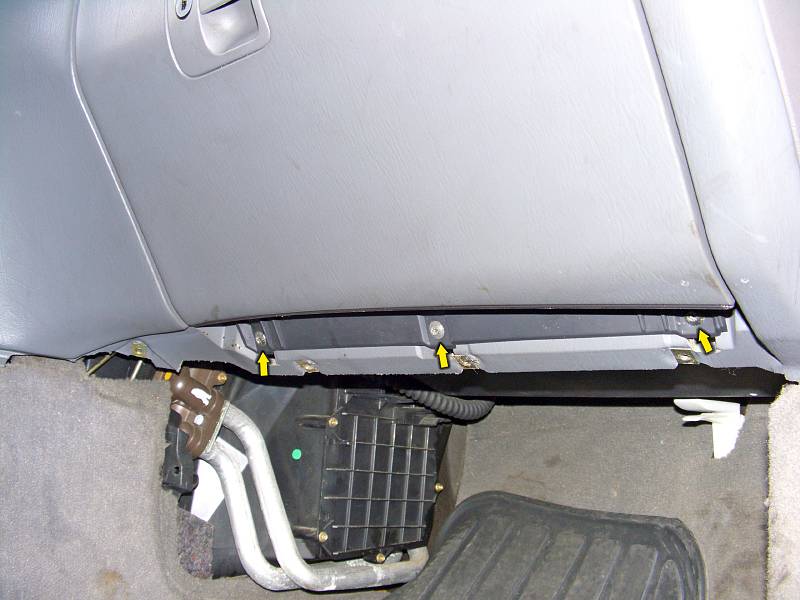 |
| 30.07.2008: Lower screws |
|
Undo the screws under the glovebox.
|
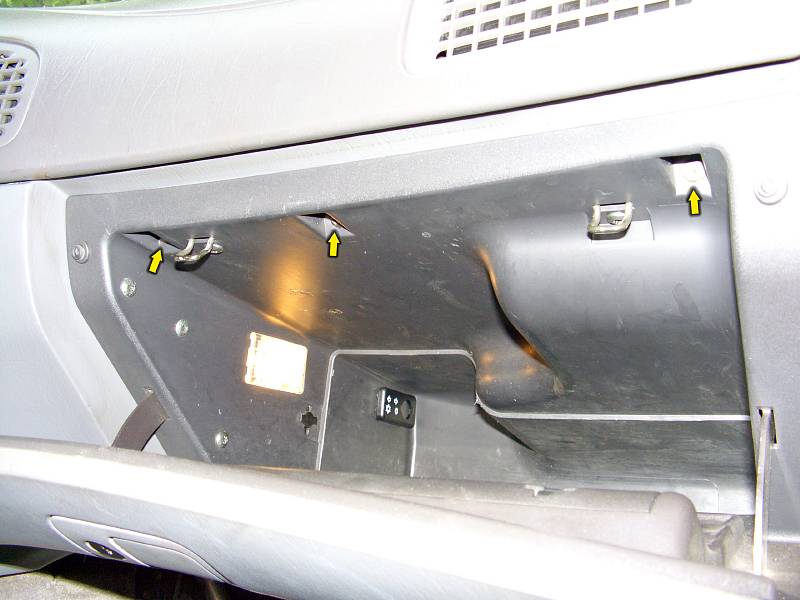 |
| 30.07.2008: Upper screws |
|
Open the glovebox and undo three more screws along the top.
|
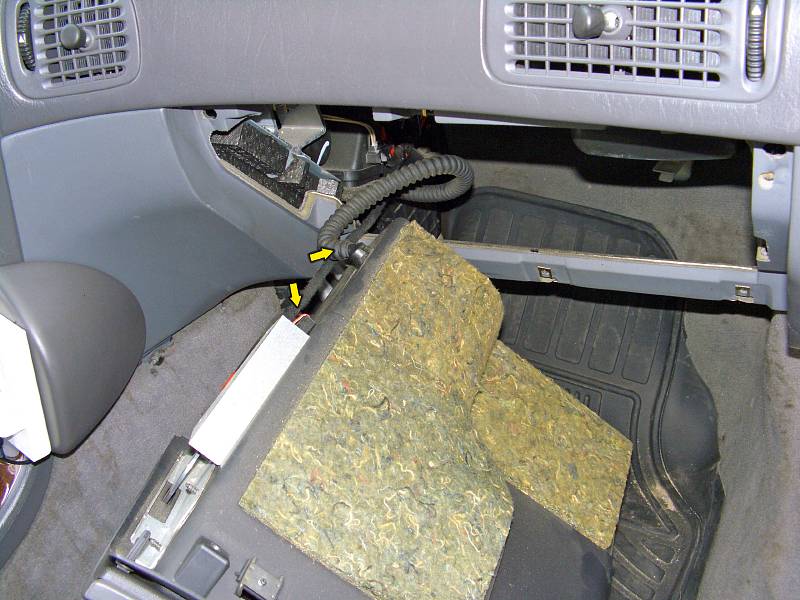 |
| 30.07.2008: Glovebox |
|
Pull the glovebox out. Unplug the lamp connector and disconnect the
cooling hose from the ACC.
|
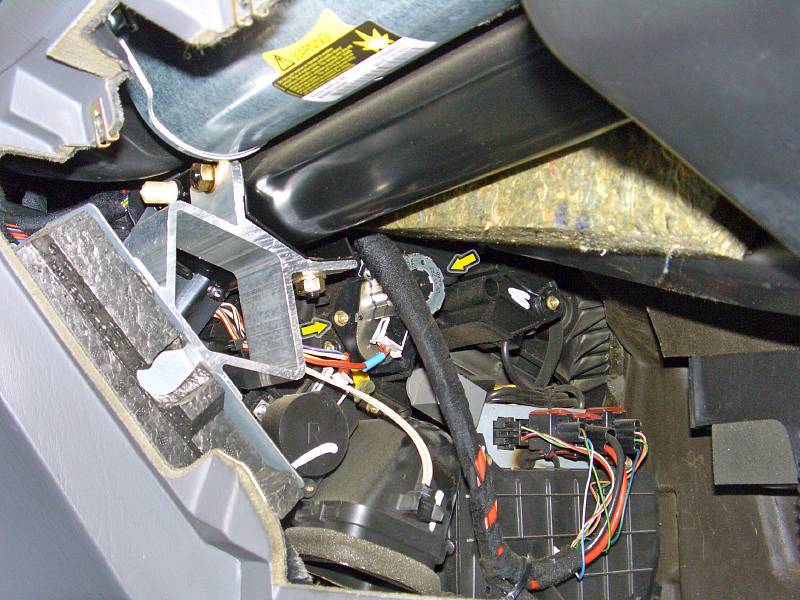 |
| 30.07.2008: Stepping motor |
|
Unscrew the motor, it's held by two screws with a 8mm hex head and a
Phillips groove. Unplug the connector and carefully lift the motor.
Note the position of the shaft.
|
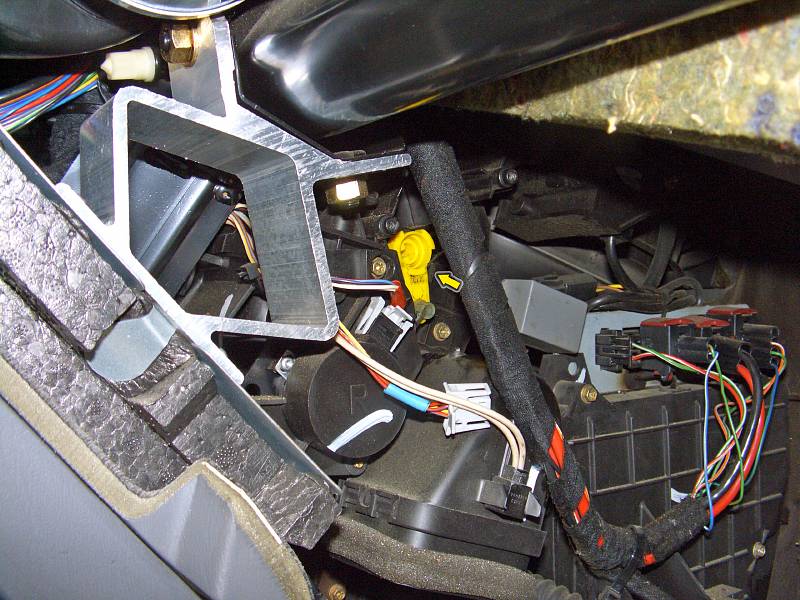 |
| 30.07.2008: Plastic lever |
|
The yellow lever is connected to the rod operating the latches on the floor
- unhook it first. Pull the lever out of its socket - it takes some effort,
but you can do it with your fingers.
|
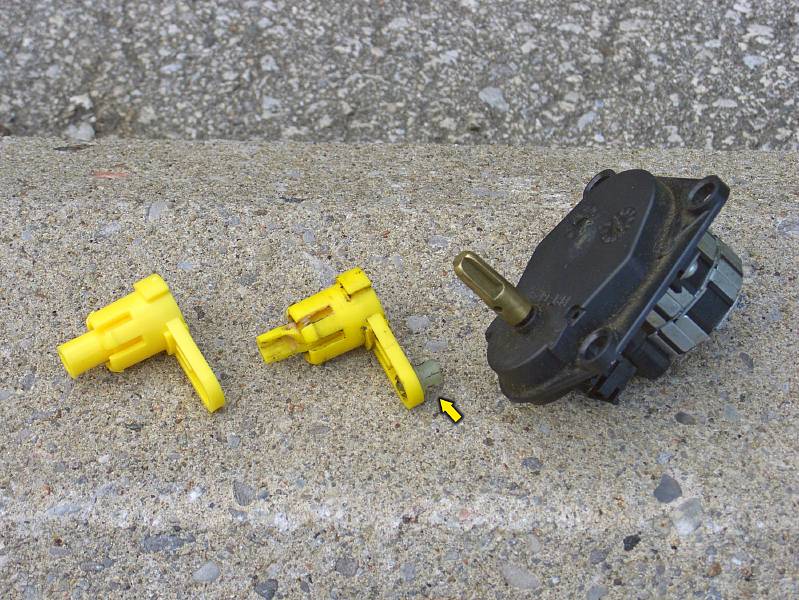 |
| 30.07.2008: Levers and motor |
|
Test motor and inspect the lever. In my case the lever was broken at the
point where it connects to the shaft operating the flaps. A new lever
(left) was $16 at the dealer (part 5334693). I had to transfer the little rod socket to
the new lever. Apply some grease on the outer surface.
|
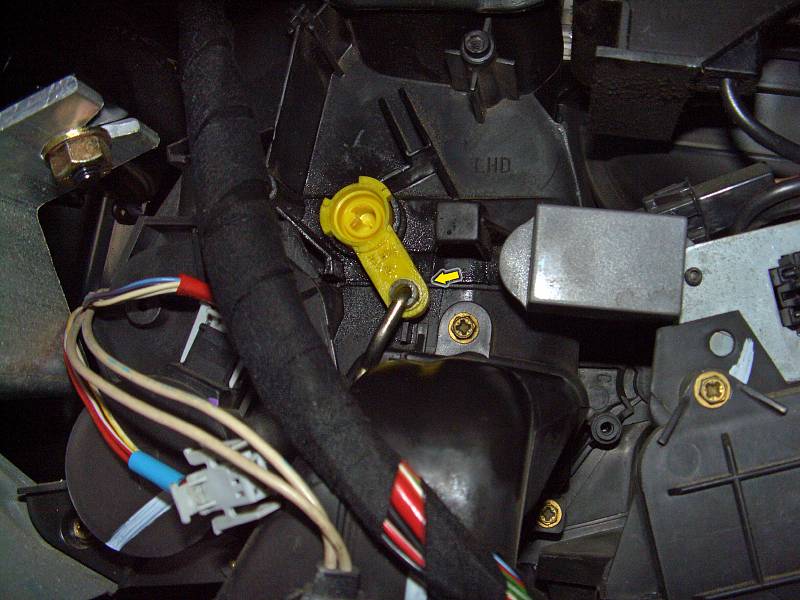 |
| 30.07.2008: New lever |
|
Before installing the new lever, reach into the socket with strong
needle-nose pliers and try turning the shaft to make sure it is not jammed
completely. You can even pull the shaft out (it's a 8" long square metal
rod) and spray some lubricant into the hole. Then insert the lever, hook
up the lower rod and re-assemble everything.
|
 |
| 21.06.2009: Broken again |
|
Less than a year later, the lever broke again. As the air
distribution unit wears with age, these levers
prove to be too weak to handle the increased friction.
|
 |
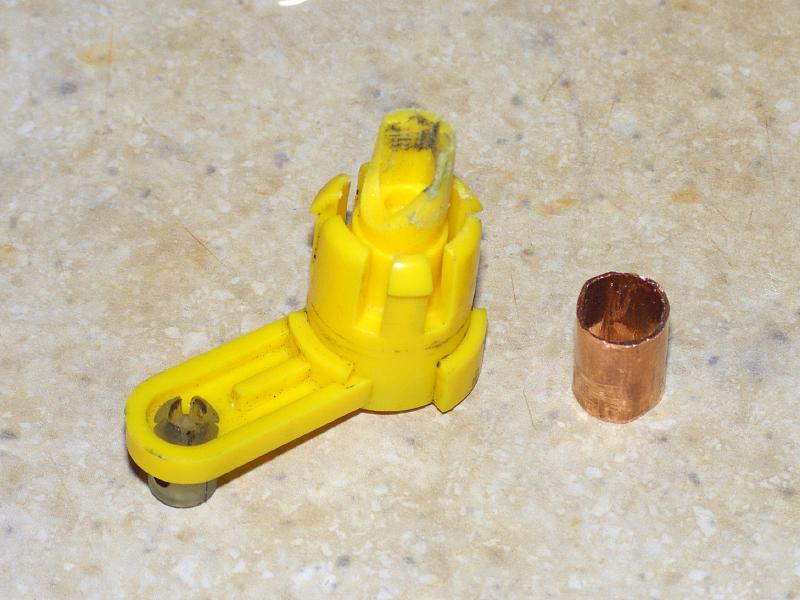
| 21.06.2009: Copper tube |
|
I cut a short piece of a 3/8" copper tube and used a soldering iron
to firmly seat it on the remaining part of the lever.
|
 |
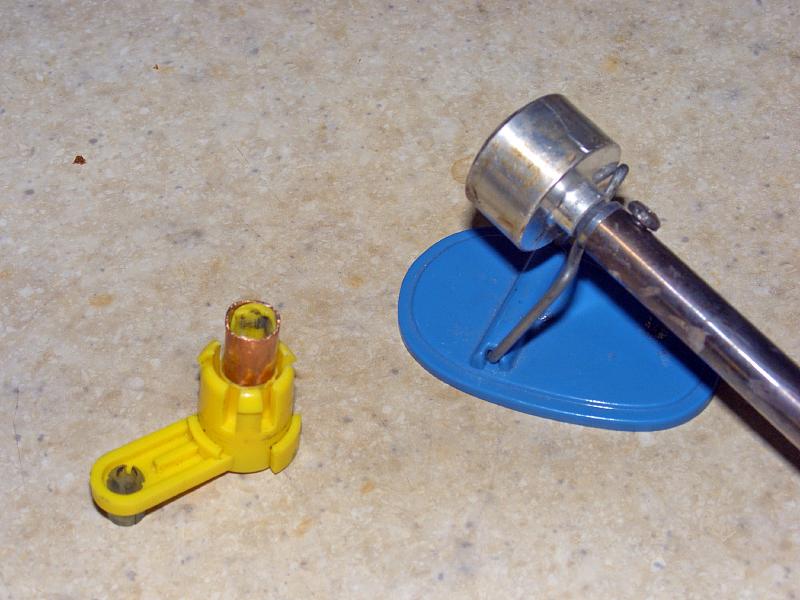
| 21.06.2009: Filled |
|
The tube was then filled with epoxy. I used this wooden stick to shape a
hole, so the shaft would fit firmly.
|


