 |
| 29.09.2007: Jack stands |
|
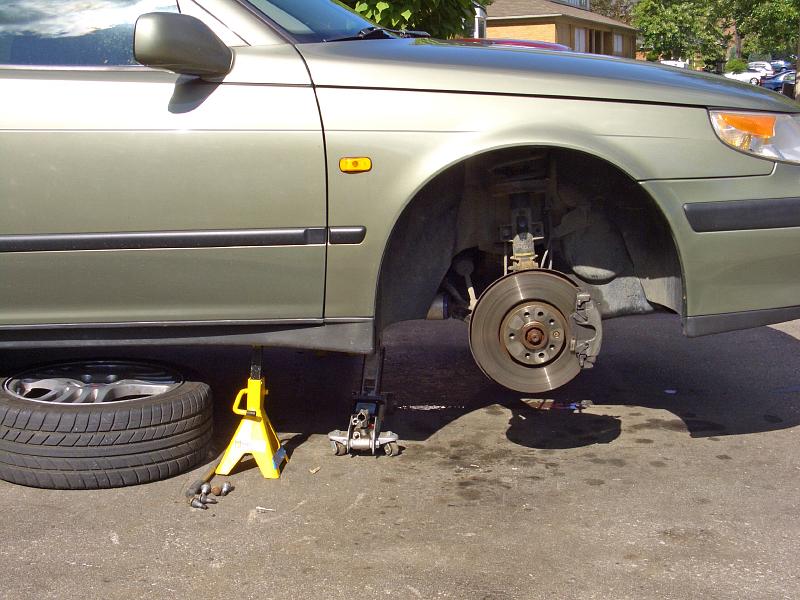
Secure the car on jack stands, take the front wheel off. Both wheels need
to be in the air, otherwise it becomes difficult to align the anti-roll
bar link with its mounting hole on the strut. Spray the bolts with rust
solvent and wire brush the threads on the anti-roll bar link and knuckle
housing bolts.
|
 |
| 29.09.2007: Link |
|
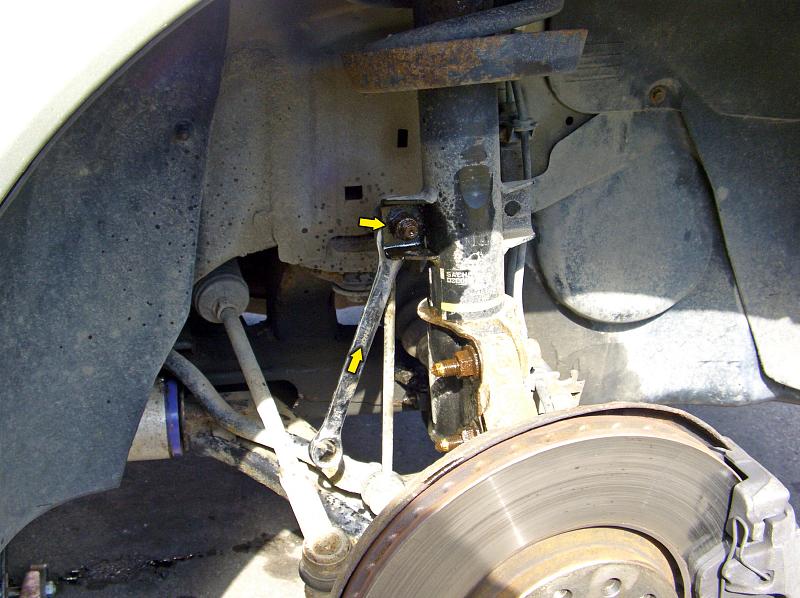
Unscrew the anti-roll bar link from the strut. The old version had a grip
behind the strut, so you could use a 17 mm spanner on it. The new version
has a smaller hex pin protruding in the front, which requires you to use
a spanner on the nut itself, while holding the pin with a small socket.
|
 |
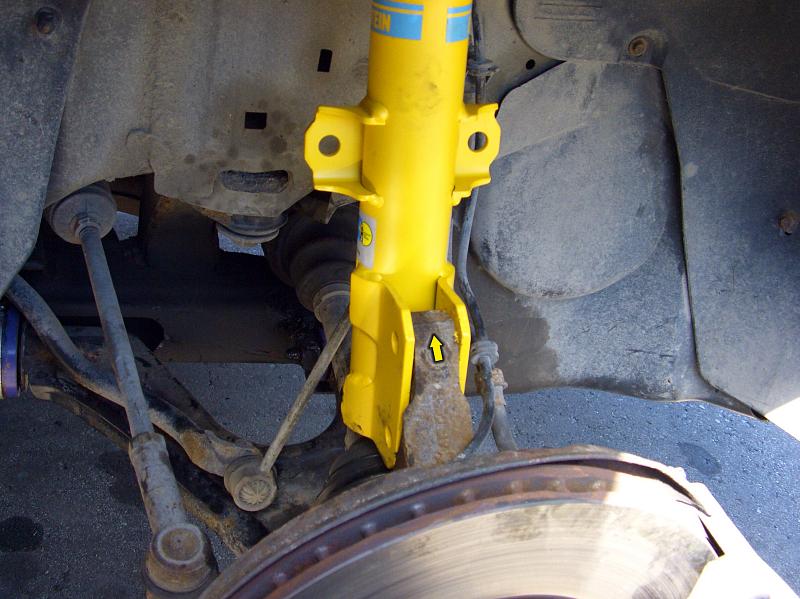
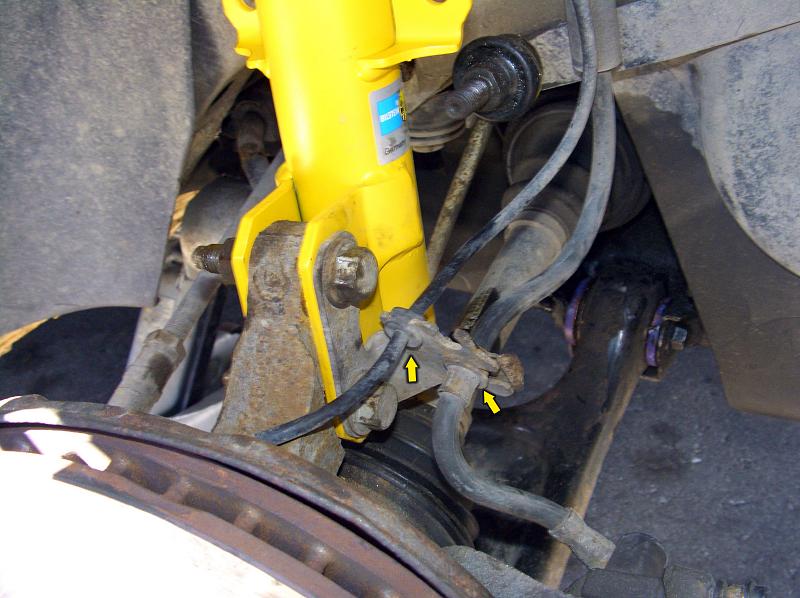
| 29.09.2007: Bracket |
|
Detach the brake line and the ABS sensor wire from the bracket on the
side of the strut.
|
 |
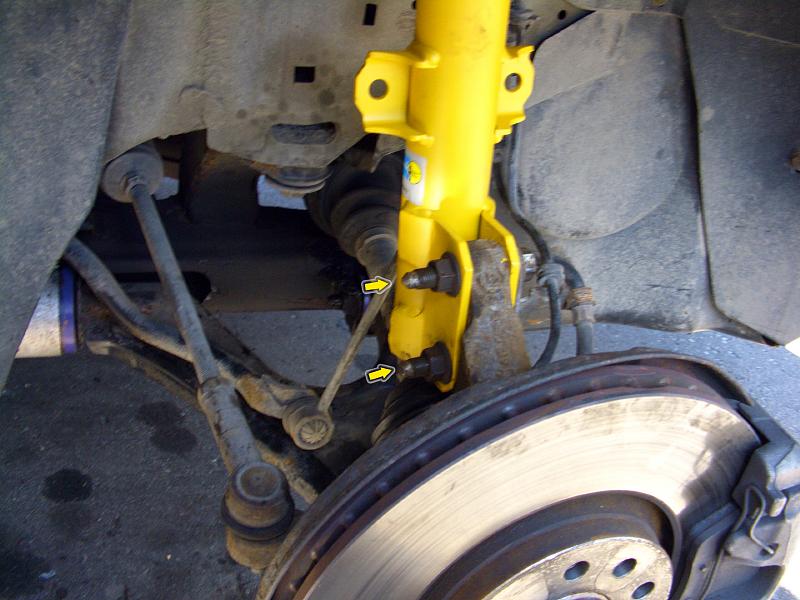
| 29.09.2007: Knuckle |
|
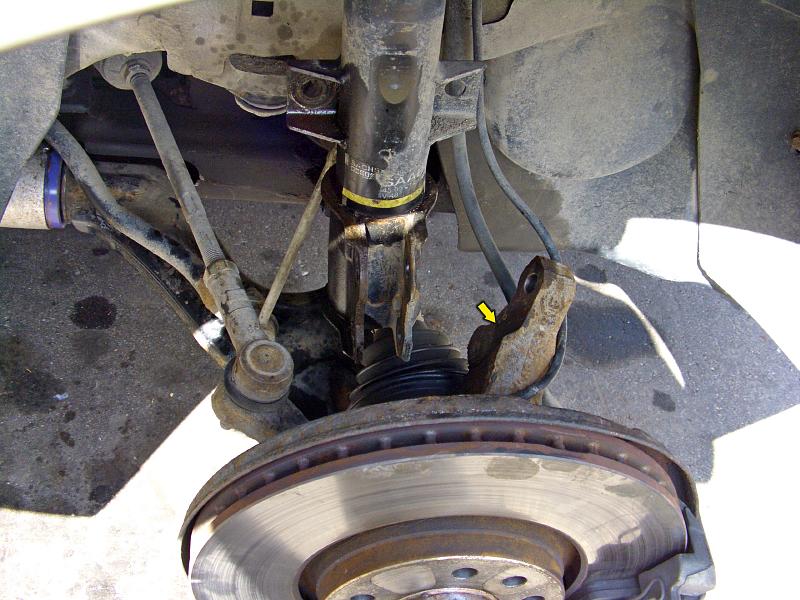
Undo two bolts holding the strut to the knuckle housing. Remove the nuts
and pull the bolts out.
|
 |
| 29.09.2007: Disconnected |
|
Detach the knuckle housing from the strut. It might be a good idea to
support the control arm from below so it doesn't strain the brake line with
its weight.
|
 |
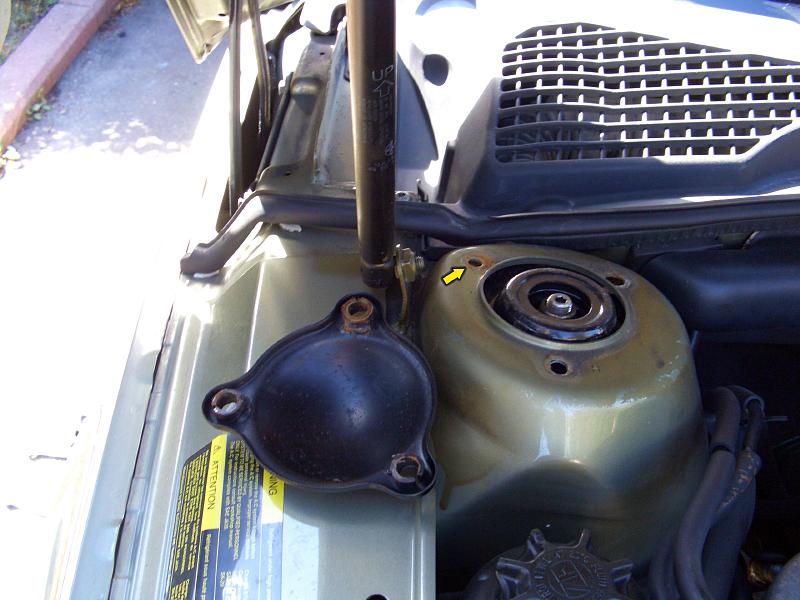
| 29.09.2007: Strut tower |
|
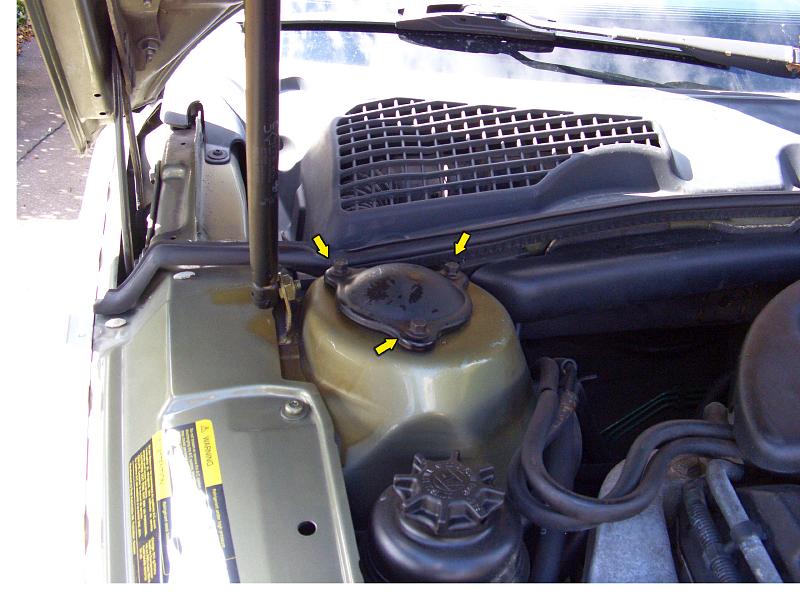
Undo three bolts holding the strut mount to the top of the tower.
While loosening the last bolt, catch the strut before it falls down and rips
the CV joint boot.
|
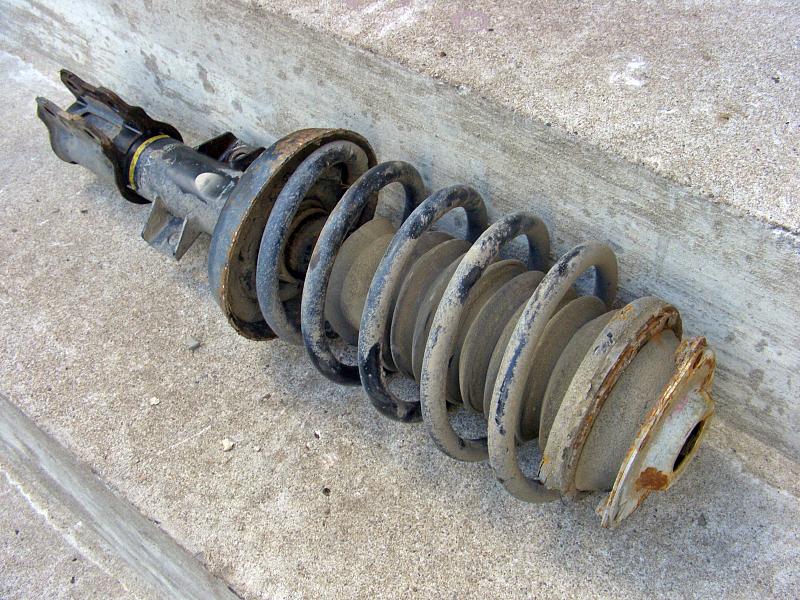 |
| 29.09.2007: Strut |
|
Lower the strut to the ground.
|
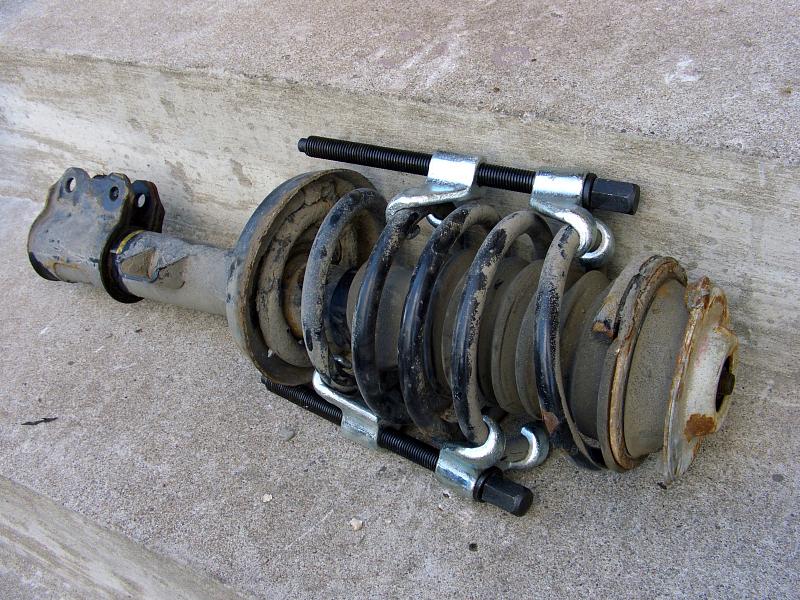 |
| 29.09.2007: Spring compressor |
|
Attach a spring compressor to relieve the load on the spring seat.
|
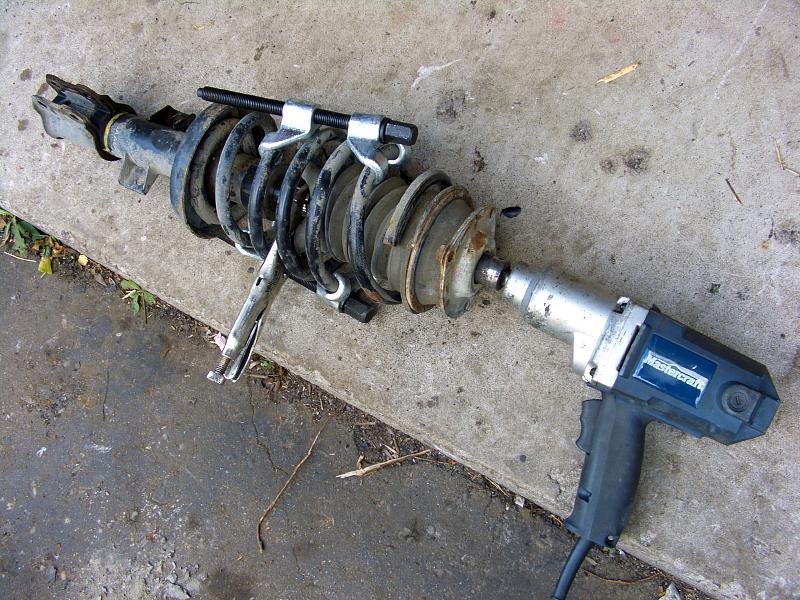 |
| 29.09.2007: Retainer nut |
|
Grab the damper rod with vice-grips and undo the retainer nut on top
of the strut. You can use a regular ratchet, but the impact wrench makes
the job much more satisfying somehow.
|
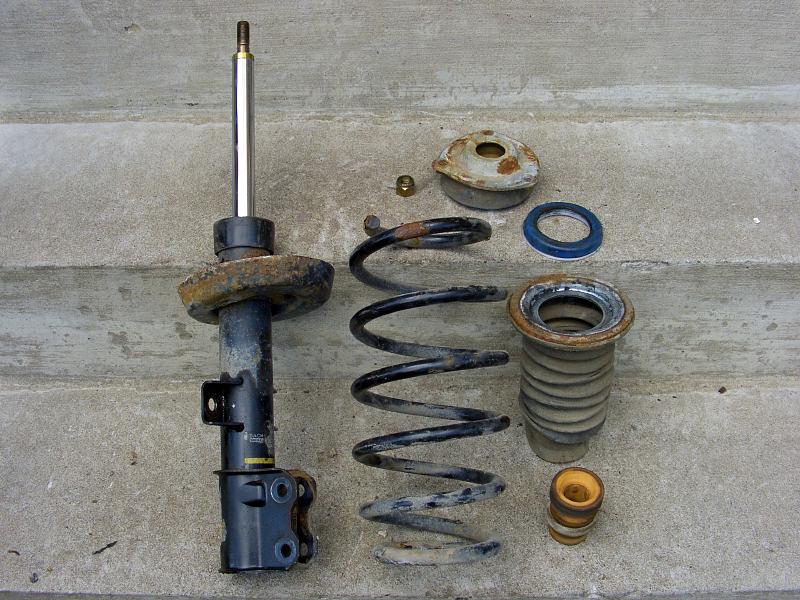 |
| 29.09.2007: Apart |
|
The strut apart (counter-clockwise): damper, spring, bump stop,
dust cover with upper spring seat, thrust bearing, strut mount, retainer nut.
|
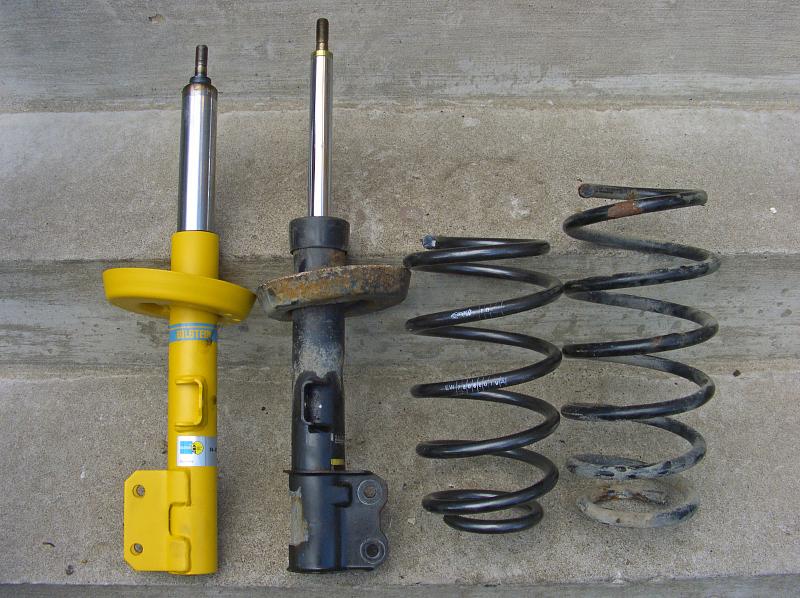 |
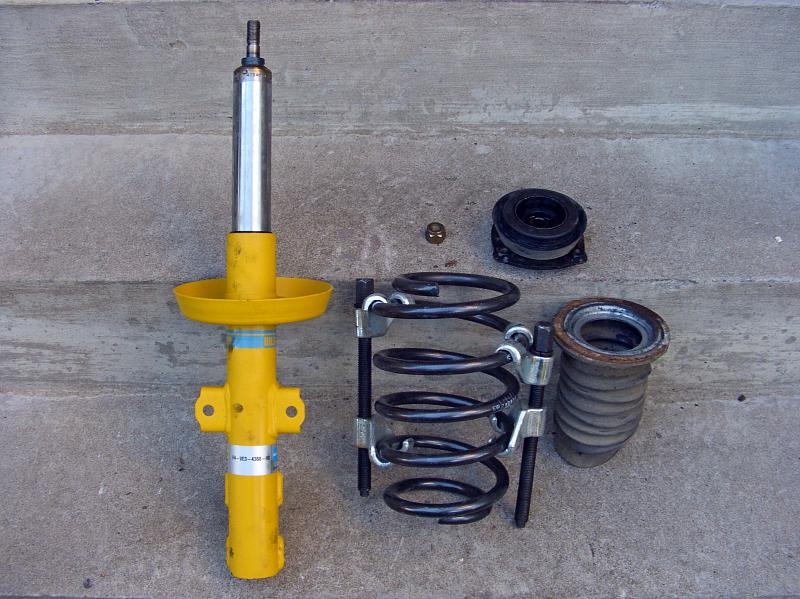
| 29.09.2007: New vs old |
|
The Bilstein monotube damper features it's famous massive rod, and the
"Sport" version is a bit shorter, being designed to match the ride height
with lowering springs. The Eibach spring has the same number of coils as
OEM, but is wound tighter, and has slightly thicker coils. It's obviously
shorter too, the posted lowering amount is 35 mm.
|
 |
| 29.09.2007: Strut mounts |
|
An aftermarket strut mount kit comes with everything you need to refresh
the mounts, including a new bearing and a set of bolts. It's made in India,
but looks reasonably solid. Unfortunately I could not use the 22 mm nut
supplied with Bilstein dampers, because my 22 mm socket did not fit into the
narrow opening in the strut mount, so I had to reuse the old 21 mm nut.
|
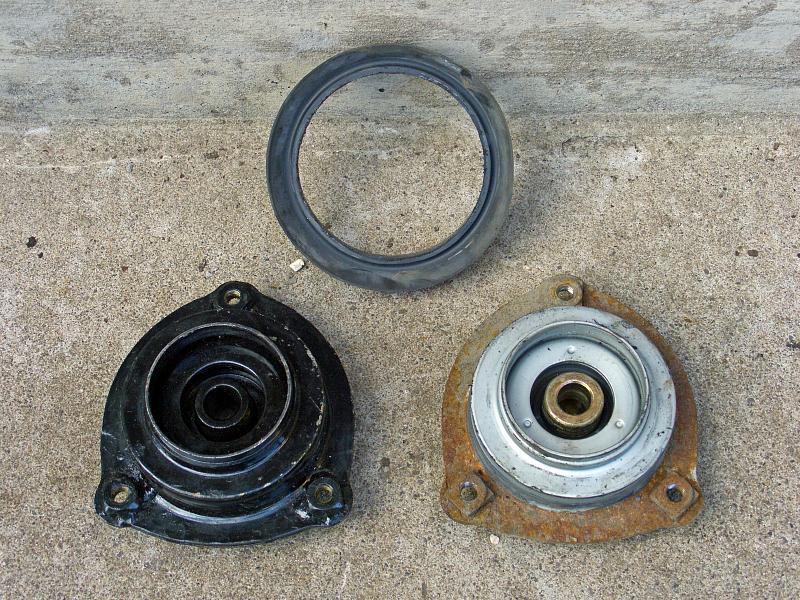 |
| 29.09.2007: Dust shield |
|
The old strut mount came with a little rubber skirt to protect the bearing from
dirt. It can be removed and transferred to the new mount.
|
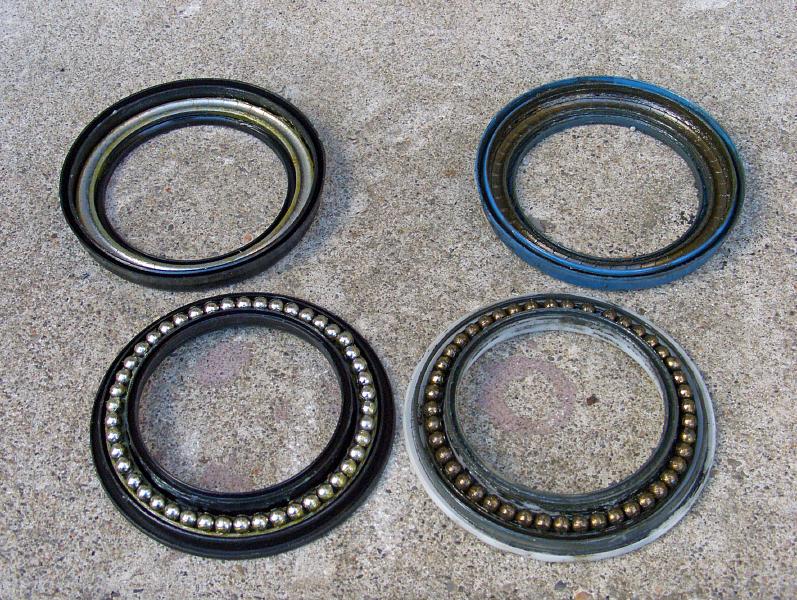 |
| 29.09.2007: Thrust bearings |
|
The thrust bearing is tight, shiny and certainly more presentable than the
tired old one, although they came looking a little dry, so I added some
bearing grease just in case.
|
 |
| 29.09.2007: Ready for assembly |
|
Bilstein dampers come with integrated bump stops, so you don't need to
reuse your old one. The spring needs to be compressed, and the strut mount
is already assembled with the skirt and the bearing on.
|
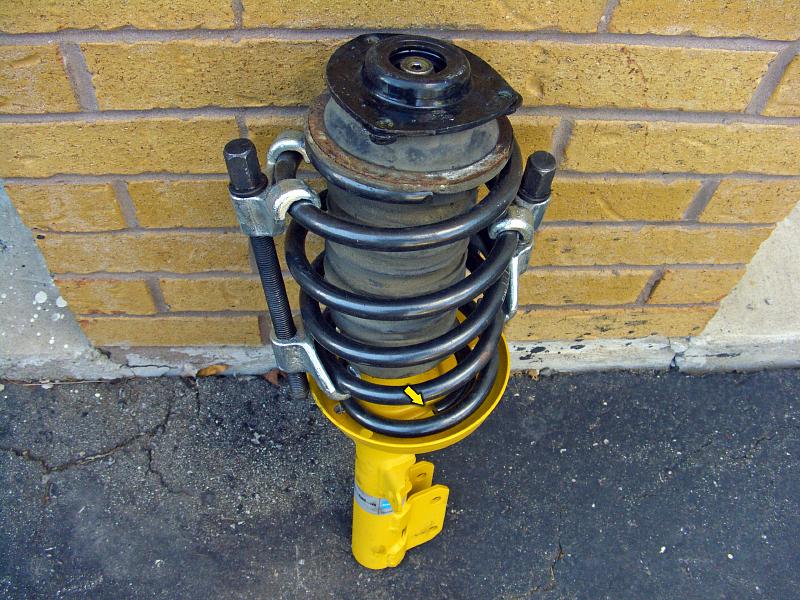 |
| 29.09.2007: Fit together |
|
Slide the spring over the damper rod, making sure that it's not upside down,
and that the end of the last coil matches the little stop on the lower
spring support. Install the upper seat, the mount, and screw the nut on.
|
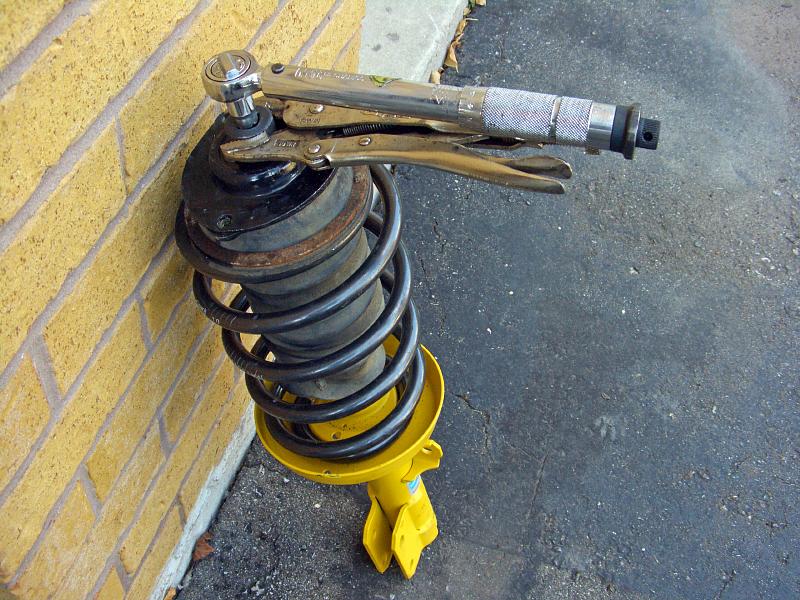 |
| 29.09.2007: Tightening |
|
This is how you are supposed to tighten the retainer nut - hold the damper
rod with a thin Allen wrench and tighten the nut. Unfortunately, the shallow
Allen socket is easy to strip, making the required 76 ft-lbs hard to achieve.
|
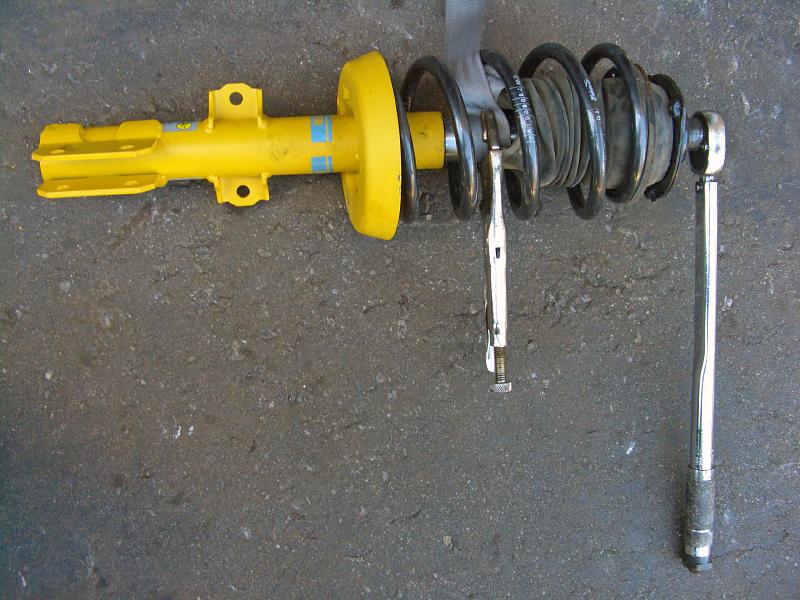 |
| 29.09.2007: Tightening |
|
Alternatively, you can grab the damper rod with vice-grips and use a good
sized torque wrench on the nut. Just wrap the rod with something so it
won't get scratched (I use a nylon belt). An impact wrench also works well on the top nut.
|
 |
| 29.09.2007: Strut tower |
|
Lift the strut to the underside of the strut tower. Align the smallest hole
first, put the cover on and screw the bolt in. Fit the remaining two bolts
and tighten all three to 13 ft-lbs.
|
 |
| 29.09.2007: Knuckle housing |
|
Lift the knuckle housing to match the holes on the damper. You will have
to raise it higher than before, because the strut is shorter now.
|
 |
| 29.09.2007: Big bolts |
|
Insert the two bolts, don't forget to fit the brake line bracket.
Mind the camber setting if you use adjuster bolts. Tighten the nuts to 75
ft-lbs +45°.
|
 |
| 29.09.2007: Bracket |
|
Attach the ABS sensor cable and the brake line to the bracket.
|
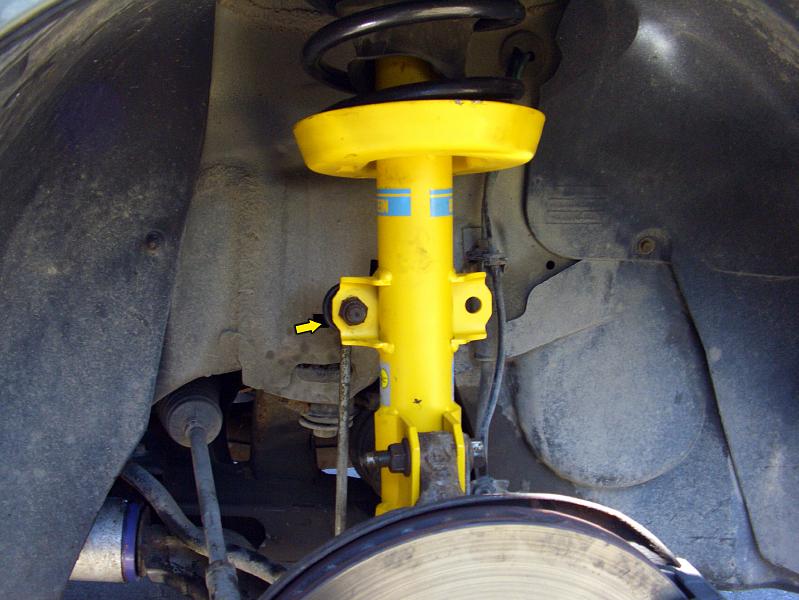 |
| 29.09.2007: Link |
|
Fit the anti-roll bar link and tighten the nut to 62 ft-lbs.
|
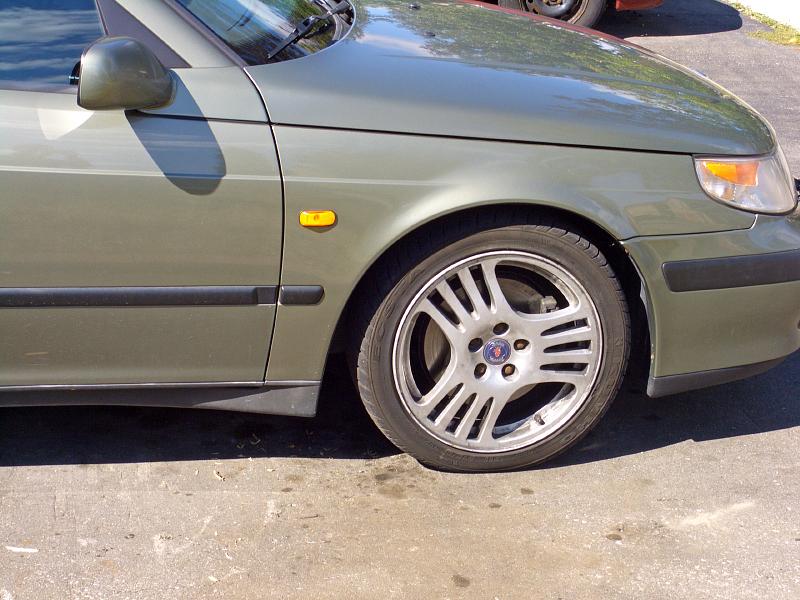 |
| 29.09.2007: Lowered |
|
Install the wheels, tighten the lug bolts to 81 ft-lbs and lower the
car to the ground.
|


