 |
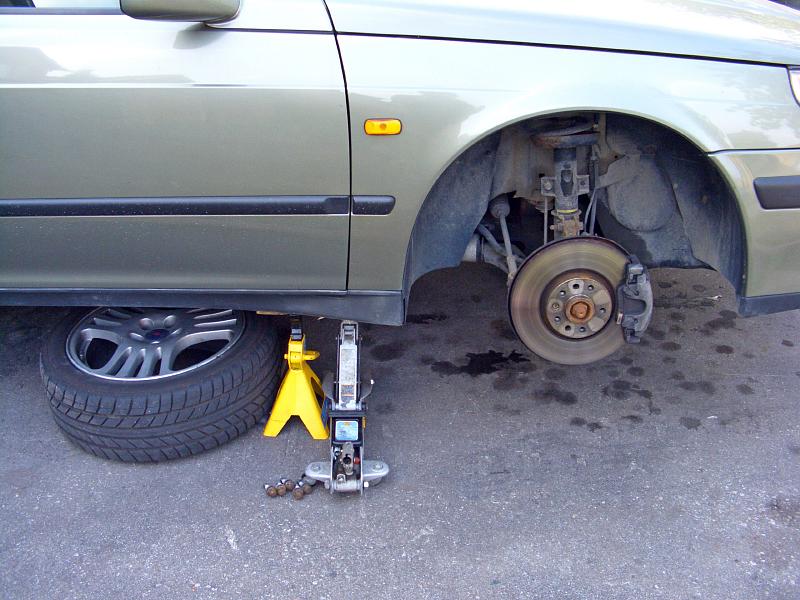
| 26.09.2007: Wheel off |
|
Raise the car and secure it on jack stands. Take off the front wheel.
|
 |
| 26.09.2007: Plastic shield |
|
Remove the plastic shield covering the belt and the front fender area.
|
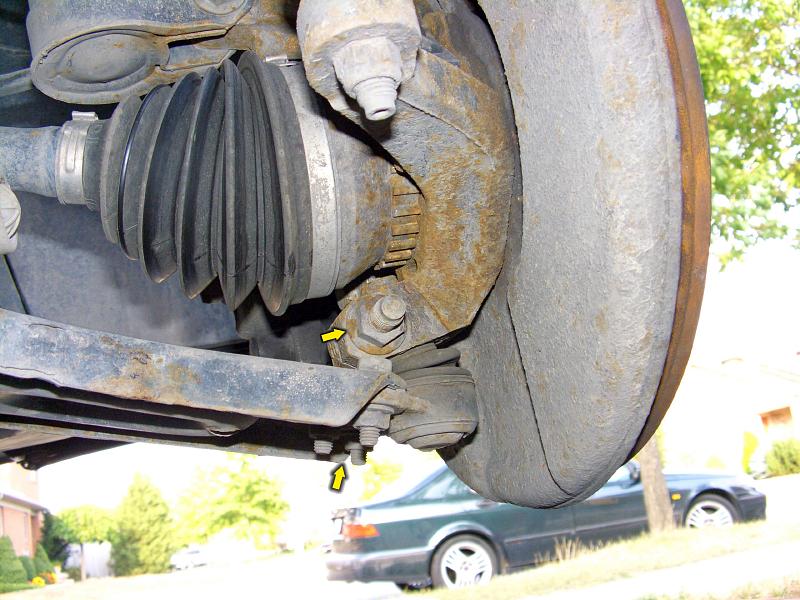 |
| 26.09.2007: Ball joint nut |
|
Undo the ball joint nut, pull the bolt and remove the ball joint out of
its socket. Alternatively, unscrew the ball joint from the control arm
(there won't be enough clearance to remove these bolts until the arm is
detached from the subframe though).
|
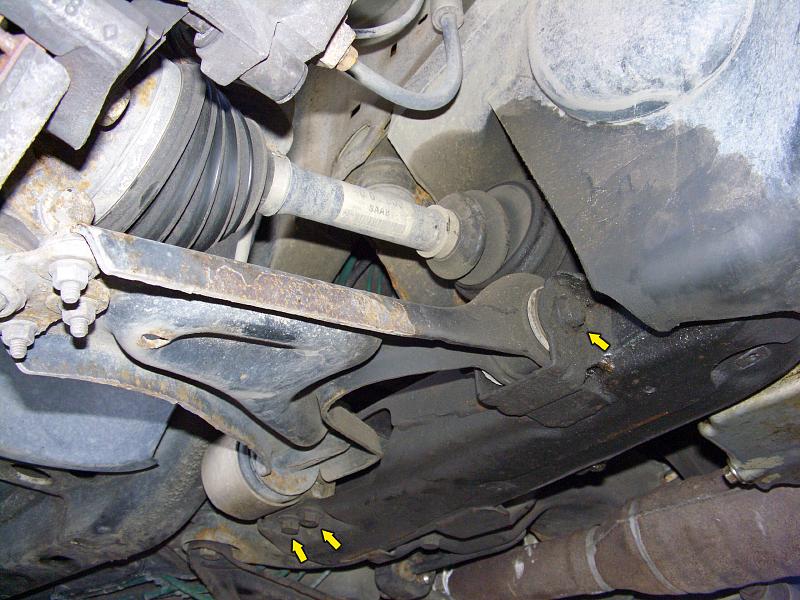 |
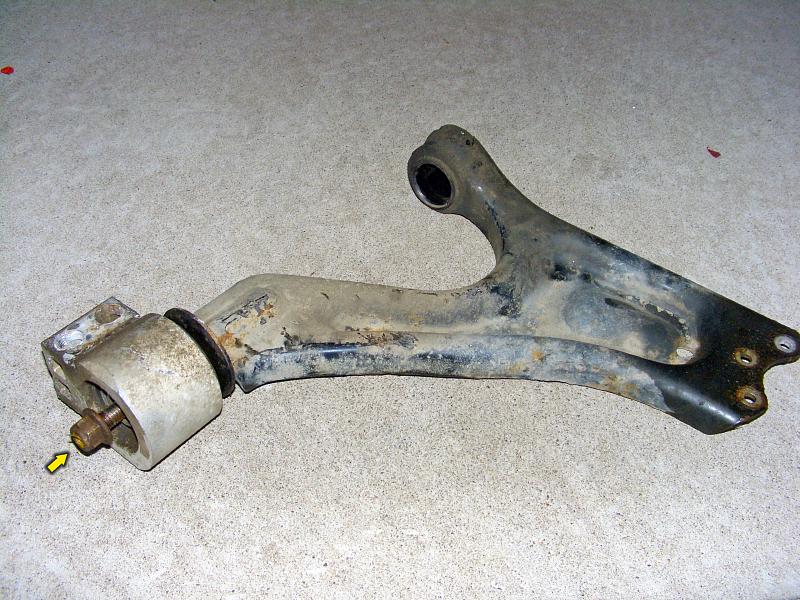
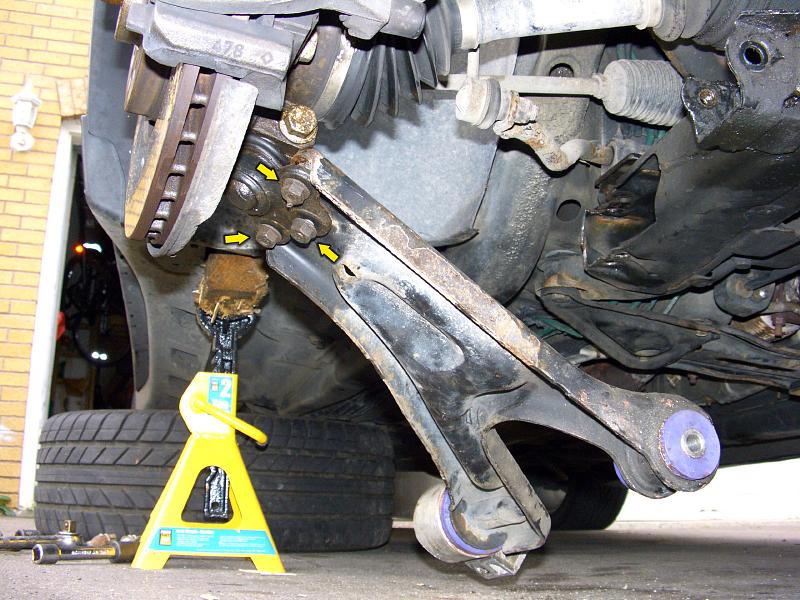
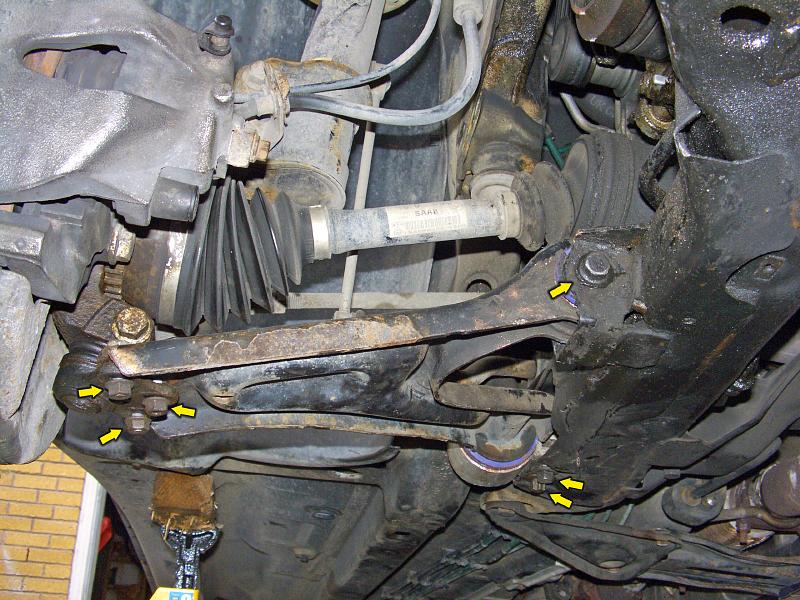
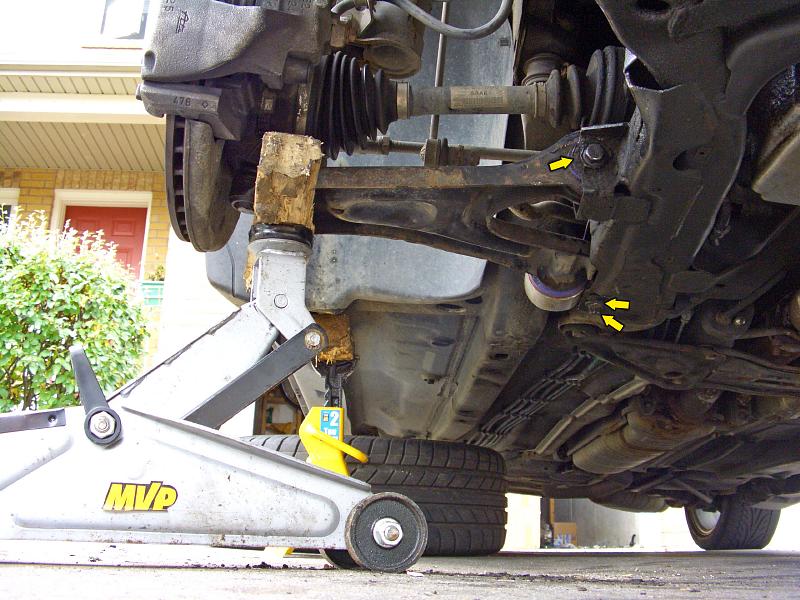
| 26.09.2007: Control arm bolts |
|
Undo three bolts holding the control arm to the subframe. One is at the
front of the arm, and two more hold the aluminium housing of the big rear
bushing. It might also be a good idea to slacken the rear bushing retainer
nut - you have more leverage while it's still on the car.
|
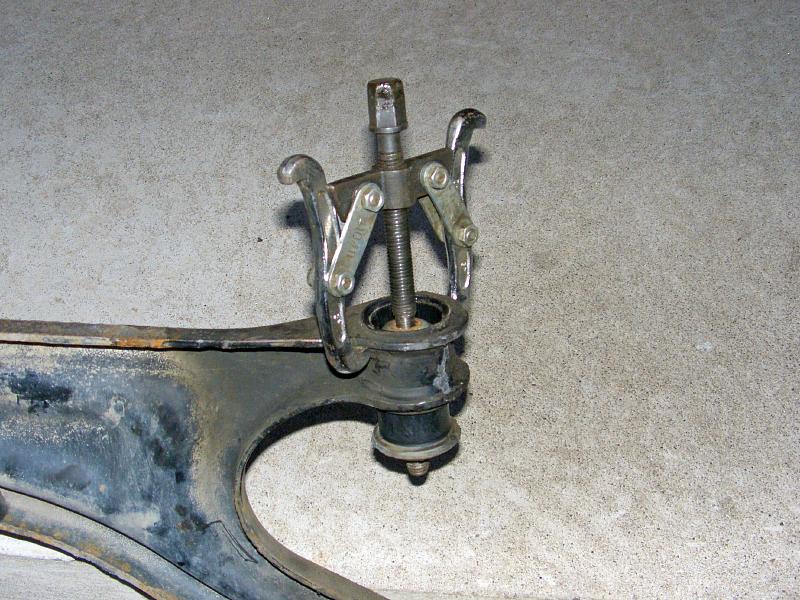 |
| 26.09.2007: Front bushing |
|
The front bushing is easy to press out with a gear puller or a similar tool.
|
 |
| 26.09.2007: Rear bushing nut |
|
The rear is more complicated. Start by removing the retainer nut and sliding
the busing off its pivot.
|
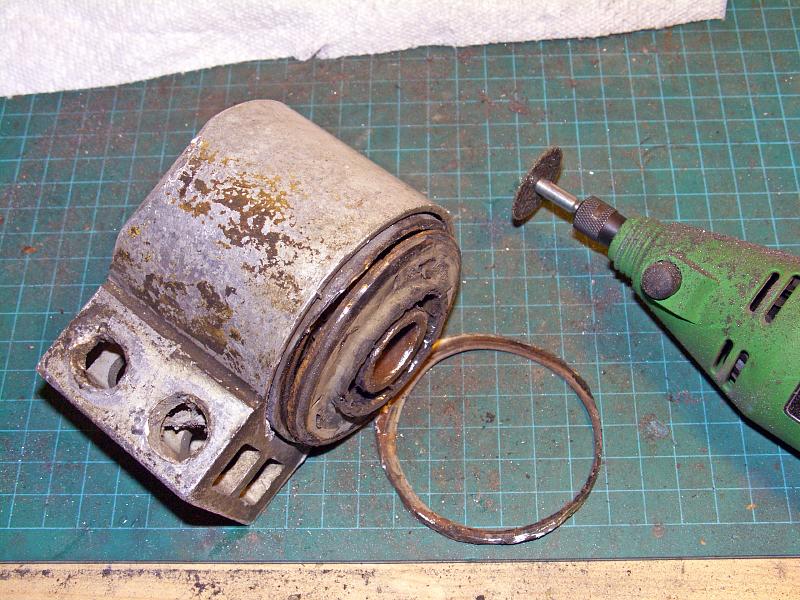 |
| 26.09.2007: Rim cut |
|
Cut the rolled rim of the big bushing - hacksaw works well, Dremel might
be faster. Pry out the metal cover that was held by the rim.
|
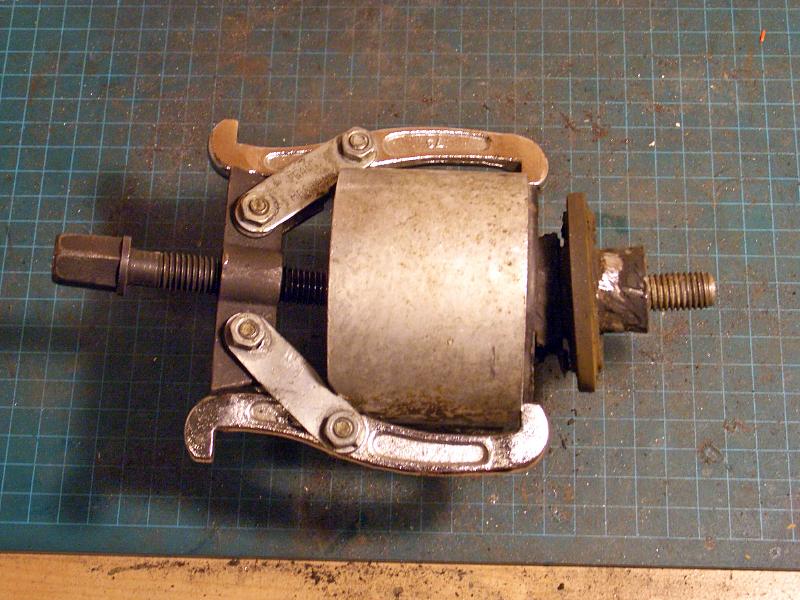 |
| 26.09.2007: Gear puller |
|
Use the gear puller to push out the inner part of the bushing, watch
for hydraulic fluid leaks (have a pan ready).
|
 |
| 26.09.2007: Cutting the sleeve |
|
Put the bushing housing in a vice, assemble a hacksaw with a blade inside
the housing and cut through the metal sleeve.
|
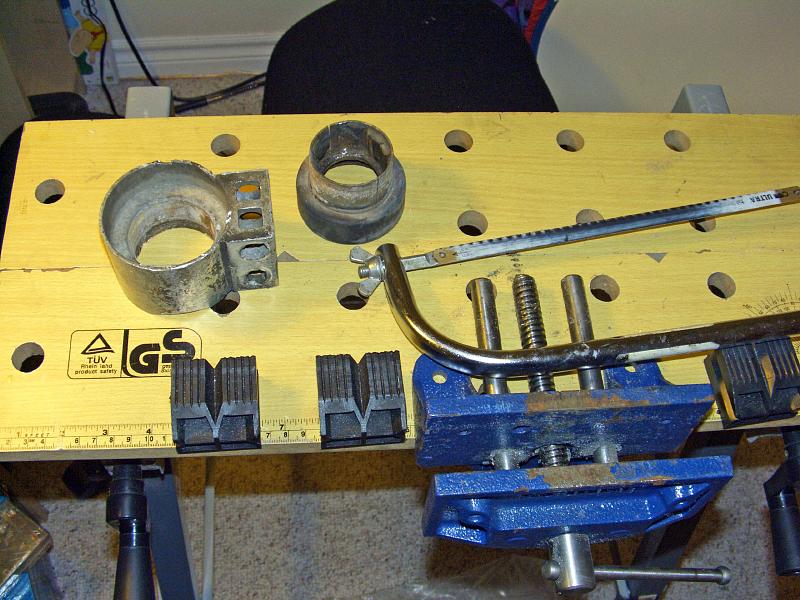 |
| 26.09.2007: Inner sleeve removed |
|
Turn the housing upside down and make another cut on the opposite side of
the sleeve. Chisel the sleeve out.
|
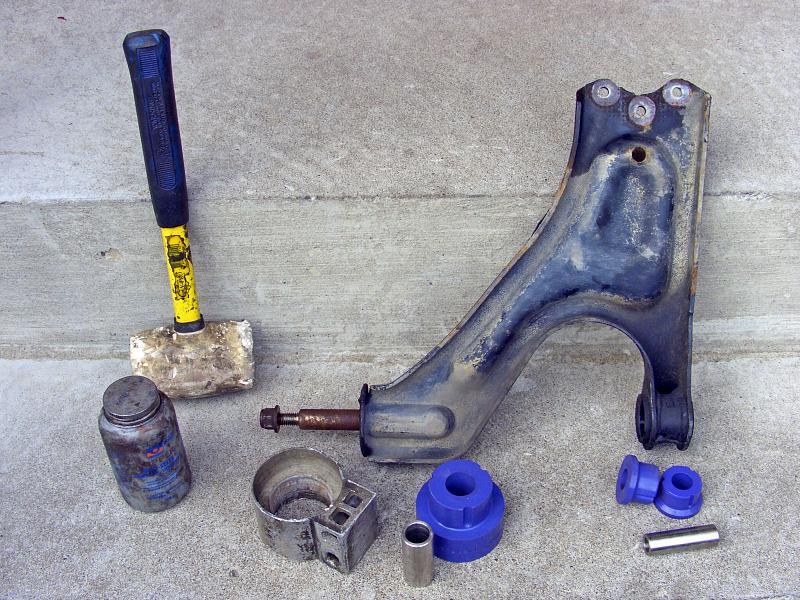 |
| 26.09.2007: New bushings |
|
I used polyurethane bushings by Powerflex. They are easy to install or
remove, all you need is a rubber mallet and some anti-seize (a small packet
of grease is usually supplied with the bushings).
|
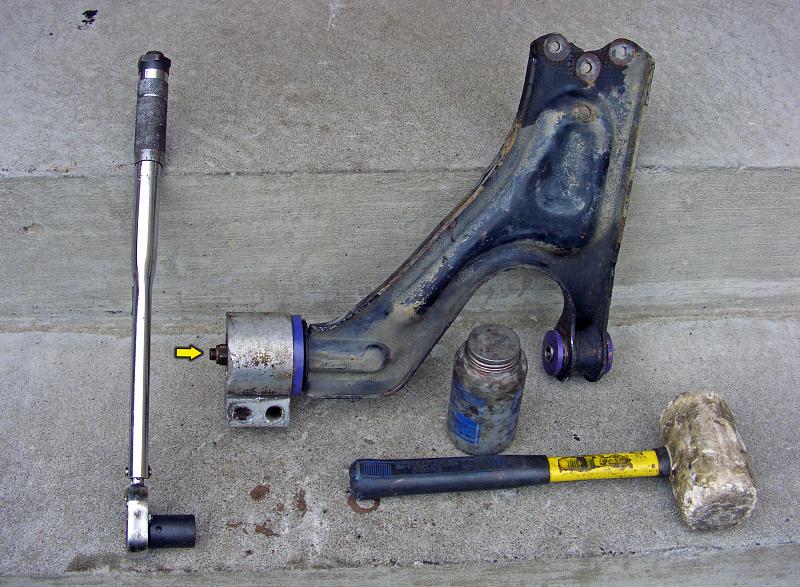 |
| 26.09.2007: Bushings installed |
|
Lubricate the bushings, slide them in, then insert the metal sleeves.
Put the big bushing back onto its pivot and tighten the nut to 77 ft-lbs.
|
 |
| 26.09.2007: Ball joint bolts |
|
Fit the ball joint back in and tighten the bolt to 70 ft-lbs (or 36 ft-lbs on 2002+ cars).
Alternatively, install three small bolts holding the ball-joint to the
control arm.
|
 |
| 26.09.2007: Attached |
|
Connect the control arm to the subframe. Slide the bolts in, but do not
tighten them yet. Tighten three small ball joint bolts to 22 ft-lbs
(if applicable).
|
 |
| 26.09.2007: Raised |
|
Place a jack under a ball joint and raise it until it takes the weight
of the car, and the control arm is 1° below horizontal. Secure the
arm to the subframe at 70 ft-lbs.
|
 |
| 26.09.2007: Done |
|
Remove the jack under the ball joint. Fit the plastic shield. Tighten the
wheel bolts to 81 ft-lbs and lower the car to the ground.
|


