 | 02.06.2007
Jacked up
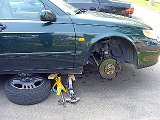
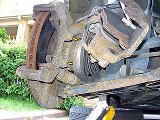
Raise the car and secure it on jack stands. Take off the front wheel.
|  | 02.06.2007
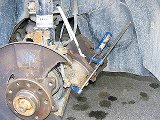
Rotor screw
Remove the caliper retaining spring and undo the rotor index screw. If the
screw is stuck, you might have to resort to
more
serious measures.
|
 | 02.06.2007
Guide pins
Take the plastic caps off the guide pins and unscrew the pins using a
7 mm Allen wrench.
|  | 02.06.2007
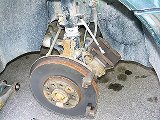
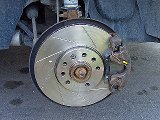
Caliper
Slide the caliper off the rotor and suspend it on the strut to prevent the
strain on the brake line.
|
 | 02.06.2007
Bracket bolts
Undo two caliper bracket bolts - 18 mm wrench on 1999-2001 9-5,
Torx E20 on 2002+ 9-5, 10 mm Allen on NG900 or 9-3.
|  | 02.06.2007
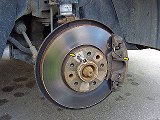
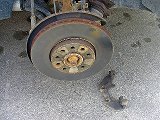
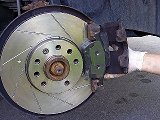
Rotor
Remove the bracket and the rotor from the hub.
|
 | 02.06.2007
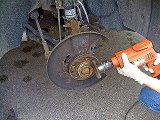
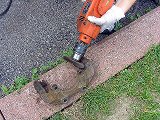
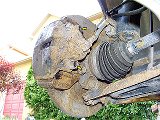
Cleaning
Use a wire brush to clean the rotor surface thoroughly.
|  | 02.06.2007
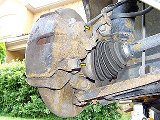
Cleaning
Clean the calipers from dirt and caked-on brake dust.
|
 | 02.06.2007
C-clamp
Use a C-clamp to slowly compress the piston back into the caliper. It's
easier to do while the old pad is still in. Consider
bleeding the brakes
afterwards.
|  | 02.06.2007
Reservoir
While compressing the piston, watch the brake fluid level - it will go up
and may overflow. You might need to extract some before you
put the cap back on.
|
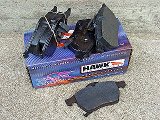 | 02.06.2007
Pads
A new set of Hawk HPS brake pads.
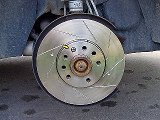
|  | 02.06.2007
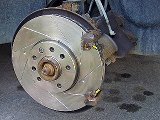
Rotor
Brembo rotors slotted by Taliaferro.
|
 | 02.06.2007
Index screw
Install the new rotor, apply some anti-seize on the index screw and put
it in. Don't tighten the screw too hard if you don't want to fight it the
next time you're doing your brakes.
|  | 02.06.2007
Bracket
Install the caliper support bracket. Apply some Loctite on the bolts and
tighten them to 86 ft-lbs. Lubricate the pad sliding grooves with
anti-seize to ensure smooth operation.
|
 | 02.06.2007
Caliper
Put the new pads in and slide the caliper on.
|  | 02.06.2007
Guide pins
Clean and lubricate the guide pins before inserting them. Tighten to 20 ft-lbs. Put the caps back on.
|
 | 02.06.2007
Retaining spring
Install the retaining spring.
|  | 02.06.2007
Done
Tighten wheel bolts to 81 ft-lbs and lower the car to the ground.
|
|


