 | 11.05.2007
Axle nut
While the car is still on the ground, pop the cover in the middle of the
wheel and loosen the axle nut using a 32 mm socket on a large breaker bar.
|  | 11.05.2007
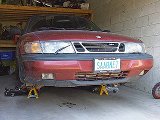
Jacked up
Raise the car and remove the wheels. Take your time spraying the fasteners
with a rust solvent.
|
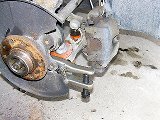
 | 11.05.2007
Axle nut
Remove the axle nut completely. If you find the rotor spinning, block it
with a screwdriver inserted through the caliper bracket.
|  | 11.05.2007
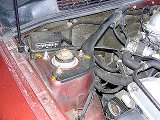
ABS sensor
Unplug the ABS sensor from the connector on the fender wall. Take extra
care as the brackets get brittle with age.
|
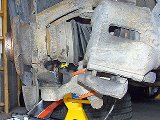
 | 11.05.2007
Caliper spring
Remove the caliper spring and the rotor screw. Those are notorious for
getting stuck, you might need a screw extractor.
| 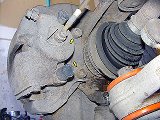 | 11.05.2007
Caliper bolts
Unbolt the caliper (10 mm Allen socket) and suspend it on a wire so there's
no strain on the brake line.
|
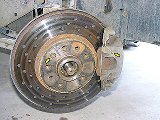
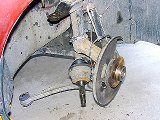
 | 11.05.2007
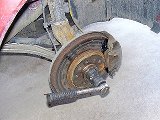
Brake rotor
Remove the rotor and undo the tie rod end nut (18 mm socket).
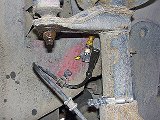
|  | 11.05.2007
Tie rod end
Use a ball joint separator on the tie rod end.
|
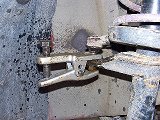
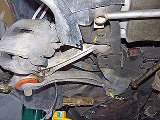
 | 11.05.2007
Sway bar link
Unbolt the sway bar link from the control arm. Hold the upper part with an
11 mm wrench and undo the nut with a 13 mm socket.
|  | 11.05.2007
Ball joint nut
Loosen the ball joint nut (18 mm wrench). If you pull the axle out slightly,
it might give you more room for the wrench.
|
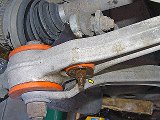
 | 11.05.2007
Ball joint separator
Split the joint using a ball joint separator.
Don't use fork type separators - that would damage the rubber boot.
|  | 11.05.2007
Suspension arms
If the ball joint won't budge, or if you don't have a proper separator,
proceed with unbolting the arms from the subframe.
|
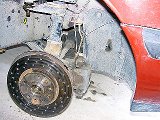
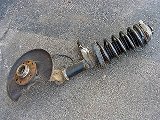
 | 11.05.2007
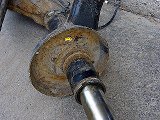
Axle
The lower end of the strut is now free, so you can swing it sideways and
pull the axle out.
|  | 11.05.2007
Strut mount
Unbolt the final three nuts on top of the strut mount and lower the
strut to the ground. Be careful - it's quite heavy.
|
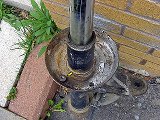
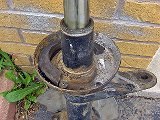
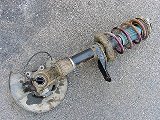 | 11.05.2007
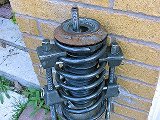
Strut
The strut on the ground, ready for disassembly.
|  | 11.05.2007
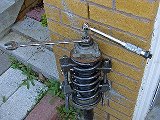
Spring compressor
Attach a spring compressor and tighten it until the spring releases the
tension on the strut mount.
|
 | 11.05.2007
Top nut
This is a proper way to undo the damper rod nut on top of the strut mount.
The big nut needs a 24 mm wrench, while the rod itself has an 11 mm hex
head on the top (my Bilstein dampers call for a 7 mm Allen instead).
| 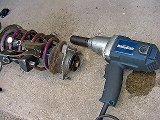 | 11.05.2007
Impact wrench
However, in real life the top of the rod will be rusted, and attempting
to use a small wrench on it will likely end up with a stripped head. The
solution is to grab the rod with vice-grips and use an impact wrench
on the nut.
|
 | 11.05.2007
Strut mount
The spring support, thrust bearing, strut mount and related hardware.
|  | 11.05.2007
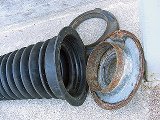
Upper spring seat
The 9-3 upper spring seat is integral with the dust cover. On the NG900
they were separate.
|
 | 11.05.2007
9-3 spring support
The old rubber spring seat is detached from the support plate. The plate is
the right size to match the seat from the 9-3, but the inner rim diameter is
too small.
|  | 11.05.2007
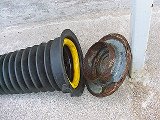
Spacer
A solid rubber spacer will solve the problem of keeping the upper spring
seat centered. These silicone rings I had were just the right size. A piece
of used accessory belt could be a good fit too.
|
 | 11.05.2007
Lower seat
The lower spring seat needs adjustment too. The coil stop is too narrow and
close to the center to hold a wider 9-3 spring.
|  | 20.05.2007
Coil stop
The lowest point of the spring seat is in the back, so that's where the new
spring stop should be. Insert a short bolt into one of the drain holes and
secure it with a nut.
|
 | 20.05.2007
Spacer
The shape of the lower spring seat does not quite match the spring profile,
so a spacer is needed to gradually raise the first coil. I used an old
rubber piece of the top mount.
| 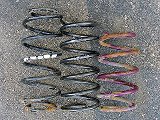 | 11.05.2007
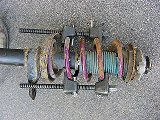
Springs
A stock NG900 spring vs Eibach 9-3 spring vs Intrax NG900 spring. You
can see the differnce in length, as well as tapered vs full size ends on
NG900 vs 9-3.
|
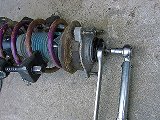
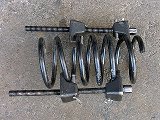 | 11.05.2007
Spring compressor
Compress the spring to prepare it for installation.
|  | 20.05.2007
Spring
Place the spring onto the strut so the last coil rests against the modified
stop. I put an old piece of hose on it so the spring doesn't rub against
the seat metal. This should protect the spring coating and keep it from
developing rust.
|
 | 11.05.2007
Upper seat
Insert the upper spring seat with a dust cover, install the bump stop if
applicable and slide the metal support plate over the rubber piece.
|  | 11.05.2007
Strut mount
Install the strut mount and tighten the upper nut on the damper rod.
|
 | 11.05.2007
Assembled
Here's a finished strut with a 9-3 spring. The installation is the reverse
of removal, see this
document for additional details and torque specs.
|  | 11.05.2007
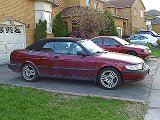
Finished
The car on the ground. The right height is about 1" lower that stock, the
old Intrax springs were even lower than that.
|
|


