 | 13.02.2006
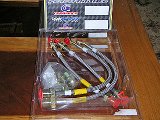
The kit
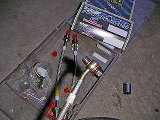
The Goodridge kit for 900/9-3 includes four stainless braided teflon coated
brake lines, as well as new washers, fasteners and retainers. It is
designed as a direct replacement for stock rubber lines.
|  | 13.02.2006
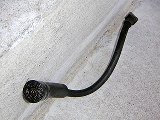
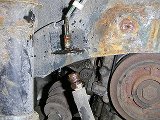
Broken line
When your car is 10 years and 300K km old, pay close attention to your
brake lines. They might corrode and break off, just like mine did.
I'm glad it happened on my driveway instead of the road.
|
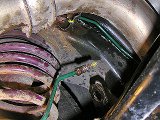
 | 13.02.2006
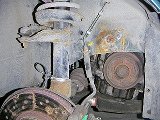
Front line
Raise the front of the car and remove the wheels (17 mm socket). Find where
the rubber brake line that goes to the front caliper is attached to the
green hard line.
|  | 13.02.2006
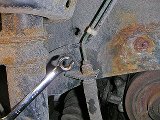
Flare wrench
It is important to use flare wrenches for all hard line nuts -- they are so
small and easy to strip with conventional open wrenches. Get a pan to
catch the brake fluid that will leak out when you disconnect the lines.
|
 | 13.02.2006
Top end
The small hard line nut is 10 mm, the bottom takes a regular 17 mm wrench.
Once the top nut is off, remove the retainer clip and pull the rubber
line down.
|  | 13.02.2006
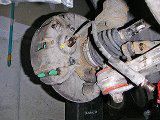
Bottom end
The banjo bolt on the caliper takes an 11 mm socket. Get ready for more
brake fluid spillage.
|
 | 13.02.2006
Banjo bolt
The kit came with new banjo bolts which had the wrong thread for my
calipers, so I reused old bolts with new washers from the kit.
|  | 13.02.2006
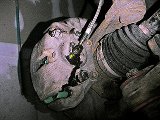
Caliper
Attach the stainless line to the caliper so it points upwards but leaves
sufficient clearance to access the top slider pin and its dust cap.
|
 | 13.02.2006
Installed
Bolt the top end of the line to the fender (Goodridge uses 24 mm retainer
nuts instead of clips here), and connect the hard line. Done!
|  | 13.02.2006
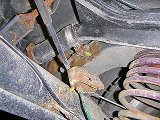
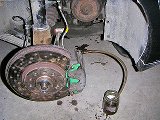
Rear right
Raise the rear of the car and release the handbrake. Locate the brake
line by the right rear spring. The clearance is tight, especially near the
top end. Use a 13 mm flare wrench for the top hard line nut, 10 mm
for the bottom.
|
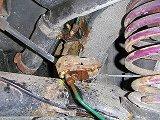 | 13.02.2006
Unbolted
After the hard lines are off, pull the retainer clips from both ends.
The fuel hose gets in the way of removing the top clip, but it's doable.
Once the clips are off, pull the old rubber line.
|  | 13.02.2006
New line
Install the new line. It's easier to bolt the hard lines on before the
retainers are secured. In addition, the top end nut on new lines was
too small so it kept slipping through the hole in its bracket, and
it took some creativity to hold it in place.
|
 | 13.02.2006
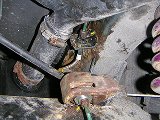
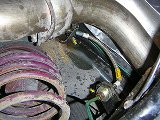
Rear left
The other line is found next to the left rear spring, with its top end
properly blocked by the exhaust pipe.
|  | 13.02.2006
Removed
The hard line nut sizes are the same: 13 mm at the top and 10 mm at the
bottom.
|
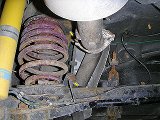
 | 13.02.2006
Done
Install the last new line. The retainers on the left side are easier to
install than on the right: clip on the top end and nut at the bottom.
|  | 13.02.2006
Bleeding
Connect a pressure bleeder to the brake fluid tank and bleed the brakes
in the following order: front left, front right, rear left, rear right.
|
|


