 | 16.08.2005
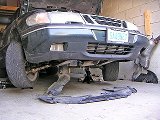
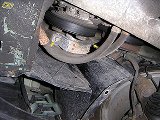
Shields down
Raise the front end of the car and remove the lower shields under the
bumper. The wheels are turned to the right to get an access to the
serpentine belt cover.
|  | 16.08.2005
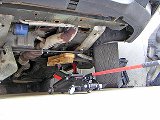
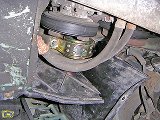
Jack
Support the transmission with a jack (the differential case looks like
a good jacking point). Don't raise it too high, just make
sure it takes the weight off the transmission mount.
|
 | 16.08.2005
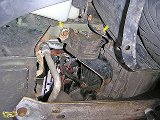
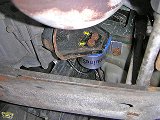
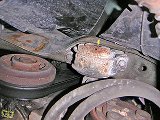
Transmission mount
Locate the transmission mount under the left fender. Slacken the 15 mm
bolts that secure it to the car body and make sure the jack supports
the engine/transmission properly.
|  | 16.08.2005
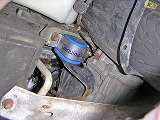
Transmission mount
Remove the bolts attaching the mount to the car body. Unbolt the mount
from the angle bracket on the transmission (16 mm socket). Remove the mount
from the car.
|
 | 16.08.2005
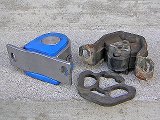
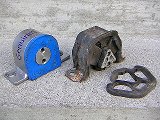
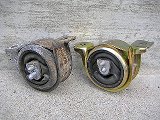
New vs old
The old mount is cracked. Its bracket it so thin I can bend it with my bare
hands. You can see how much stronger the sport mount is. It has a thick
metal frame that doesn't allow any flex.
|  | 16.08.2005
New vs old
The Taliaferro mount is completely filled with polyurethane, while the
stock mount has three relatively soft rubber sections. The old rubber
spacer is no longer needed, you can discard it.
|
 | 16.08.2005
Transmission mount
Attach the mount to the bracket, then put in the bolts attaching it to the
side member. You might need to raise or lower the jack to make it fit. Tighten
the bracket bolts to 29 ft-lbs.
|  | 16.08.2005
Transmission mount
Tighten the remaining two bolts to 54 ft-lbs. It's a pity such a beautiful
piece of hardware remains hidden from view.
|
 | 16.08.2005
Engine mount
The passenger side engine mount is located under the right fender. Support
the oil pan with a jack and loosen the 15 mm bolts holding the mount
to the car body.
|  | 16.08.2005
Engine mount
There's only one bolt going to the engine bracket, but if the mount is worn
and sagging, there's a chance the bolt head won't match the hole anymore,
so you'll have to hunt it inside the mount with a long 8 mm Allen key.
|
 | 16.08.2005
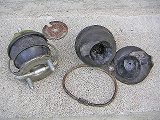
Old vs new
All bolts are out, and the mount is removed from the car. You can
immediately see how deformed it is compared to the new mount. The engine
sat so low the oil pan was touching the subframe every time the engine
moved.
|  | 16.08.2005
Old vs new
This shows how the bolt does not match the hole anymore. You can force it
through, but with a limited clearance under the fender it is not a easy
task. In fact, with a bit of load placed on the mount, the bolt
hides from view completely.
|
 | 16.08.2005
New engine mount
The torque values for this mount are the same: 29 ft-lbs for the bolt in
the centre, and 54 ft-lbs for the bolts going to the side member.
|  | 16.08.2005
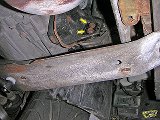
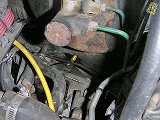
Lower rear nuts
There are two nuts attaching the rear mount to the subframe from below.
On my car one of the nuts was 16 mm and another 17 mm. I'm not sure if
this is always the case, so be prepared.
|
 | 16.08.2005
Rear mount nut
The third nut attaches the top of the rear mount to the engine bracket.
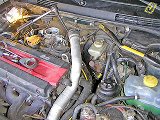
You can reach it using a long extention with a U-joint. Removing the throttle
body inlet pipe just gives you enough room to work. You can see that I took
this opportunity to clean the throttle body and the IAC valve.
|  | 16.08.2005
Rear mount nut
The nut itself is 16 mm. Unfortunately, there's very little room to get to
it and apply proper leverage, that's why a long extention works better.
I've also disconnected the gearshift rod from the linkage to get more
freedom in lifting the engine. If you do that, don't forget to
align it
afterwards.
|
 | 16.08.2005
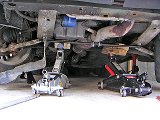
Jacks
The engine is now supported with two jacks: under the oil pan and the
differential. This allows to lift it as much as possible to create enough
room to remove the mount. When lifting the engine, be careful not to jam
or break any hoses or other parts.
|  | 16.08.2005
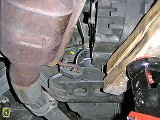
Rear mount
Even with the engine tilted to the max, there's barely enough room to
wrestle the mount in or out. The Saab Manual actually orders you to lower the
entire subframe instead. For some silly reason it also calls for removing
the wheels for the side mounts.
|
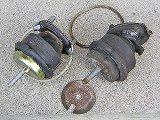
 | 16.08.2005
New vs old
This mount was in the worst shape of all -- it was torn completely, and the
hydraulic fluid apparently leaked long time ago.
|  | 16.08.2005
New vs old
The big washer goes on top of the mount with the cut-out facing the rear
of the car. Put the new mount in, remove the suporting jacks and torque
all three nuts to 29 ft-lbs. Done!
|
|


