 | 08.08.2005
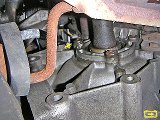
Seal screws
Lock the transmission in fourth gear and raise the front of the car.
Since your car is likely a 94-96, the topmost screw on the differential seal
retainer will probably be rusted or stuck. Take your time to soak it in
rust solvent.
|  | 08.08.2005
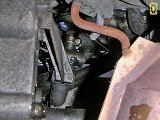
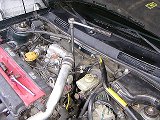
From below
Undo the 13 mm nut securing the linkage to the gear rod at the firewall and
move the shifter into third gear to pull it out of the linkage. Undo the
bolt on the transmission end of the linkage and remove the linkage assembly.
|
 | 08.08.2005
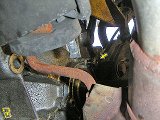
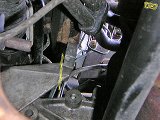
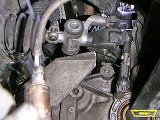
Screw undone
Pull off the rubber boot and the plastic bushing from the engine bracket,
you won't need them anymore. Unscrew the top bolt on the differential seal
retainer (Torx T40).
|  | 08.08.2005
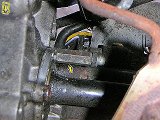
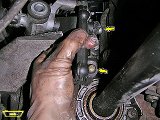
Stud
Bolt on a new linkage stud in place of the old retainer screw (16 mm wrench).
The stud has a little ball joint on its end.
|
 | 08.08.2005
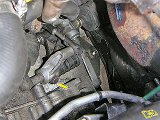
Bracket
Inspect the bracket that connects the engine to the rear mount. There's a
round lug on top of it, which used to be occupied by the plastic bushing
of the old linkage. Cut the lug off.
| 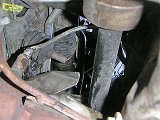 | 08.08.2005
Bracket cut
This is a very tight location even for a hack saw. Be careful not to damage
any hoses while cutting the bracket. Thankfully, it's made of aluminium,
which is easy to cut.
|
 | 08.08.2005
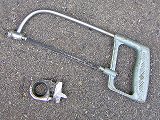
Lug
This little saw is almost as old as I am. My grandfather gave it to me when
I was learning to work with mechanic's tools as a kid. It belongs to my son
now. Today, it proved to be a perfect tool for the job ;P.
|  | 08.08.2005
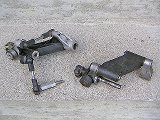
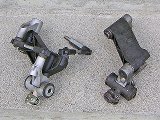
New vs old
The ball stud is still pictured attached to the linkage to show the complete
assembly. It's the same stud you bolted to the differential a few minutes
ago.
|
 | 08.08.2005
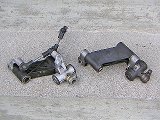
New vs old
The new linkage has a much more sophisticated design. The tilting movement
is performed by a separate set of levers, while the base remains centered
on the transmission rod and attached to the engine on another end.
|  | 08.08.2005
New vs old
The result is a much greater movement accuracy and a more precise shifter
feel.
|
 | 08.08.2005
Transmission end
Put the new linkage on both the transmission rod and the shifter connection
rod at the firewall. Tighten the 13 mm bolt on the transmission side.
|  | 08.08.2005
Connecting pin
If you are installing a used linkage, check the condition of rubber
bushings and clean inside the ball joint sockets on both ends of the
connecting pin. Put some grease on the balls before installing it.
|
 | 08.08.2005
Shifter end
The pin connects the far end of the linkage to the ball stud on the
differential body. It holds the linkage better than the old lug with a
round plastic bush, while allowing sufficient freedom of movement.
|  | 08.08.2005
Tightening
Finally, align
the shifter position and tighten the nut on the linkage. Lower the car
on the ground and go for a test drive to check how the new linkage works.
|
|


