 |
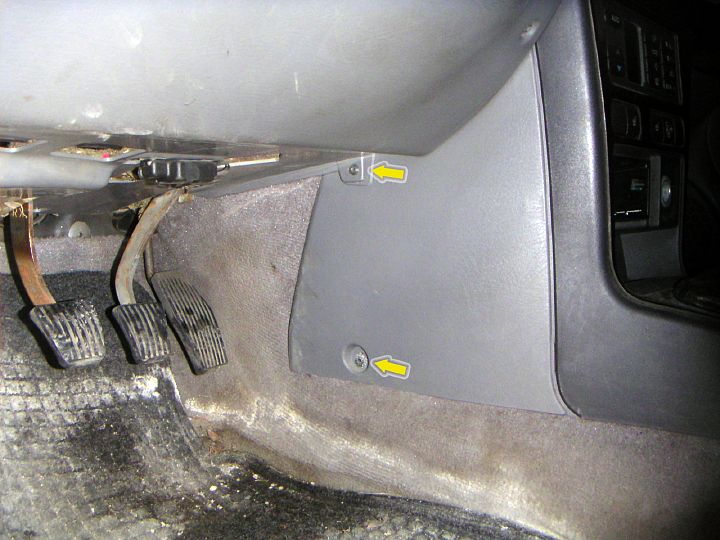
| 04.04.2005: Driver side |
|
Remove the lower panel on the driver side (two Torx T25 screws).
Push the panel towards the front of the car to release the tabs for removal.
The spring cleaning is due on this car ;).
|
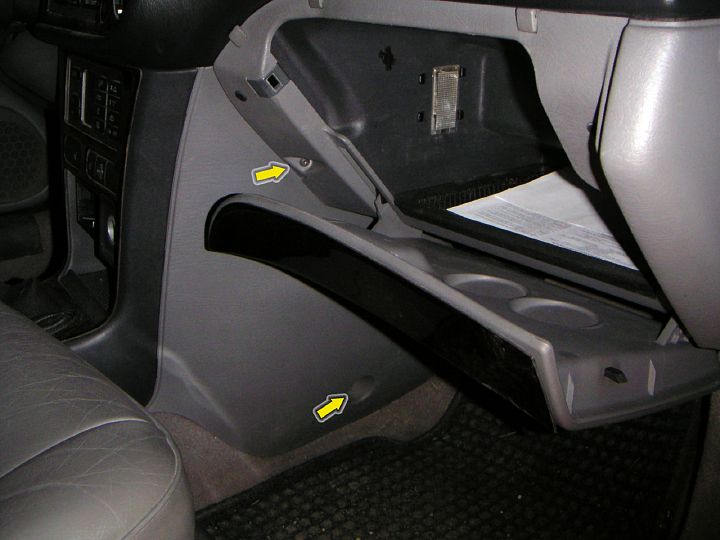 |
| 04.04.2005: Passenger side |
|
Remove the lower panel on the passenger side (two Torx T25 screws).
Push the panel towards the front of the car to release the tabs for removal.
|
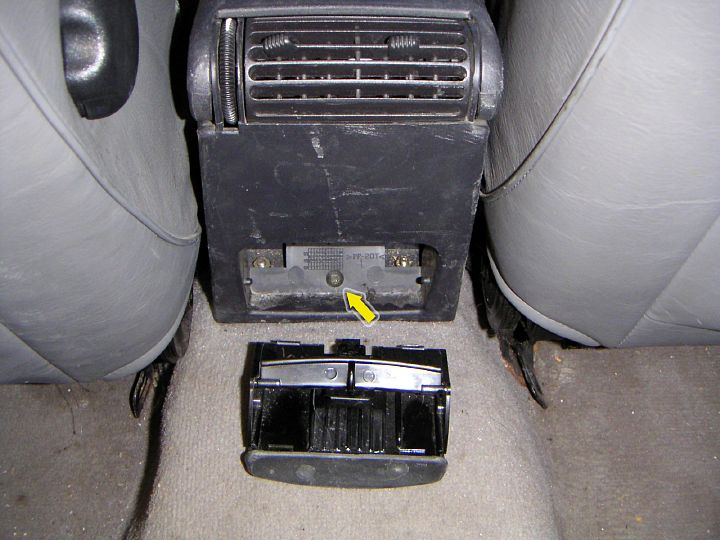 |
| 04.04.2005: Ashtray |
|
Take out the ashtray on the back of the centre console (it just pops out).
Undo the Torx T25 screw under the ash tray and remove the cover with ACC
vents and storage compartment lid (pull it up to remove).
|
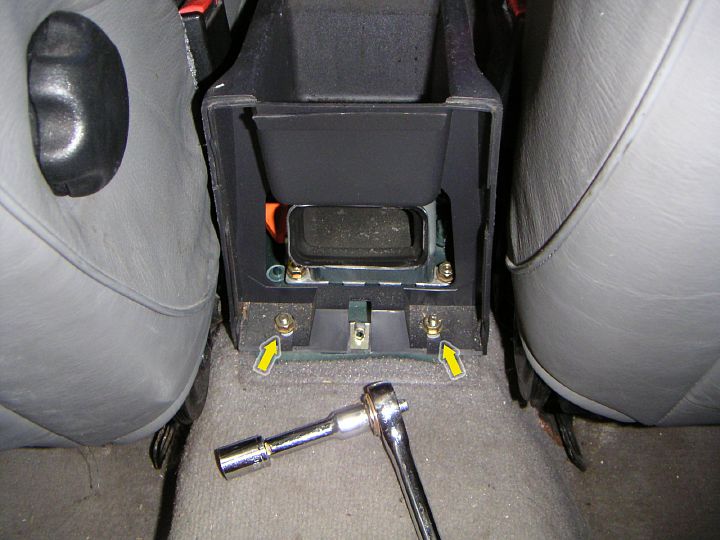 |
| 04.04.2005: Nuts |
|
Undo two 10 mm nuts securing the centre console to the floor.
|
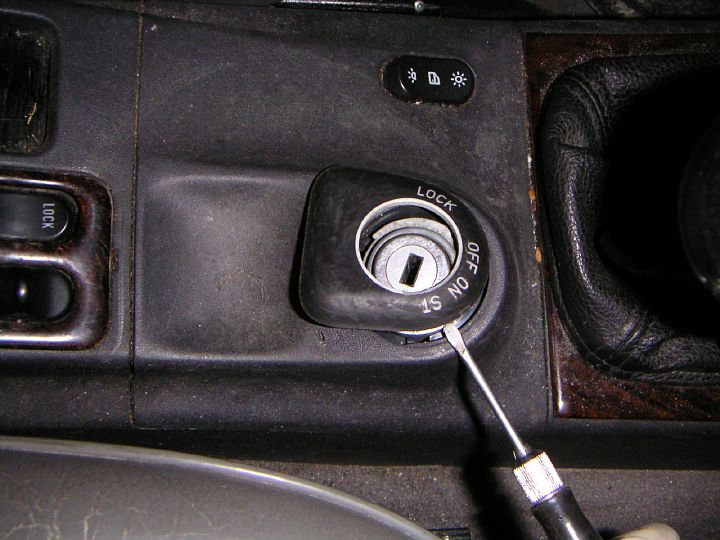 |
| 04.04.2005: Ignition cover |
|
On the 900, just pry up the ignition lock cover with a small screwdriver.
On the 9-3, the cover will be bigger and there's a PCB with key antenna
under it. The antenna can be removed by twisting it sideways and pulling
it up or by releasing the tabs using a small screwdriver. There's a
connector at the bottom.
|
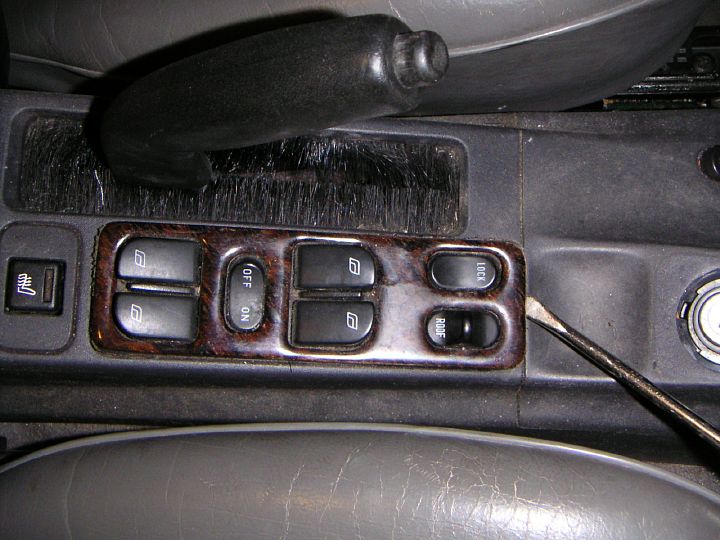 |
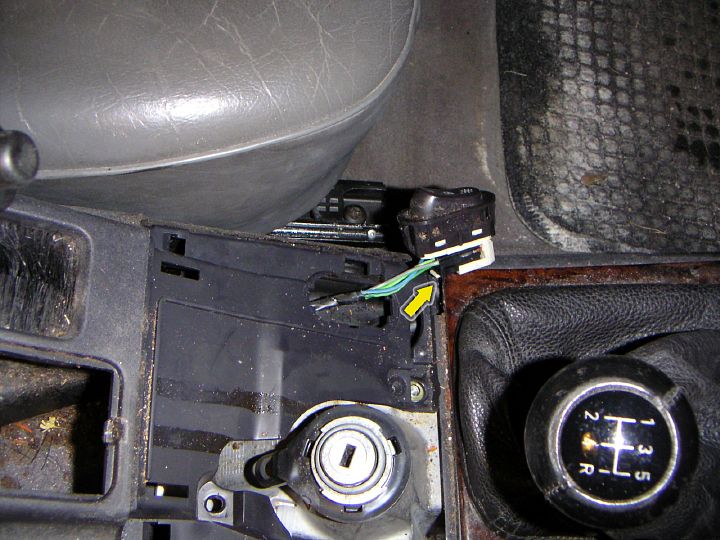
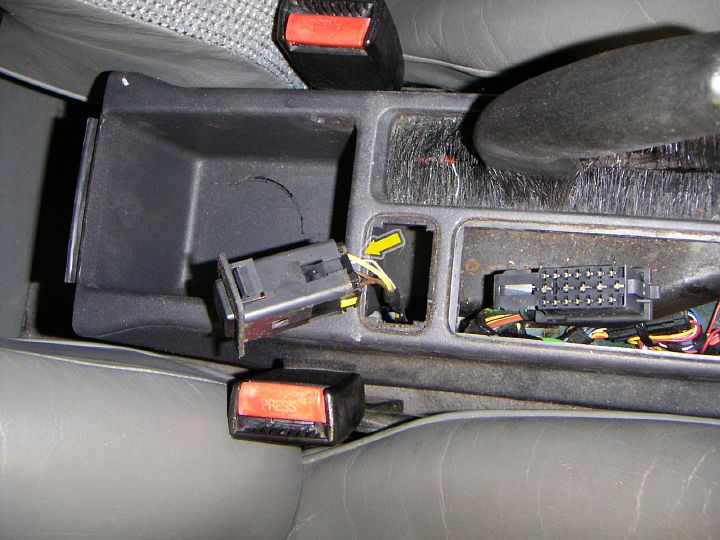
| 04.04.2005: Window switches |
|
Press the tab on the window switch cluster and push it from below through
the handbrake opening.
|
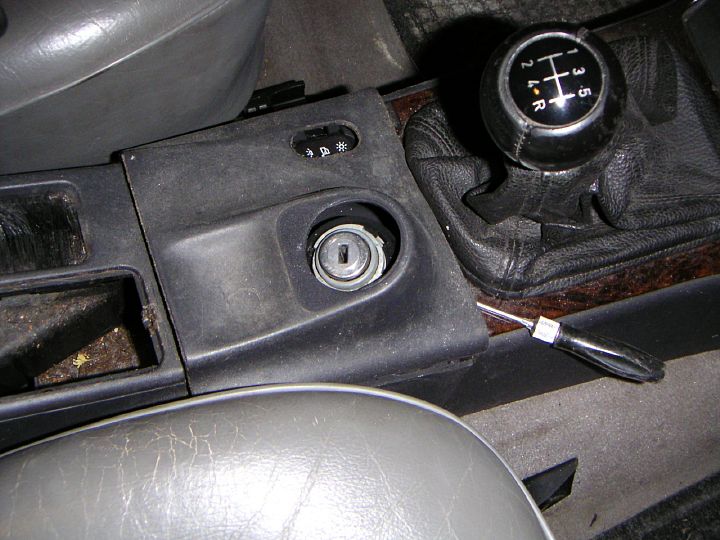 |
| 04.04.2005: Cover |
|
Pry off the larger cover over the ignition lock.
|
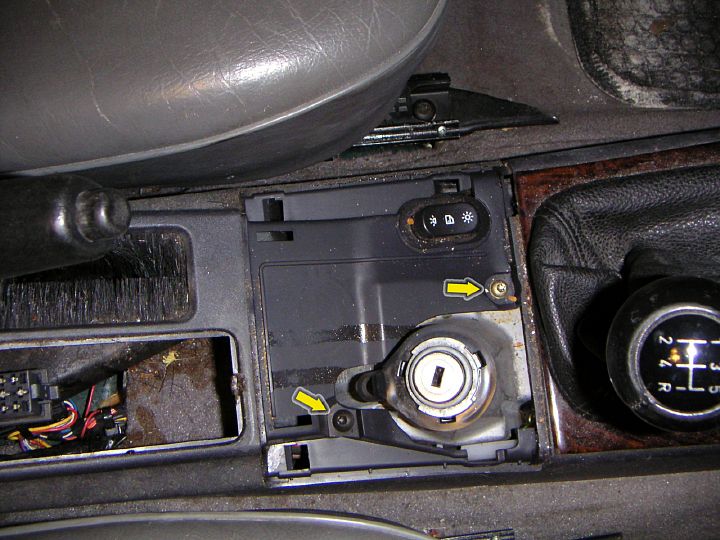 |
| 04.04.2005: Screws |
|
Remove two screws holding the front of the console to the shifter housing
(Torx T25). Apparently, the previous owner was a huge fan of Cola.
|
 |
| 04.04.2005: Light switch |
|
Pull out the light switch (if equipped) and disconnect the wires.
|
 |
| 04.04.2005: Heater switch |
|
Pull out the rear seat heater switch (if equipped) and disconnect the wires.
|
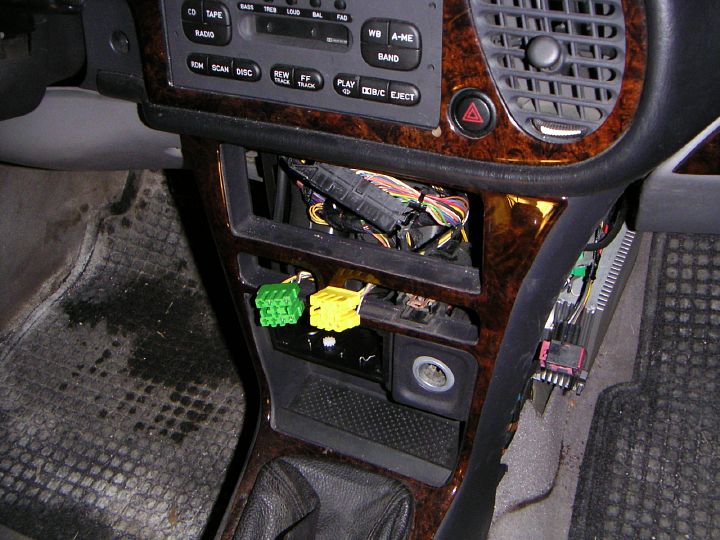 |
| 04.04.2005: Knobs out |
|
The ACC panel and the seat heater switches come out of the panel, allowing
you to unplug the wires. The ACC fan has a cap that comes off, and then
you need to push the fan inside the dash. There are also two connectors
on the back of the lighter outlet.
|
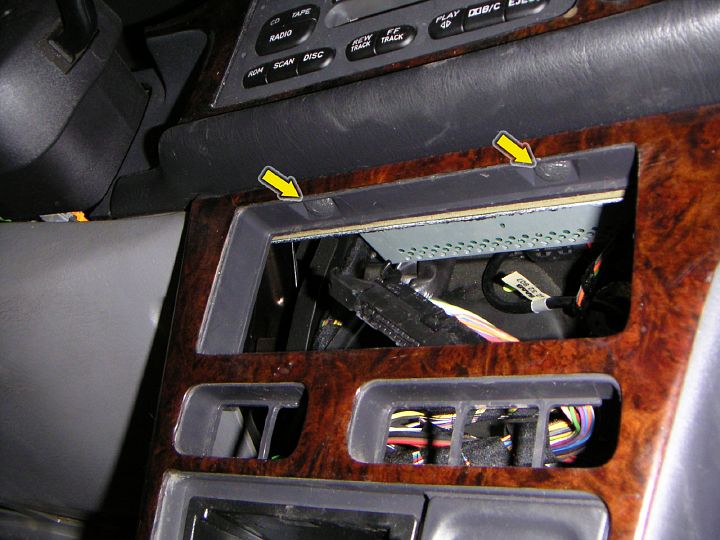 |
| 04.04.2005: Tabs |
|
Locate two tabs on the top where the ACC panel was, and remove them (push
the knob in the middle further in to release the lock). Remove the rear
half of the centre console (disconnect the tabs from the front part and
pull it up). Pop the shifter boot from the console, pull it up onto the
shifter knob and remove the front half of the console.
|
 |
| 04.04.2005: Vent |
|
Remove the air vent.
|
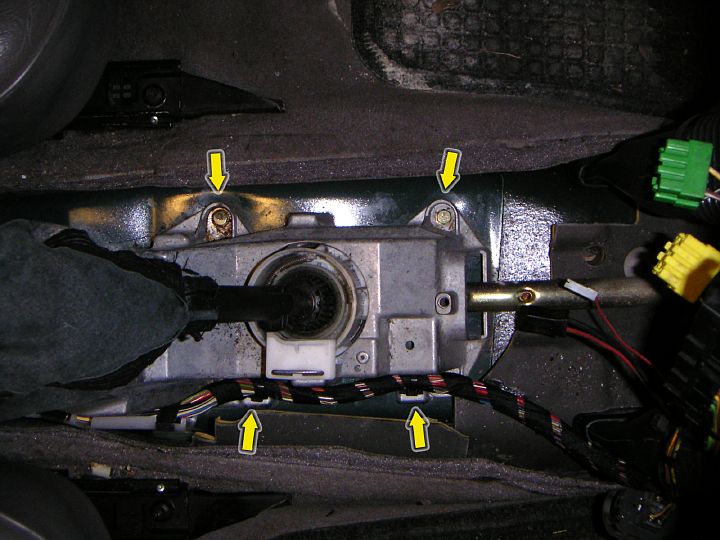 |
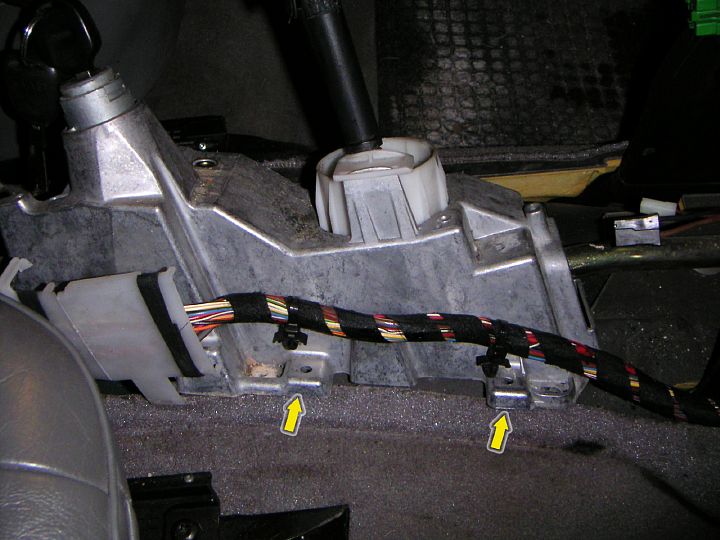
| 04.04.2005: Housing |
|
Undo four bolts holding the shifter housing to the floor (10 mm socket).
The clamp on the gearshift linkage should be loosened at this point
(see the shifter
alignment procedure).
|
 |
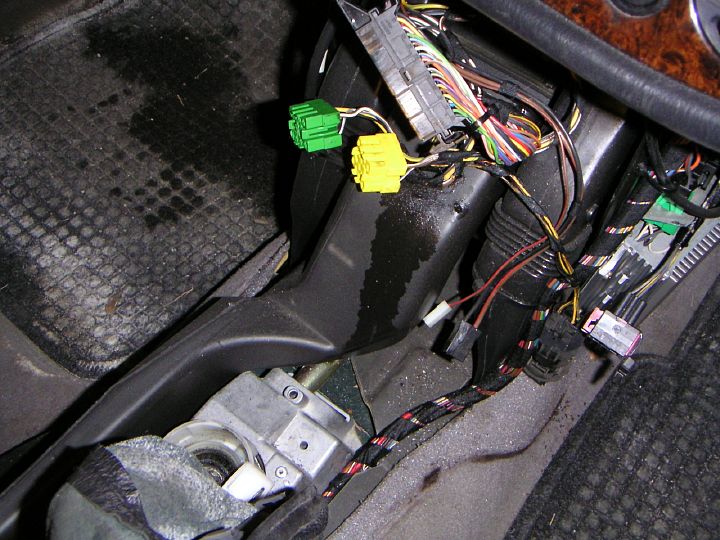
| 04.04.2005: Wires |
|
Unplug the clips attaching the wires on the passenger side.
|
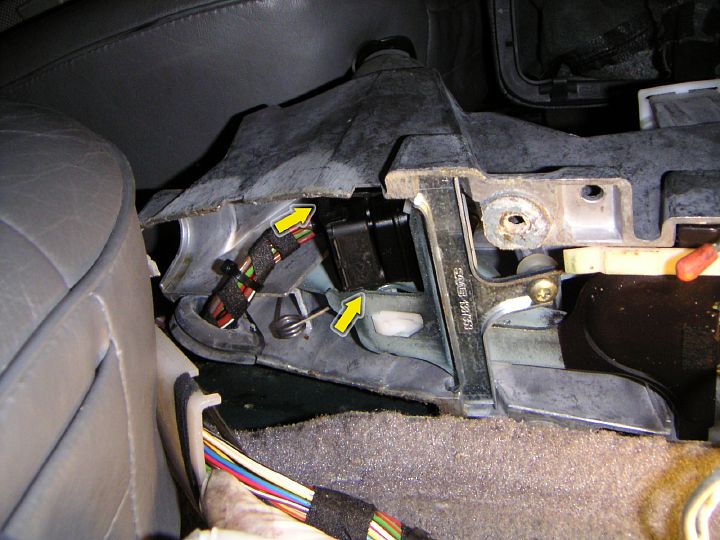 |
| 04.04.2005: Harness |
|
Turn the housing on the side and disconnect the ignition lock harness
(use a flat screwdriver to release the tabs on each side).
|
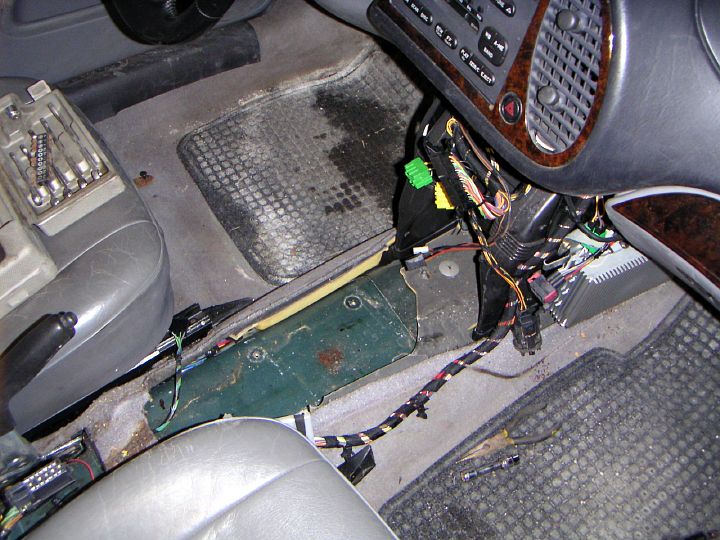 |
| 04.04.2005: Removed |
|
With the clamp on the linkage undone, pull the housing, and it should come
right out. Take your time to clean up inside the console.
|
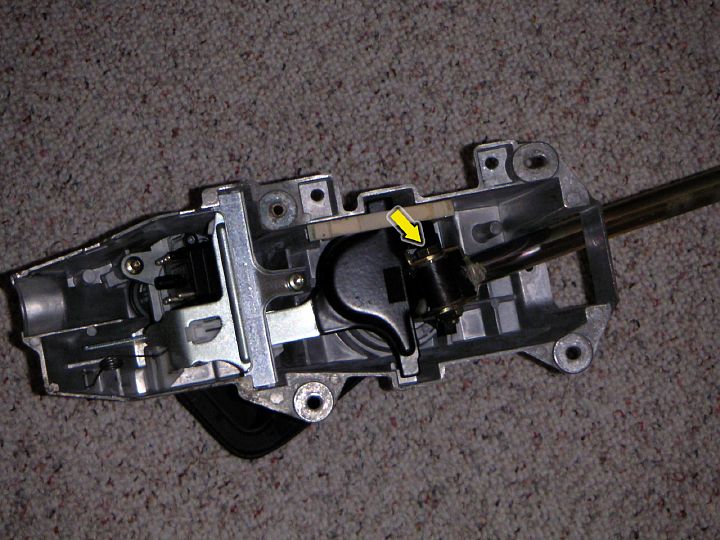 |
| 04.04.2005: Underside |
|
Undo the bolt at the base of the shifter to detach the long gear selector
shaft (13 mm wrench). The big black plate next to the base of the rod is
the reverse lockout mechanism. You can remove it to further shorten
the shifter action.
|
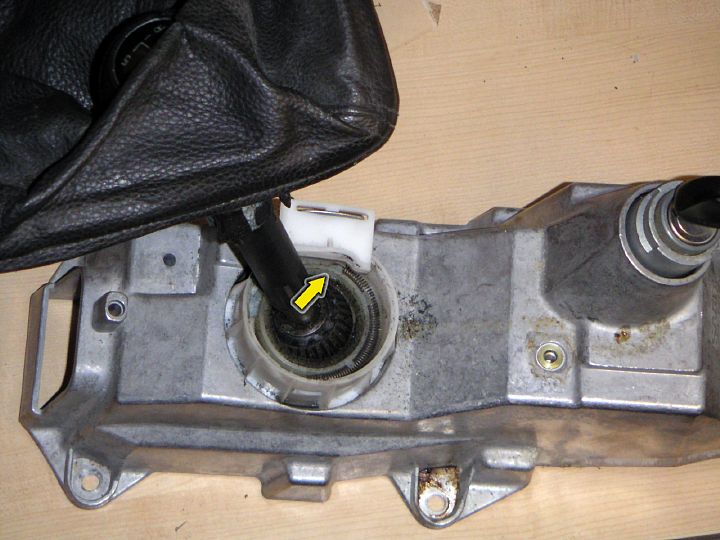 |
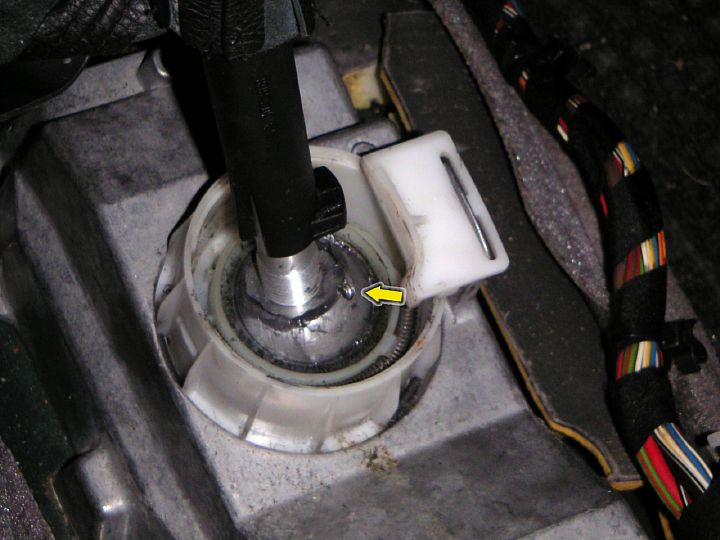
| 04.04.2005: Spring |
|
Use needle-nose pliers to remove the spring, then turn the plastic retainer
counter-clockwise.
|
 |
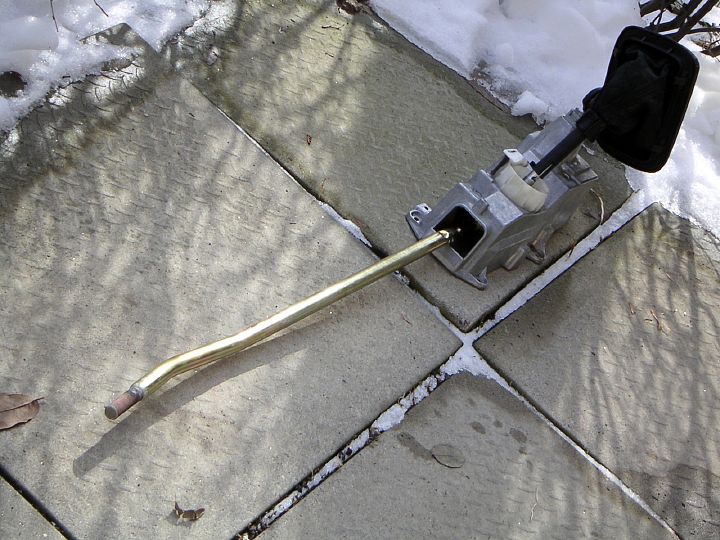
| 04.04.2005: Stick |
|
Here's the shifter just out of the housing. The plastic gaiter and the boot
are attached to the knob.
|
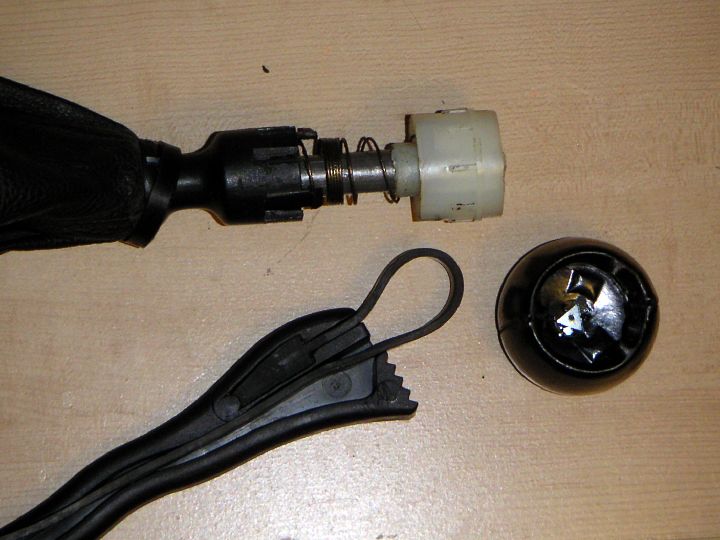 |
| 04.04.2005: Knob |
|
Use a strap wrench to twist the knob and break the bond. In my case,
the knob cover came off first ;). Once the knob is off, remove the knob and
everything that's attached to it, and put it on the new shifter rod.
Note the position of the gear markings on the knob.
|
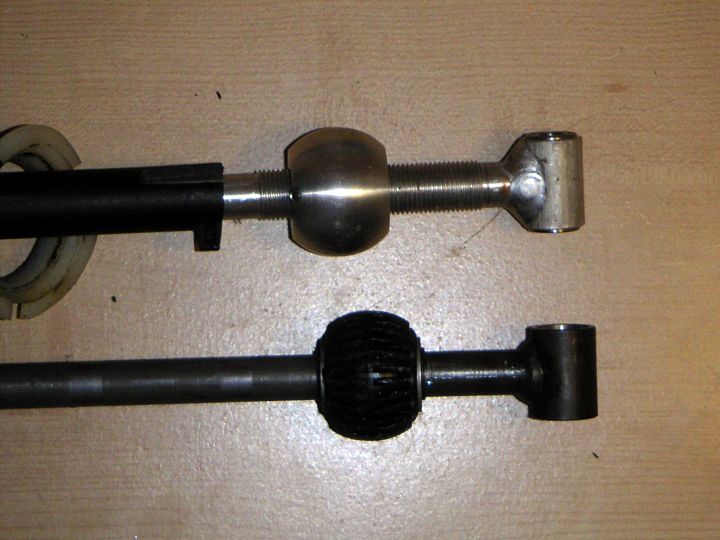 |
| 04.04.2005: New vs old |
|
The new rod next to the old one. You can see that there is not much
difference in the ball position. With the reverse lockout intact, there
is actually very little room for adjustment. Both the rod and the ball are
made of aluminium, and there are two ball bearings at the base (vs
the plastic biushing on the OEM shifter).
|
 |
| 04.04.2005: Assembled |
|
Assemble the shifter with fresh grease and bolt on the selector shaft.
Install the housing back on the car, tighten the bolts and perform
the alignment
procedure. You should feel the shofter throws and the more precise
feel of the shifter.
|
 |
| 04.04.2005: Adjustment |
|
The shifter can be adjusted directly on the car, even after everything is
put back together. All you need to do is pull the boot up, release the
locking screw on the ball with a 2 mm hex screwdriver and wiggle it until
the ball turns to the desired position. Make sure you can reach all gears
without the rod rubbing against anything inside the housing. Tighten the
locking screw afterwards.
|


