 | 16.08.2003
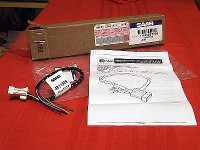
Saab telephone harness
The first, and the most expensive part you need is the Saab telephone
harness. Part #30567734, price $17.49. My dealership didn't have it in
stock, and I was the first customer to ever ask about it. The warehouse
also had it on back order, so it took them over a week to find the part
for me. The harness comes in a rather large box and has a manual in
7 languages containing brief installation instructions and connection
specifications.
|  | 16.08.2003
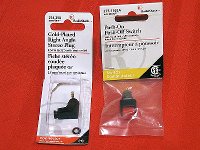
A phone plug and a switch
Your next stop is Radio Shack. If your phone has a 2.5 mm jack, the
plug is $3.99 (part
#274-298). Typically, the tip of the connector is the microphone, the
middle contact is the output, and the big ring is the ground. If don't
want to bother soldering, or if your phone has a proprietary connector,
just get a cheap earpiece or a hands-free set and cut the wires off.
Also, if your phone does not support muting the radio, a push-button
switch will cost you $4.79 (part
#275-1565).
|
 | 16.08.2003
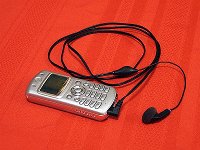
Cell phone
The essential part, a cellular phone. This one can be obtained for free
with a year subscription from a local provider
(Rogers AT&T).
|  | 16.08.2003
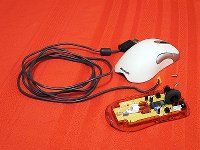
Dead mouse
A dead mouse, $0. I get a long flexible cable, my two year old son gets
a new toy. He's already got a keyboard of his own, so this would be a logical
addition.
|
 | 16.08.2003
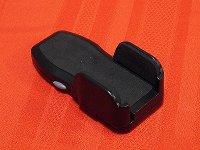
Cradle
A $10 phone cradle from a local hardware store. It comes with a swivel
base that sticks to the dashboard.
|  | 16.08.2003
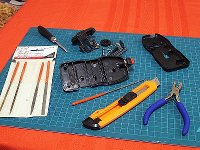
Cradle dissection
The cradle is taken apart to cut a hole for the switch.
|
 | 16.08.2003
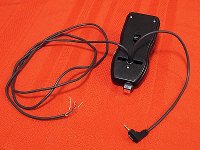
Cradle with cable
The cable has five wires -- three for the telephone (microphone, output and
ground) and two for the mute button (the signal and the ground). I wonder
if you can get away with four wires by combining the grounds (they are
separate on the harness though).
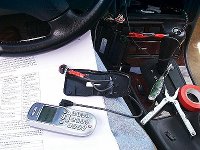
|  | 16.08.2003
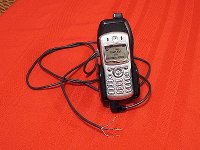
Cradle with cell phone
We have two telephones, one has a handsfree jack on the right side, and
another at the bottom. I had to leave a rather long piece of cable
attached to the plug to fit both phones (and who knows what we will
get next).
|
 | 17.08.2003
Cradle
Many phones perform the "answer" or "dial" action depending on the context,
when you short circuit the microphone signal to the ground. If your unit
supports this feature, you can install a second (momentary) switch to take
advantage of that. Out of my phones only one does it, so I didn't bother.
| 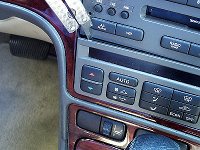 | 17.08.2003
ACC head removal
To remove the ACC head unit, use a flat screwdriver or another tool to
gently pry out the edge, then another edge, and then the unit pops out
easily.
|
 | 17.08.2003
Connecting the wires
Unfortunately, you cannot solder your cable to the harness at home since the
wires have to be pulled through a tiny hole (through the "On Star" button
socket in my case), and neither it's easy to solder them when in the car.
I ended up simply twisting wire ends together and wrapping them with
electric tape. If you have OnStar in your car, there may not be a
telephone connector available, so you might need a different kind of
harness or a Triad
splitter.
| 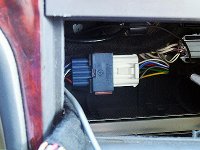 | 17.08.2003
Harness closeup
Before plugging the harness in, note the red locking tab on top of the
socket -- you need to pull it up before inserting the connector. Connect
pin 3 (microphone ground) and pin 8 (output ground) together to the ground
from the telephone. Pin 10 to the microphone signal, and pin 7 to the
output signal. Pins 4 (ground) and 5 (radio mute) should be connected to
the wires from the push-button switch (or to the appropriate pins on the
proprietary phone connector if the phone supports the mute feature).
|
 | 17.08.2003
Cradle base
I did not want to damage the wooden trim by sticking the cradle directly
on it, so I attached the base to a piece of thick transparent plastic
(which I cut off the packaging of the cradle itself ;).
| 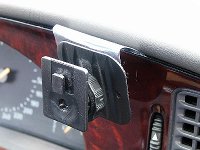 | 17.08.2003
Base installation
Then I bent the plastic and inserted it between the wood veneer and the
dash. There's enough adhesive in between them to hold the cradle well.
|
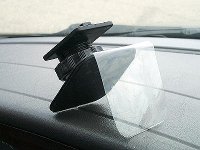
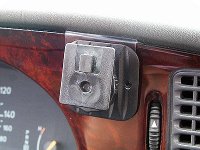 | 17.08.2003
Base in place
The job is done.
|  | 17.08.2003
Cradle mounted
This picture shows the cradle and the wires -- the phone connector hangs
down freely, and the other end disappears between the button plugs.
|
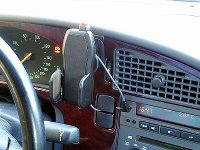
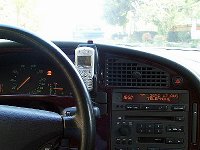
 | 17.08.2003
Passenger view
When you push the button on top of the cradle, the SID displays the
"TELEPHONE" message, and you can talk on the phone. If you were listening
to the radio, it will be turned off temporarily. Pushing the cradle button
off brings back the radio and the information the SID was displaying before
the call. Curiously enough, it works even when the car is not started --
the SID wakes up showing the time and the "TELEPHONE" message, you make the
call and then turn the whole thing off by releasing the cradle button.
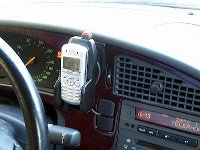
|  | 17.08.2003
Driver view
The sound quality is quite good, definitely better than through the
earpiece that came with my phone. I did not have to adjust the microphone
in the car, and I'm not aware of what setting is it on, high or low.
The sound on the other end of the line is OK as well. You might also want
to increase the default volume of the telephone mode -- there's a setting
in the stereo unit setup mode (you can invoke it by turning the stereo on
with the "WB" button pressed).
|
|


